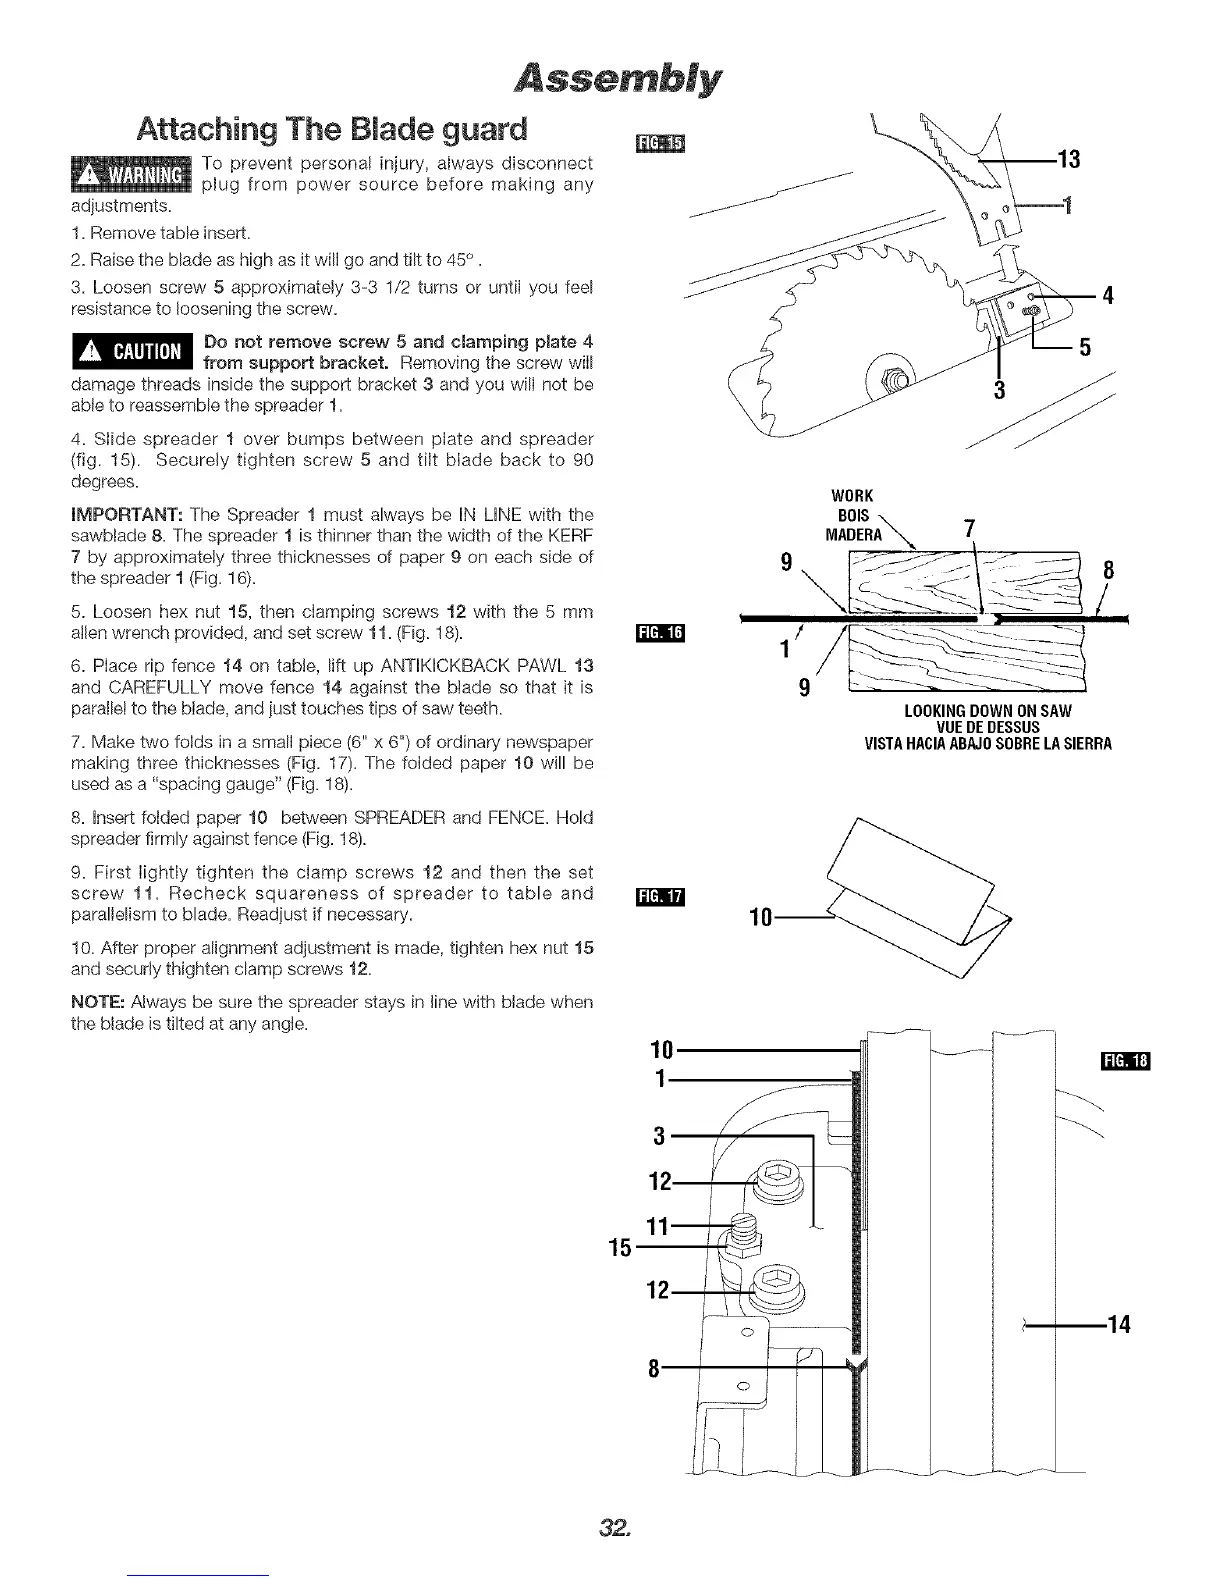
Attaching The BJade guard
To prevent personal injury, always disconnect
plug from power source before making any
adjustments.
1. Remove table insert.
2. Raise the blade as high as it will go and tilt to 45° .
3. Loosen screw 5 approximately 3-3 1/2 turns or until you feel
resistance to loosening the screw.
Do not remove screw 5 and cmamping pUate 4
from support bracket. Removing the screw wilI
damage threads inside the support bracket 3 and you wilI not be
able to reassemble the spreader 1.
4. Slide spreader I over bumps between plate and spreader
(fig. 15). Securely tighten screw 5 and tilt blade back to 90
degrees.
IMPORTANT: The Spreader 1 must always be HNLHNEwith the
sawblade 8. The spreader I is thinner than the width of the KERF
7 by approximately three thicknesses of paper 9 on each side of
the spreader t (Fig. 16).
5. Loosen hex nut 15, then clamping screws 12 with the 5 mm
allen wrench provided, and set screw 11. (Fig. 18).
6. Place rip fence 14 on table, lift up ANTIKICKBACK PAWL 13
and CAREFULLY move fence t4 against the blade so that it is
parallel to the biade, and just touches tips of saw teeth.
7. Make two folds in a small piece (6" x 6") of ordinary newspaper
making three thicknesses (Fig. 17). The folded paper 10 will be
used as a "spacing gauge" (Fig. 18).
8. Insert folded paper 10 between SPREADER and FENCE. Hold
spreader firmly against fence (Fig. 18).
9. First lightly tighten the clamp screws 12 and then the set
screw 11. Recheck squareness of spreader to table and
parallelism to blade. Readjust if necessary.
10. After proper alignment adjustment is made, tighten hex nut 15
and securly thighten clamp screws 12.
NOTE: Always be sure the spreader stays in line with blade when
the blade is tilted at any angle.
i[_
[i[€'lifi
10
1
15--
!
!
1
WORK
BOIS \
MADERA "_
LOOKINGDOWNON SAW
VUEDEDESSUS
VISTAHACIAABAJOSOBRELASIERRA
10
32.