Do you have a question about the Bosch B440 and is the answer not in the manual?
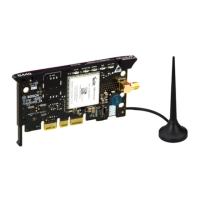
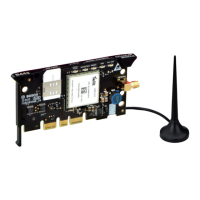
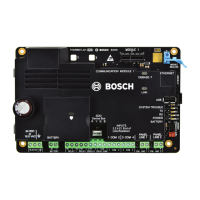
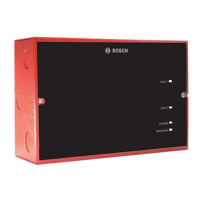
Identifies key physical components of the B440 module.
Steps for mounting and connecting the magnetic antenna.
Instructions for connecting the module to the control panel.
Steps to safely detach the module from the control panel.
Explains signal LED behavior at power up and during network registration.
The B440 Conettix Plug-in Cellular Communicator provides IP communication over the Verizon 3G cellular network. It connects directly to a control panel, enabling the panel to be configured for Personal Notification using the B440 module and the cellular network. The module requires active cellular service to communicate, and Bosch Cellular devices are shipped pre-activated with this service.
Before making any connections, it is crucial to remove all power (AC and battery) from the system to prevent personal injury or equipment damage.
To install the antenna:
To install the module: The control panel communicates with and provides power to the module through its plug-in connection. Proper installation ensures the necessary electrical and mechanical connection.
To remove an installed module, hold the plug-in module retention clip open with one hand while grasping the top corners of the module support handle with your other hand. Then, pull the module out.
At power-up, all B440 LEDs activate for several seconds, indicating proper insertion. The Signal LEDs then turn off until the module registers on the cellular network. Registering a new module might take up to 2 minutes.
The LED display helps ensure a good signal strength level. The signal strength LEDs momentarily turn off to indicate that the module has measured and updated the signal strength status.
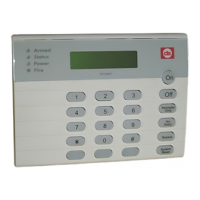
The module can be configured using Remote Programming Software (RPS) or an SDI2 keypad to program the control panel for communication. For detailed programming parameter descriptions, options, and defaults, refer to RPS Help or the Program Entry Guide for your specific control panel. For Bosch Cellular account status and management, use RPS or the online service portal (http://www.conettix.com/Cellular.aspx) and click on the Cellular Portal Login link.
The B440 is compatible with most Bosch control panels when used with a B450 Conettix Plug-in Communicator Interface. Refer to the Conettix Plug-in Communicator Interface (B450) Installation and Operation Guide for complete control panel compatibility listings.
| Network Technology | GSM |
|---|---|
| GPRS | Class 10 |
| SIM | Mini-SIM |
| Status | Discontinued |
| Card slot | No |
| Camera | No |
| Video | No |
| Radio | No |
| USB | No |
| Games | Yes |
| Organizer | Yes |
| 2G bands | GSM 900 / 1800 |
| Alert types | Vibration; Downloadable polyphonic ringtones |
| Messaging | SMS |
| Battery | Removable Li-Ion battery |