12 | English
1 618 C00 50R | (24.1.12) Bosch Power Tools
Product Features
The numbering of the product features shown refers to the
illustration of the measuring tool on the graphic page.
1 Exit opening for laser beam
2 Operating mode button
3 Battery low indicator
4 On/Off switch
5 Magnets
6 Tripod mount 5/8"
7 Tripod mount 1/4"
8 Latch of battery lid
9 Battery lid
10 Laser warning label
11 Serial number
12 Laser viewing glasses*
13 Laser target plate
14 Measuring plate with stand*
15 Universal holder*
16 Tripod*
17 Case
* The accessories illustrated or described are not included as
standard delivery.
Technical Data
Assembly
Inserting/Replacing the Battery
Alkali-manganese batteries are recommended for the meas-
uring tool.
To open the battery lid 9, slide the latch 8 in the direction of
the arrow and fold the battery lid up. Insert the batteries.
When inserting, pay attention to the correct polarity accord-
ing to the representation on the inside of the battery lid.
When the batteries are low, the battery low indicator 3 flashes
red. Additionally, the laser beams flash for approx. 5 s every
10 minutes. When the flashing initially begins, the measuring
tool can be operated for approx. 1 more hour. When the bat-
teries become empty, the laser beams flash one more time di-
rectly prior to the automatic shut-off.
Always replace all batteries at the same time. Only use batter-
ies from one brand and with the identical capacity.
f Remove the batteries from the measuring tool when
not using it for extended periods. When storing for ex-
tended periods, the batteries can corrode and discharge
themselves.
Operation
Initial Operation
f Protect the measuring tool against moisture and direct
sun light.
f Do not subject the measuring tool to extreme tempera-
tures or variations in temperature. As an example, do
not leave it in vehicles for long time. In case of large varia-
tions in temperature, allow the measuring tool to adjust to
the ambient temperature before putting it into operation.
In case of extreme temperatures or variations in tempera-
ture, the accuracy of the measuring tool can be impaired.
f Avoid heavy impact or falling of the measuring tool.
After heavy exterior impact on the measuring tool, an accu-
racy check should always be carried out before continuing
to work (see “Levelling Accuracy”).
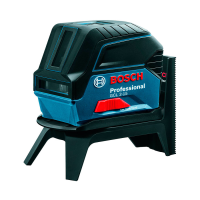
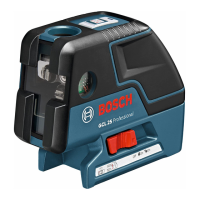
Point and line laser GCL 25
Article number
3 601 K66 B00
Working range
1)
– Laser lines
– Horizontal point beams
– Point beam, upward
– Point beam, downward
10 m
30 m
10 m
5m
Levelling accuracy
– Laser lines and horizontal
point beams
– Vertical point beams
±0.3 mm/m
±0.5 mm/m
Self-levelling range, typically
± 4°
Levelling duration, typically
<4s
Operating temperature
–10 °C ... +50 °C
Storage temperature
–20 °C ... +70 °C
Relative air humidity, max.
90 %
Laser class
2
Laser type
635 nm, <1 mW
C
6
1
Tripod mount
1/4", 5/8"
Batteries
4x1.5VLR06(AA)
1) The working range can be decreased by unfavourable environmental
conditions (e.g. direct sun irradiation).
Please observe the article number on the type plate of your measuring
tool. The trade names of the individual measuring tools may vary.
The measuring tool can be clearly identified with the serial number 11
on the type plate.
Battery life for the operating
modes
– Cross and point-line operation
– 5-point operation
– Line operation
12 h
24 h
30 h
Weight according to
EPTA-Procedure 01/2003
0.6 kg
Dimensions
(length x width x height)
155x56x118mm
Degree of protection
IP 54 (dust and splash
water protected)
Point and line laser GCL 25
1) The working range can be decreased by unfavourable environmental
conditions (e.g. direct sun irradiation).
Please observe the article number on the type plate of your measuring
tool. The trade names of the individual measuring tools may vary.
The measuring tool can be clearly identified with the serial number 11
on the type plate.
OBJ_BUCH-1546-001.book Page 12 Tuesday, January 24, 2012 4:18 PM
 Loading...
