-24-
Operating Instructions
Never leave the trigger
locked “ON”. Before
plugging the tool in, check that the trigger
lock is “OFF”. Accidental start-ups could
cause injury.
Be aware of the loca-
tion and setting of the
switch “Lock-ON” button. If the switch is
locked “ON” during the use, be ready for
emergency situations to switch it “OFF”.
Do not use the switch
“Lock-ON” feature in
situations where kickback is likely, such
as when working into a corner. When the
wheel binds, the tool will kick-back in op-
posite direction of wheel rotation and the
release of the trigger “Lock-ON” may be
difficult.
If the “Lock-ON” button
is continuously being
depressed, the trigger cannot be re-
leased.
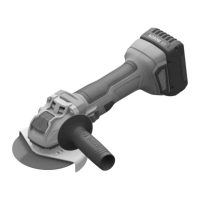
▶ Paddle Switch (Fig. 21)
The paddle switch has a Lock-OFF feature
to help prevent accidental startups. TO
TURN TOOL “ON”, push Lock-Off switch
backward to unlock the paddle switch,
then squeeze paddle switch. TO TURN
TOOL “OFF”, release pressure on paddle
switch. The switch is spring loaded and
will return to the “OFF” position automati-
cally.
If your tool has the Lock-ON (GWX13-
50VSP only) feature incorporated into the
paddle switch for extended operation,
there will be a red button on the bottom of
the tool directly behind the paddle switch,
Fig. 22. TO LOCK SWITCH “ON” after pad-
dle switch has been activated, push “Lock-
ON” button while simultaneously releasing
pressure from the paddle switch. TO TURN
TOOL “OFF”, squeeze and release paddle
switch.
▶ Slide Switch (Fig. 23)
TO TURN TOOL ON, press the back of the
switch and slide it forward towards the
gear housing until it comes to a stop and
the motor starts running. For Lock-ON,
when the switch is in the ON position,
press the front of the switch and release
it. the switch should remain in the Lock-
ON position and the tool will continue to
run.
TO TURN TOOL “OFF”, press the rear por-
tion of the switch. The switch is spring
loaded and will return to the “OFF” posi-
tion automatically.
Side
Switch
ON
OFF
Paddle Switch
Fig. 23
Fig. 21
Lock-ON Button
Fig. 22

 Loading...