6
en Operating the appliance
X Fig. B
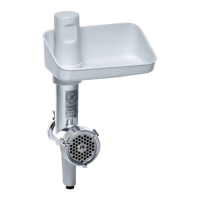
■ Stow perforated discs in the storage
compartment.
■ Stow individual parts of the sausage
filler attachment and kebbe attachment
in the pusher and close the pusher with
the lid.
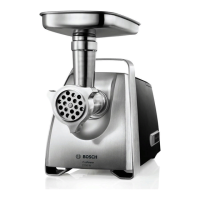
Assembling the mincer
attachment
X Fig. C
■ Take perforated disc with required
hole diameter out of the storage
compartment.
■ Insert worm gear into the housing.
■ Put blade on the worm gear. Blades
must face the perforated disc.
■ Put perforated disc with the required
hole diameter on the worm gear.
Recess on the perforated disc must
be situated on the lug in the housing.
■ Screw on threaded ring clockwise. Do
not tighten the threaded ring too tight.
■ Disassembly is in reverse order.
Use for:
– processing raw or cooked meat, bacon,
poultry and fish.
– Do not process bones!
– Process steak tartare through the
mincer twice.
Assembling sausage filler
attachment
Note: The parts of the mincer attachment
(without perforated disc and blade) are
used.
X Fig. D
■ Take nozzle (A) and bearing ring (D) out
of the pusher.
■ Insert worm gear into the housing.
■ Insert nozzle into the threaded ring.
■ Put bearing ring on the worm gear and
hold in place. Recess on the bearing
ring must be situated on the lug in
the housing.
■ Screw on threaded ring with nozzle
clockwise. Do not tighten the threaded
ring too tight.
■ Disassembly is in reverse order.
Use for:
Filling artificial and natural casings with
sausage meat.
Assembling kebbe attachment
Note: The parts of the mincer attachment
(without perforated disc and blade) are
used.
X Fig. E
■ Take shaper (B) and conical ring (C) out
of the pusher.
■ Insert worm gear into the housing.
■ Insert shaper into threaded ring.
■ Put conical ring on the worm gear and
hold in place. Recess on the conical
ring must be situated on the lug in
the housing.
■ Screw on threaded ring with shaper
clockwise. Do not tighten the threaded
ring too tight.
■ Disassembly is in reverse order.
Use for:
Shaping dough tubes.
Operating the appliance
W Risk of injury
– Before fitting/removing attachment, wait
until the drive has come to a standstill
and pull out the mains plug.
– Do not reach into the feed tube. Always
use the stuffer to push food down the
hole.
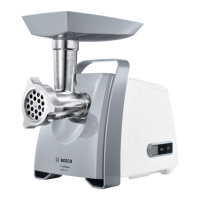
X Fig. F
■ Stand the mincer on a clean, level work
surface.
■ Take power cord out of the cable
storage and pull out to the required
length.
■ Put the completely assembled mincer
attachment, inclined slightly to the right,
on the drive.
■ Turn mincer attachment upwards until it
engages.
■ Tighten threaded ring on the mincer
attachment.
■ Attach filling tray.
■ Insert pusher into filling opening.