Installation instructions en
13
Installation instructions
16 Installation instructions
16.1 General information
¡ Read this instruction manual carefully.
¡ Only a licensed expert may connect the ap-
pliance.
¡ Improper installation, opening of the appli-
ance, connection or assembly may lead to
a loss of validity of the product warranty.
¡ Switch off the power supply before carrying
out any work.
¡ After installation, ensure that the user does
not have access to the electrical compon-
ents.
¡ Never use this appliance in boats or in
vehicles.
16.2 Safe installation
Follow these safety instructions when in-
stalling the appliance.
The appliance can only be used safely if it is
correctly installed in accordance with the in-
stallation instructions. The installer is respons-
ible for ensuring that the appliance works per-
fectly at its installation location.
WARNING‒Danger: Magnetism!
The appliance contains permanent magnets.
They may affect electronic implants, e.g.
pacemakers or insulin pumps.
▶ Persons with electronic implants must
stand at least 10cm away from the appli-
ance.
WARNING‒Risk of injury!
Parts that are accessible during installation
may have sharp edges and may lead to cut-
ting injuries.
▶ Wear protective gloves
16.3 Instructions for the electrical
connection
In order to safely connect the appliance to the elec-
trical system, observe the following instructions.
¡ Only an authorised expert or a specially trained ser-
vice technician may connect the appliance. The per-
son must be approved in accordance with the local
regulations of the country and the electricity supply
company.
¡ Connect the appliance to a fixed installation and set
up appropriate isolating switches in accordance with
the installation regulations.
¡ The manufacturer shall assume no liability for mal-
functions or damage resulting from incorrect elec-
trical wiring.
Connection type
¡ The appliance corresponds to protection class 1.
You should therefore only use the appliance with a
protective earth connection.
16.4 Information on fitted units
¡ You can only install the induction hob above draw-
ers or ovens with fan ventilation. Do not install refri-
gerators, dishwashers, non-ventilated ovens or
washing machines below the hob.
¡ Ensure that the fitted unit is heat-resistant up to at
least 90°C.
Worktop
Follow the worktop manufacturer's recommendations.
¡ Level, horizontal, stable.
¡ The worktop into which you are fitting the appliance
must be able to withstand loads of approx. 60kg.
¡ For thin worktops, use heat-resistant and moisture-
resistant reinforcement material.
¡ Only check the evenness of the hob after it has
been installed.
Extractor hood
¡ The clearance between the extractor hood and the
hob must correspond at least to the clearance spe-
cified in the installation instructions for the extractor
hood.
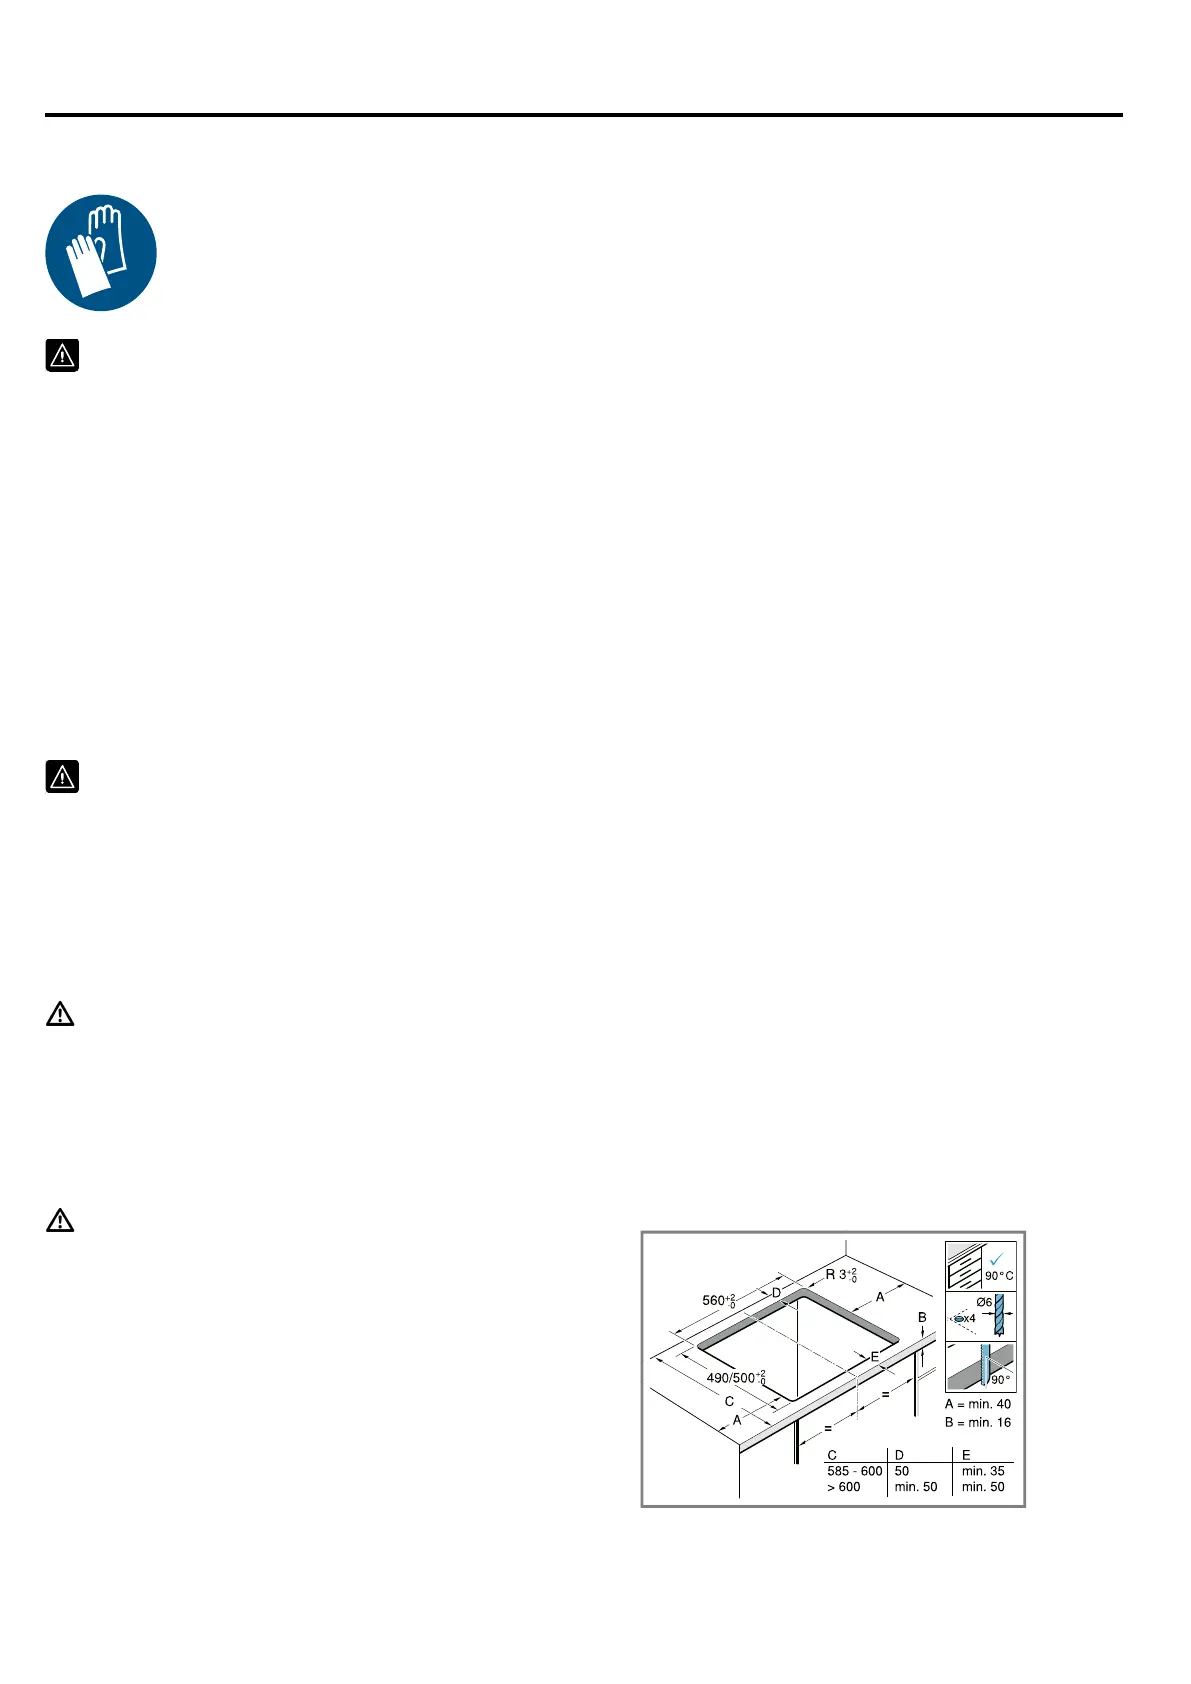
16.5 Preparing the fitted units
1.
Mark the unit cut-out in accordance with the installa-
tion diagram.
‒ Ensure that the angle of the cut surface to the
worktop is 90°.
2.
After making the cut-outs, remove any shavings.
3.
Seal the cut surfaces with heat-resistant material.