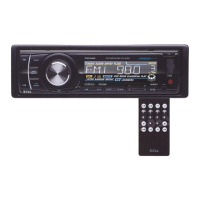
Installation
DIN
front
mount
installation
Before you begin installing your new
!Sl~
receiver, please become familiar
with all the information contained
in
this manual.
For details
about
installing the head
unit, read the instructions
below
and
refer to the diagrams for further
clarification.
~-
dashboard attachment
surface
r support screw
'<:S
/
5 x 15mm
support screw
Insert and tighten the "headless"
support screw into the back
of
the
head unit as shown (Figure
1).
Insert the mounting case for the head
unit into the dashboard. Inspect the
dashboard material
to
determine its
approximate thickness. Select the
appropriate support tabs and bend
them outward
to
secure the bracket
in
place (Figure 1).
Bend the support strap provided
to
conform
to
the mounting case and
the dashboard surface
to
which you
plan
to
secure the support strap
(Figure
2).
Slide one ofthe utili!y holes
on the support strap onto the support
screw and fasten it with the spring
washer and nut provided.
Using the 5 x 15mm screw and the
plain washer, secure the backstrap to
the dashboard surface as shown
in
the diagram. Tighten, secure, and
check the overall mounting to be sure
it is safe and will not release
in
an
emergency stop
or
other sudden
movement
of
the vehicle.
5mmnut
-
~
Figure 1 Bending the support tabs
Before final installation
of
the unit,
temporarily connect the wiring and
make sure that the unit and system
work properly.
Avoid installing the unit
in
a location
which is subject to high temperatures,
direct sunlight, hot air from such
sources as heaters or exhaust lines,
or
where it will be subject
to
contact
with dust, dirt, moisture
or
excessive
vibration.
head unit
Install the unit so that it does not get
in
the driver's way and cannot injure a
passenger if there is a sudden stop.
Use only the installation parts and
hardware provided with the unit
to
ensure proper installation. Using other
parts can cause malfunction and
possible damage
to
your receiver.
Consult with your nearest dealer if an
installation requires the drilling of holes
or
other modifications
to
the vehicle.
7~"
mount;ng case
'l
....
support screw
Figure
2. Forming the support bracket
7550BI User's Manual - page 2
 Loading...