6
Headgear Adjustment
1. Adjust the headgear diameter with the twist knob on the back.
Twist clockwise to tighten and counterclockwise to loosen.
2. Adjust the height by locking the pin
into the hole to lock securely in place.
3. To adjust the viewing angle, loosen the knob
on both sides of the helmet and change angle
locker to the desired tilt position
(positioned in the middle by default).
Once achieving the desire angle, tighten the knobs
until snug. The helmet should still swing up,
but it should not drift downward when in place
for welding.
4. To adjust the distance between the user’s face
and ADF, press down on the two lockers until the
headband can move back and forth freely,
reposition the headband at one of the 6 slots as
desired. This should be done one side at a time
and both sides should be located at the same
position for proper auto-darkening lter operation.
OPERATION
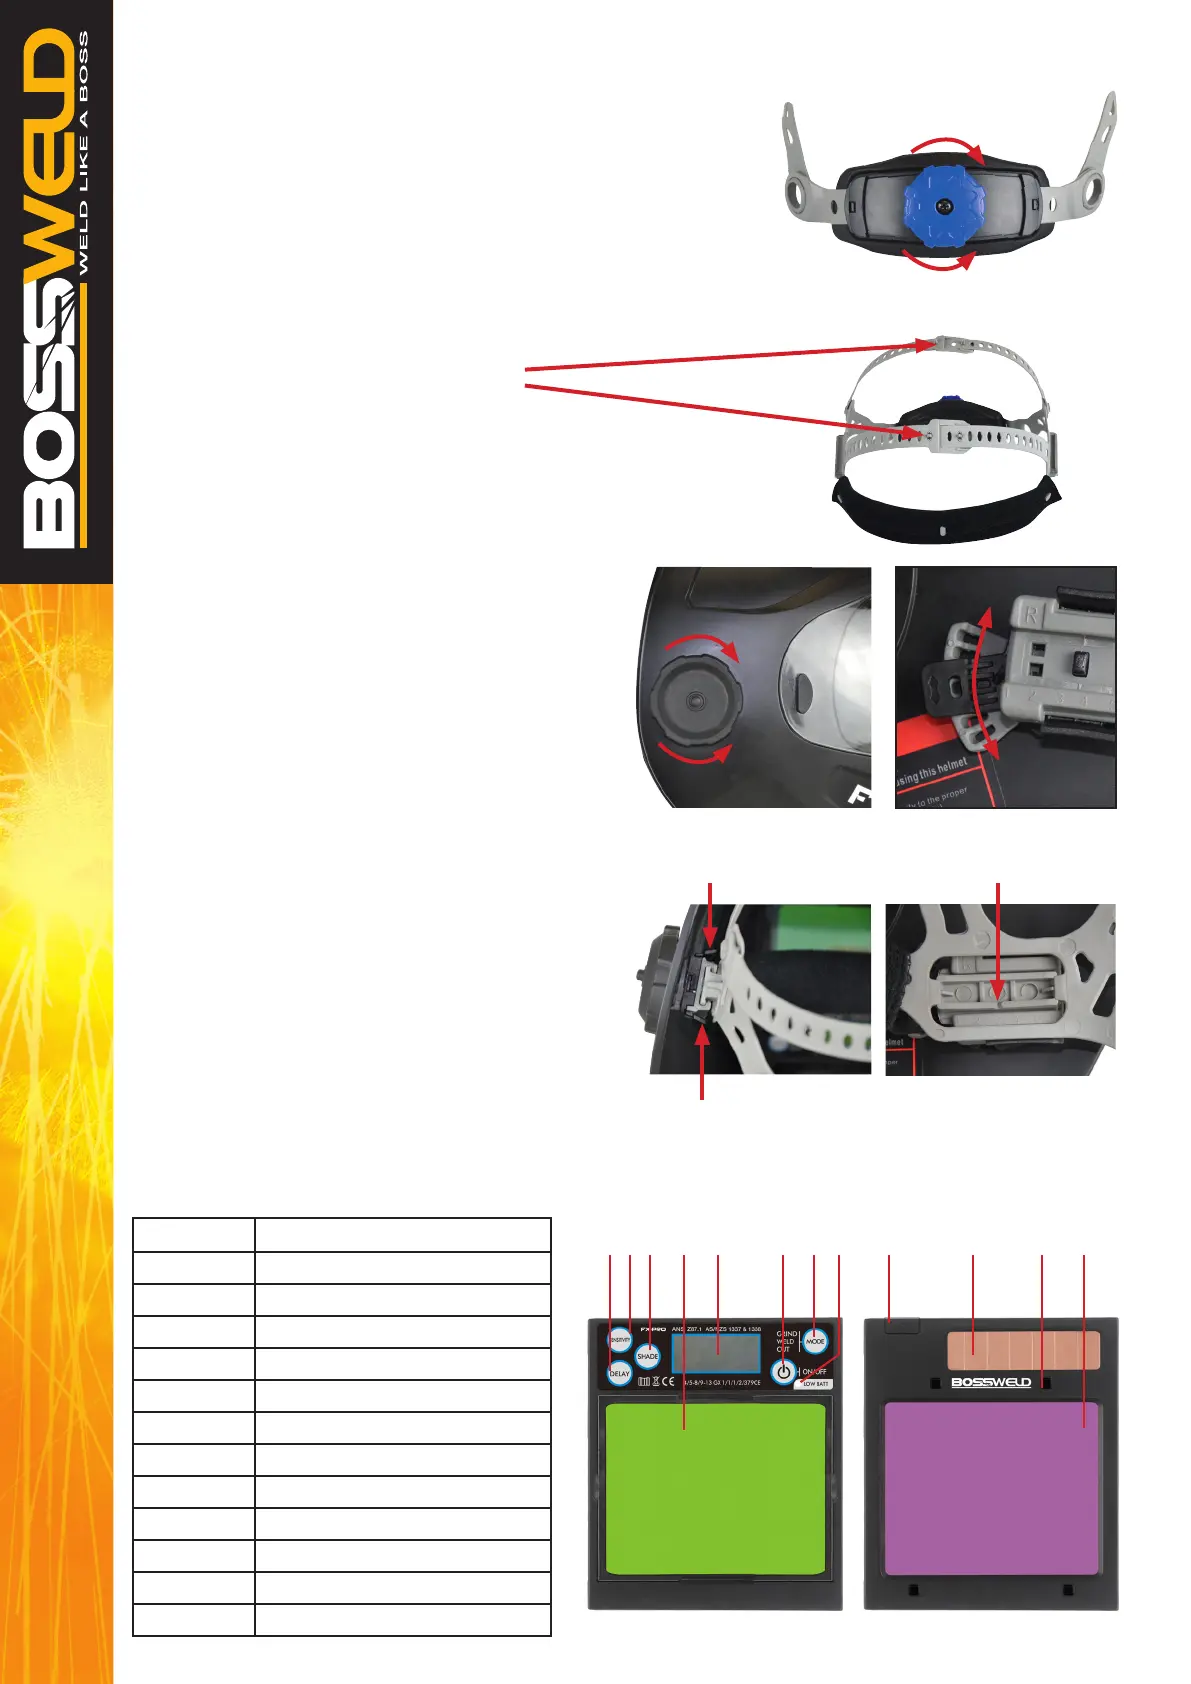
FX-PRO BREAKDOWN
Part No: Description
1 Delay Switch Button
2 Sensitivity Switch Button
3 Shade Switch Button
4 Display Screen
5 LCD
6 Power ON/OFF Button
7 Mode Button
8 Low Battery Indicator
9 Battery Case
10 Solar Cell
11 Arc Sensor (x 4)
12 UV/IR Filter
Tighten
Loosen
Tighten
Loosen
Press
Adjustment 1- 6
Press
Angle Adjust
1 2 3 4 5 6 7 8 129 10 11