Page 15/42
February 2021MULCHING MOWER MASTER SERIES | User manual
3. Attach mounting bracket for 3-point mounting to hydraulic lateral shifter:
• Due to the size and weight, please only attach the bracket with 2 persons!
• The flail mulcher must stand on an absolutely solid ground (concrete, asphalt, tiles), in particular if you intend
to jack up the machine on square timbers.
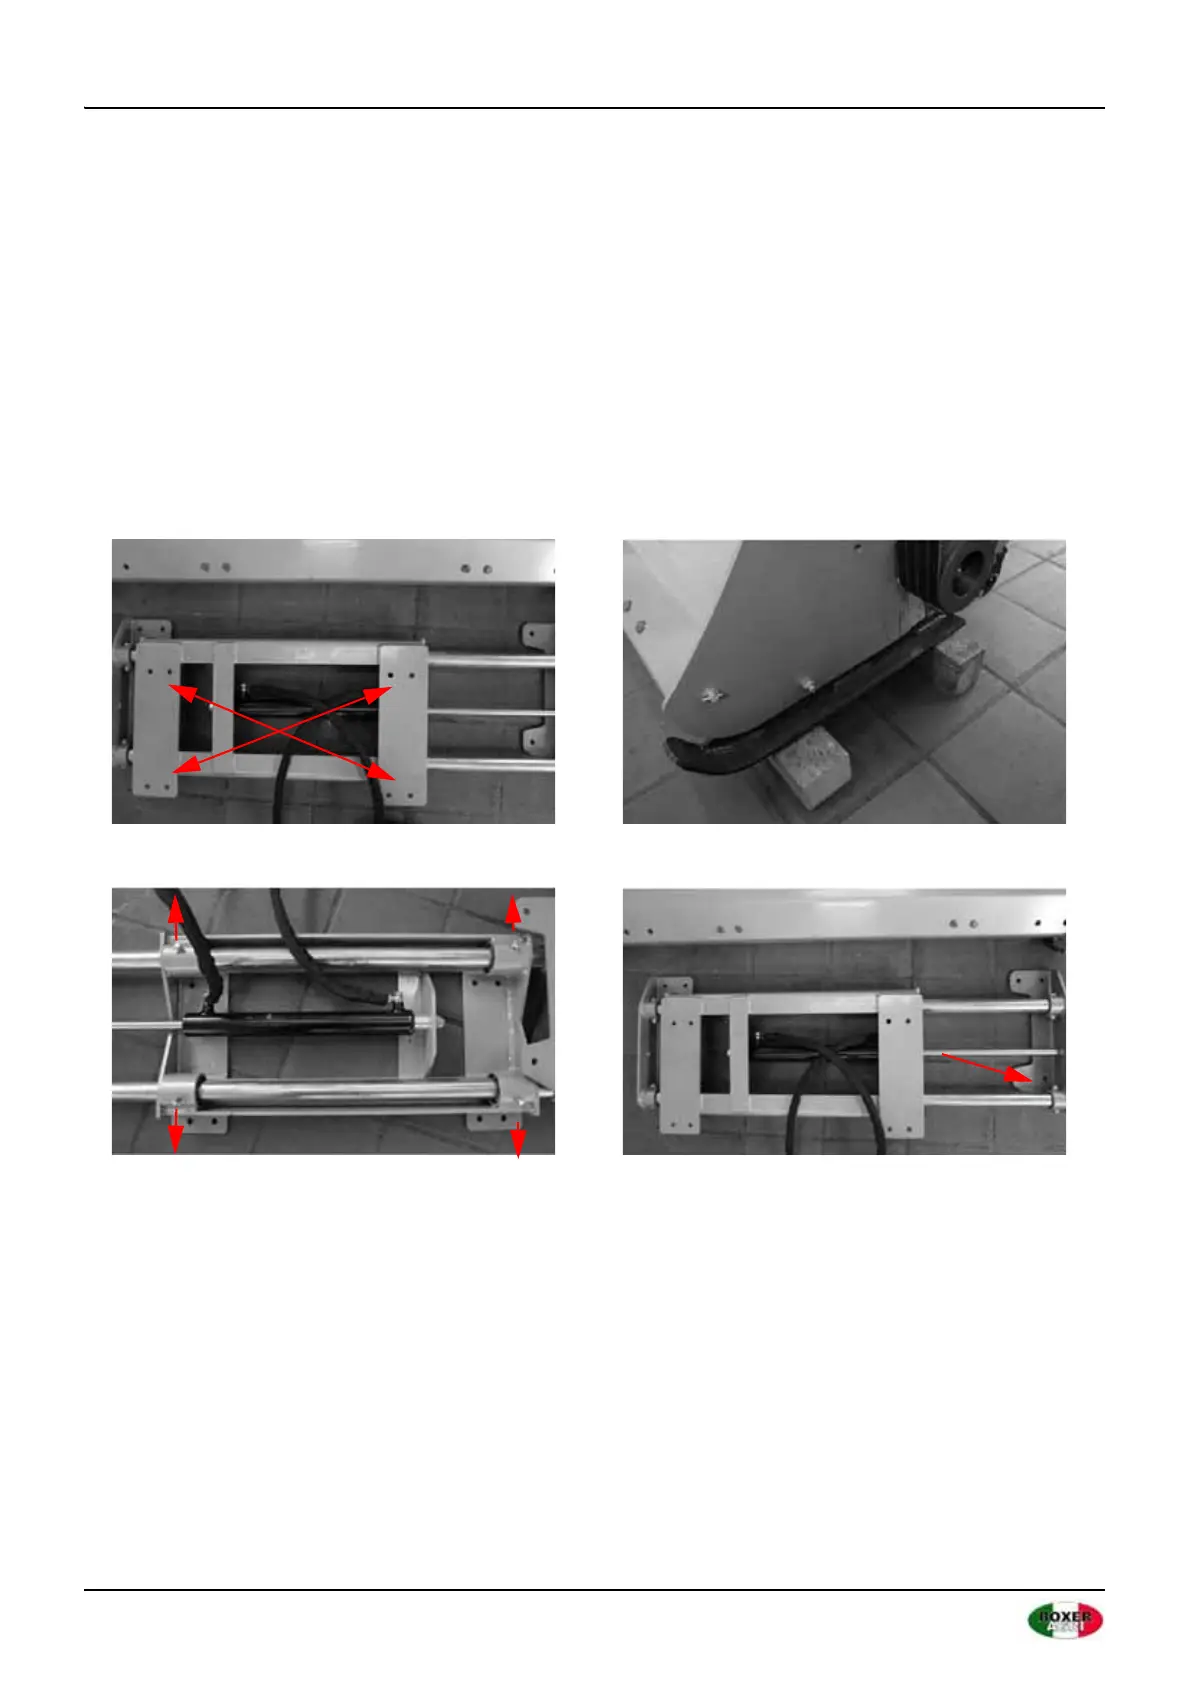
• The bracket is attached to the hydraulic lateral shifter using 8 screws, 8 nuts and 8 washers (Figure 9).
• Be careful not to crush or damage the hydraulic lines.
• Before attaching the 3-point bracket, check the position of the 4 grease nipples on the underside of the
hydraulic lateral shifter.
• The grease nipples must point to the outside, because otherwise the grease gun cannot be used later.
• The arrows in Figure 11 show the correct alignment of the grease nipples. If a grease nipple is not aligned
correctly, this can be corrected using a small washer (not included in scope of delivery).
• Align the mulcher with the hydraulic lateral shifter as shown in Figure 12. Ensure that the beveled side is at the
bottom right (see red arrow in Figure 12).
Fig. 9 Bore for 3-point bracket (4 x 2) Fig. 10 Jacking up the mulcher
Fig. 11 Underside with correct grease nipple alignment Fig. 12 Alignment of lateral shifter