4
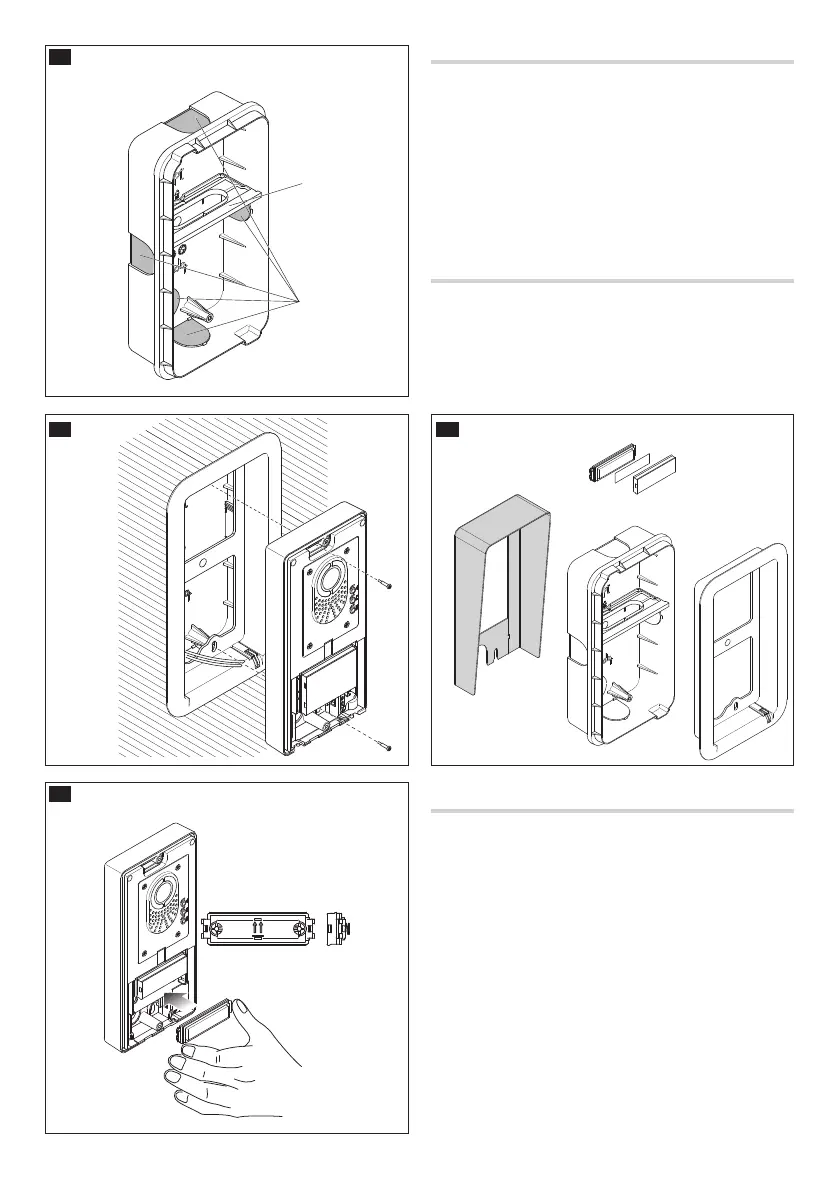
Recessed installation (optional)
Wall in the recessed box at the desired height, respecting the positioning
of the lens of the surveillance camera . Push the pipe with the system
conductors through one of the breaking points ( point A).
When using the recessed box any possible deformations can be avoided by
using the spacer provided ( point B).
Using the Allen screwdriver remove the cover . Position the frame
surround in the recessed box , push the connection cables through
hole and secure the entry panel . Take o the terminal board
cover and make the connections. Once the connections have been
made, put back on the terminal board cover and assemble the front cover.
Accessories
DPS single button;
LTP Wall roof;
Recessed box LSI;
Recessed frame LCI;
$
%
C
D
F
E
Assembly and removal of buttons modules
Insert the button module paying attention to the up to down orientation
.
Remove the small piece of glass and write the names paying attention
to the direction of insertion of the glass panel .
KIT FREE_LC-LVC 24810470 25-11-14_EN