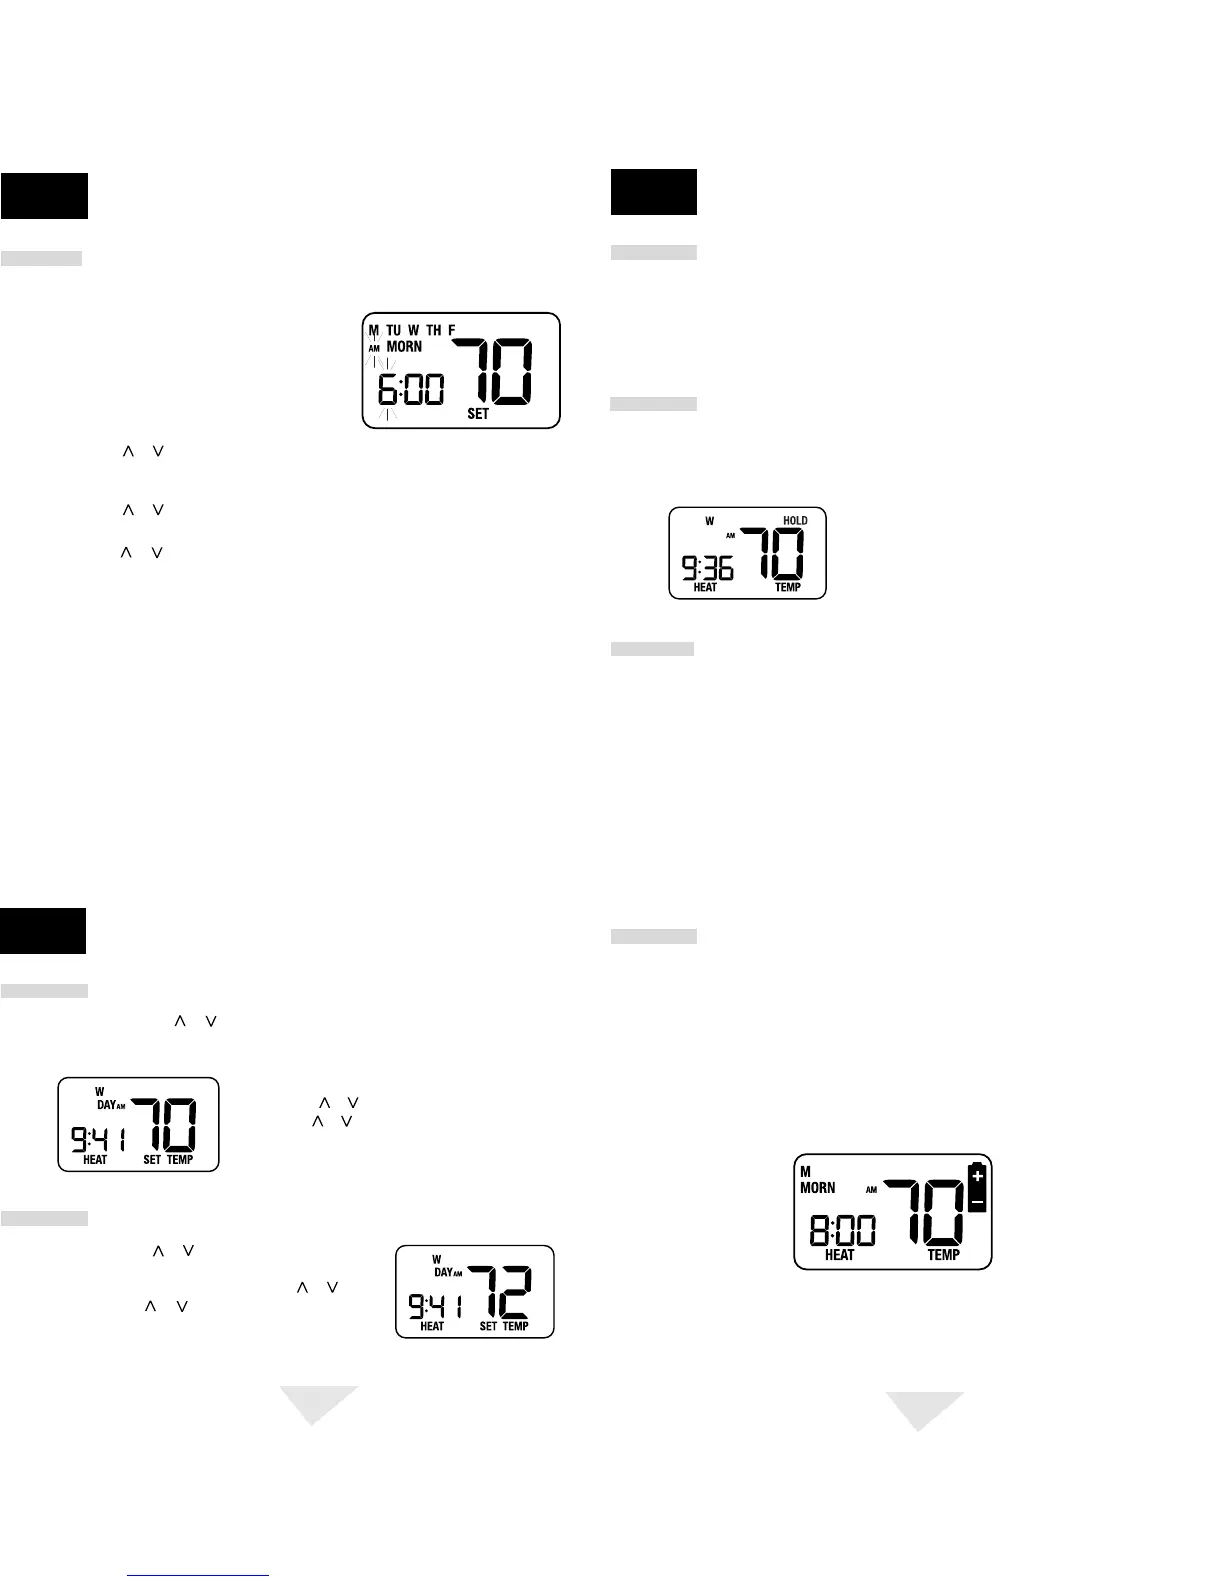
5.1
Review Set Temperature
5.2
Temporary Program Override
1. Press and hold or button for 3 seconds.
The entire display will flash once and the SET TEMP
indicator will be displayed. Release the or button
and press the or button again as desired to
adjust the set temperature.
1. Press and hold the or button. The current setpoint temperature will be displayed
in the place of the current room temperature, and the indicator SET TEMP will
be displayed.
2.
The display will return to normal operating mode
when the or button is released. Continuing to
hold the or button for 3 seconds or longer
will allow the user to temporarily override the
current programmed setpoint (See Temporary
Program Override).
6
NOTE:
To erase all entered programs, current time of day, day of week and other user
settings, gently press the RESET button using a paper clip or a small pencil tip. This will
return all thermostat settings to their default values.
5. Press the or button to change the setpoint temperature to the desired setting in
1˚ F increments (0.5˚ C). Press the PROG button to save. The thermostat will now
display the DAY setpoint time and temperature. Again, you will see the hour portion of
the setpoint time and the AM/PM indicator will be flashing.
6. Follow steps 3 through 5 to set the setpoint times and temperatures for the MORN,
DAY, EVE and NIGHT setpoints for the Weekday group in the HEAT mode.
7. After pressing the PROG button, you will enter the Weekend Program Group. The
display will show SA, SU to indicate the Weekend group is being programmed. The
hour portion of the MORN setpoint time and the AM/PM indicator will be flashing.
8. Follow steps 3 through 5 to set the setpoint times and temperatures for the MORN,
DAY, EVE and NIGHT setpoints for the Weekend group in the HEAT mode.
9. Place the system switch in the COOL mode of operation. The display will show COOL.
Follow steps 2 through 8 to program the setpoint times and temperatures for the
Weekday and Weekend groups in the COOL mode.
3. Press the or button to change the time to the desired hour in 1 hour
increments. Press the PROG button to save. The minute portion of the setpoint
time will begin flashing.
4. Press the or button to change the time to the desired minute in 10-minute
increments. Press the PROG button to save. The SET TEMP will begin flashing.
Entering Your Program
1. Place the system switch in the HEAT mode of operation.
2. Press the PROG button to enter Program
Setting mode. The MORN setpoint of the
Weekday Program Group will be displayed.
The display will show M, TU, W, TH, F to
indicate the Weekday group is being
programmed. The hour portion of the setpoint
time and the AM/PM indicator will be flashing.
ADDITIONAL
OPERATION FEATURES
5
4.4.2
PROGRAMMING
4
cont.
ADDITIONAL
OPERATION FEATURES
5
cont.
NOTE:
The installer can reset the thermostat and bypass the compressor protection
features by pressing the RESET button. This will erase all entered programs, current
time of day, day of week and other user settings and should only be used during
installation for testing purposes or to reset a thermostat to regain normal operation. This
will return all Thermostat settings to their default values. The user will have to
re-program all of the erased settings.
5.4
Compressor Protection
This thermostat includes an automatic compressor protection feature to avoid potential
damage to the cooling system from short cycling. This thermostat automatically provides a
5-minute delay after turning off the cooling system output to protect the compressor. This
protection is also present in the heat mode of operation on single stage heat pump systems
to protect the compressor.
5.5
Low Battery Detection and Replacement
This thermostat requires two (2) properly installed "AA" alkaline batteries to provide power
for the thermostat to properly control the system operation.
This thermostat is equipped with a low battery detection feature that constantly monitors the
batteries during normal operating mode to determine whether they have sufficient power to
provide proper operation.
When this feature determines that the battery status is low, a low battery indicator will
appear in the display. It is recommended that the batteries be replaced immediately to
maintain system operation and program settings.
7
2. The display will return to normal operating mode after 15 seconds or you can press
the RETURN button.
3. The program indicator (MORN, DAY, EVE OR NIGHT) will be flashing in the display
indicating that a Temporary Program Override is in effect. The Temporary Program
Override will reset when the next setpoint time occurs or after 4 hours–whichever
comes first.
5.2
Temporary Program Override cont.
5.3
Extended Hold (Vacation) Mode
1. Press the HOLD button to bypass the program schedule. The current setpoint
temperature will be held either permanently or for 24 hours depending on the setting
selection made in section 4.3.2.
2. Press the HOLD button again to return the thermostat
to normal program operation.
3. The hold period lasts until the hold is released as in
step #2 above, or is limited to 24 hours if the default
was changed in the User Options Settings ( see
section 4.3.2).
 Loading...