3
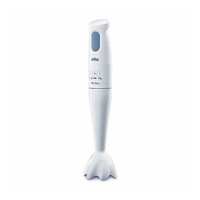
Variable speed regulator
4
Buttons for releasing
the working parts
7
Wallholder for the handblender and cord
8
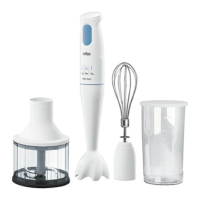
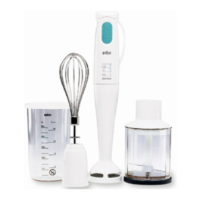
Mixing/measuring beaker
with air-tight lid
l
Chopper bowl with model marking (ca)
m
Anti-slip double function base/lid
Chopper HC-5
p
Chopper bowl with model marking (hc)
q
Anti-slip double function base/lid
Wallholder
Use the supplied screws and plugs to mount the
wallholder
7
to the wall (a). The wallholder
provides convenient storage for the handblender
and the cord (b).
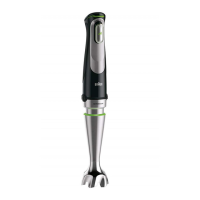
Variable speed regulator
Speed 1 … 5
For the basic functions of the handblender
(e. g. blending, mixing).
Speed 4 … 5
For the chopper CA-5 or HC-5.
Speed 3 … 5
For whipping cream and eggwhite with the
whisk
F
.
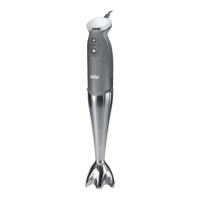
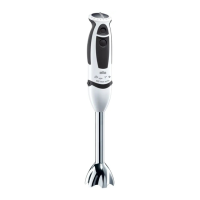
Assembly/disassembly
Before assembling or disassembling the
appliance, make sure that it is unplugged. To
assemble the handblender, insert the shaft with
the blade
1
until it locks (d).
You can remove the shaft with the blade from the
motor part, by pressing the two buttons
4
and
pulling the shaft off (d). Before switching the
appliance on, make sure that all parts are properly
assembled.
How to operate
your handblender
Use it to make sauces, soups, mayonnaise,
dietary and baby food, mixed drinks or cocktails
and to whip eggwhite, cream and skimmed milk. It
comes complete with a practical mixing/meas-
uring beaker
8
, but you can operate the Braun
handblender just as well in any bowl, pan or other
container too. Should you want to blend directly in
the saucepan while cooking, take the pan from
the stove first, to protect your Braun handblender
from overheating. To avoid splashing, insert the
handblender into the vessel first, and then press
the switch
2
(c) for operation. To turn your
handblender off, simply release the switch. Only
then, take the handblender out of the vessel.
Whisk
Notice: Use the whisk
F
only for whipping cream
and eggwhite; not for other applications (e. g.
sponges).
Attaching: Insert the whisk
6
until
it locks. Then connect gear with the motor part by
locking.
Removing: First pull the whisk
6
and then release the gear by pressing the buttons
4
on the motor part.
For best results, use a wider vessel and move the
handblender clockwise in circles. Cream should
be cooled to refrigerator temperature before being
whipped.
4 5
English
Our products are engineered to meet the highest
standards of quality, functionality and design. We
hope you thoroughly enjoy your new Braun
appliance.
Caution
Read all Instructions carefully before using this
product.
For UK only:
IMPORTANT
Your appliance is already fitted with a plug
incorporating a 3 A fuse. If it does not fit your
socket the plug should be cut off from the mains
lead and an appropriate plug fitted. Throw away
the cut off plug; do not insert it in a 13 A socket
elsewhere in the house as this could cause a
shock hazard.
IMPORTANT –
Fitting a Different Plug:
The wires in the mains lead are coloured in
accordance with the following code:
Blue – Neutral Brown – Live
If the colours of the wires in the mains lead do not
correspond with the coloured markings identifying
the terminals in your plug, proceed as follows:
The blue wire must be connected to the terminal
marked with the letter N or coloured black. The
brown wire must be connected to the terminal
marked with the letter L or coloured red.
Never connect the blue or brown
wire to the earth pin (E), when
using a three pin plug.
The appliance must be protected
by a 3 amp fuse if a 13A (BS
1363) plug is used.
The fuse cover must be refitted when changing
the fuse. If the fuse cover is lost do not use the
plug until a replacement cover has been fitted.
These parts are available from authorised Braun
Service Dealers. Never use the plug without the
fuse cover fitted.
• This appliance was constructed to process
normal household quantities. Please remember
to keep this appliance out of the reach of
children.
• The blades are very sharp! Do not reach into or
underneath the blades.
• Note: The chopper CA-5 or HC-5 can be used
with any model in the «Multiquick/Multipimer
control plus» range. The chopper bowl
p
and the anti-slip double function base/lid
q
must not be used in the microwave oven
.
• Do not use the mixing/measuring beaker
8
in
the microwave oven.
• Before operating check whether your voltage
corresponds to the voltage printed on the unit.
• Do not hold the motor part
1
under running
water or immerse it entirely in water.
• Remove all remaingin water before connecting
any attachments (e. g. the shaft with blade
5
)
to the motor part.
• Braun electric appliances meet applicable
safety standards. Repairs on electric
appliances must only be done by authorised
service personnel. Faulty, unqualified repair
work may cause accidents or injury to the user.
• The cord of the appliance may only be replaced
by an authorised Braun Service Centre
because a special tool is required.
Specifications
• Type/voltage/wattage:
see type plate of the unit.
• Blade are of stainless steel.
• MR 550, MR 550 CA, MR 550 HC and
MR 555 CA: High-quality plastic shaft.
• MR 550 M and MR 555 M CA:
Stainless steel shaft.
 Loading...