SERIES 6A ELECTROPNEUMATIC POSITIONER
QUICK START GUIDE
4 of 12© 2021 BRAY INTERNATIONAL, INC. ALL RIGHTS RESERVED. BRAY.COM The Information
contained herein shall not be copied, transferred, conveyed, or displayed in any manner that would
violate its proprietary nature without the express written permission of Bray International, Inc.
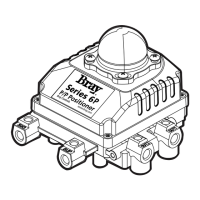
MOUNTING AND SETUP (Continued)
Step Position the positioner on the actuator
and tighten the mounting screws
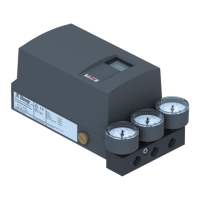
Step Insert the pneumatic fittings on the
positioner and actuator before inserting
tubing into the outputs of the positioner
to the inputs of the actuator
Note Supply air will be routed to Y in
the event of a signal loss (fail condition)
Single acting actuators release air from
Y upon loss of signal
For double-acting actuators make sure
Y is connected to the desired port for
fail position
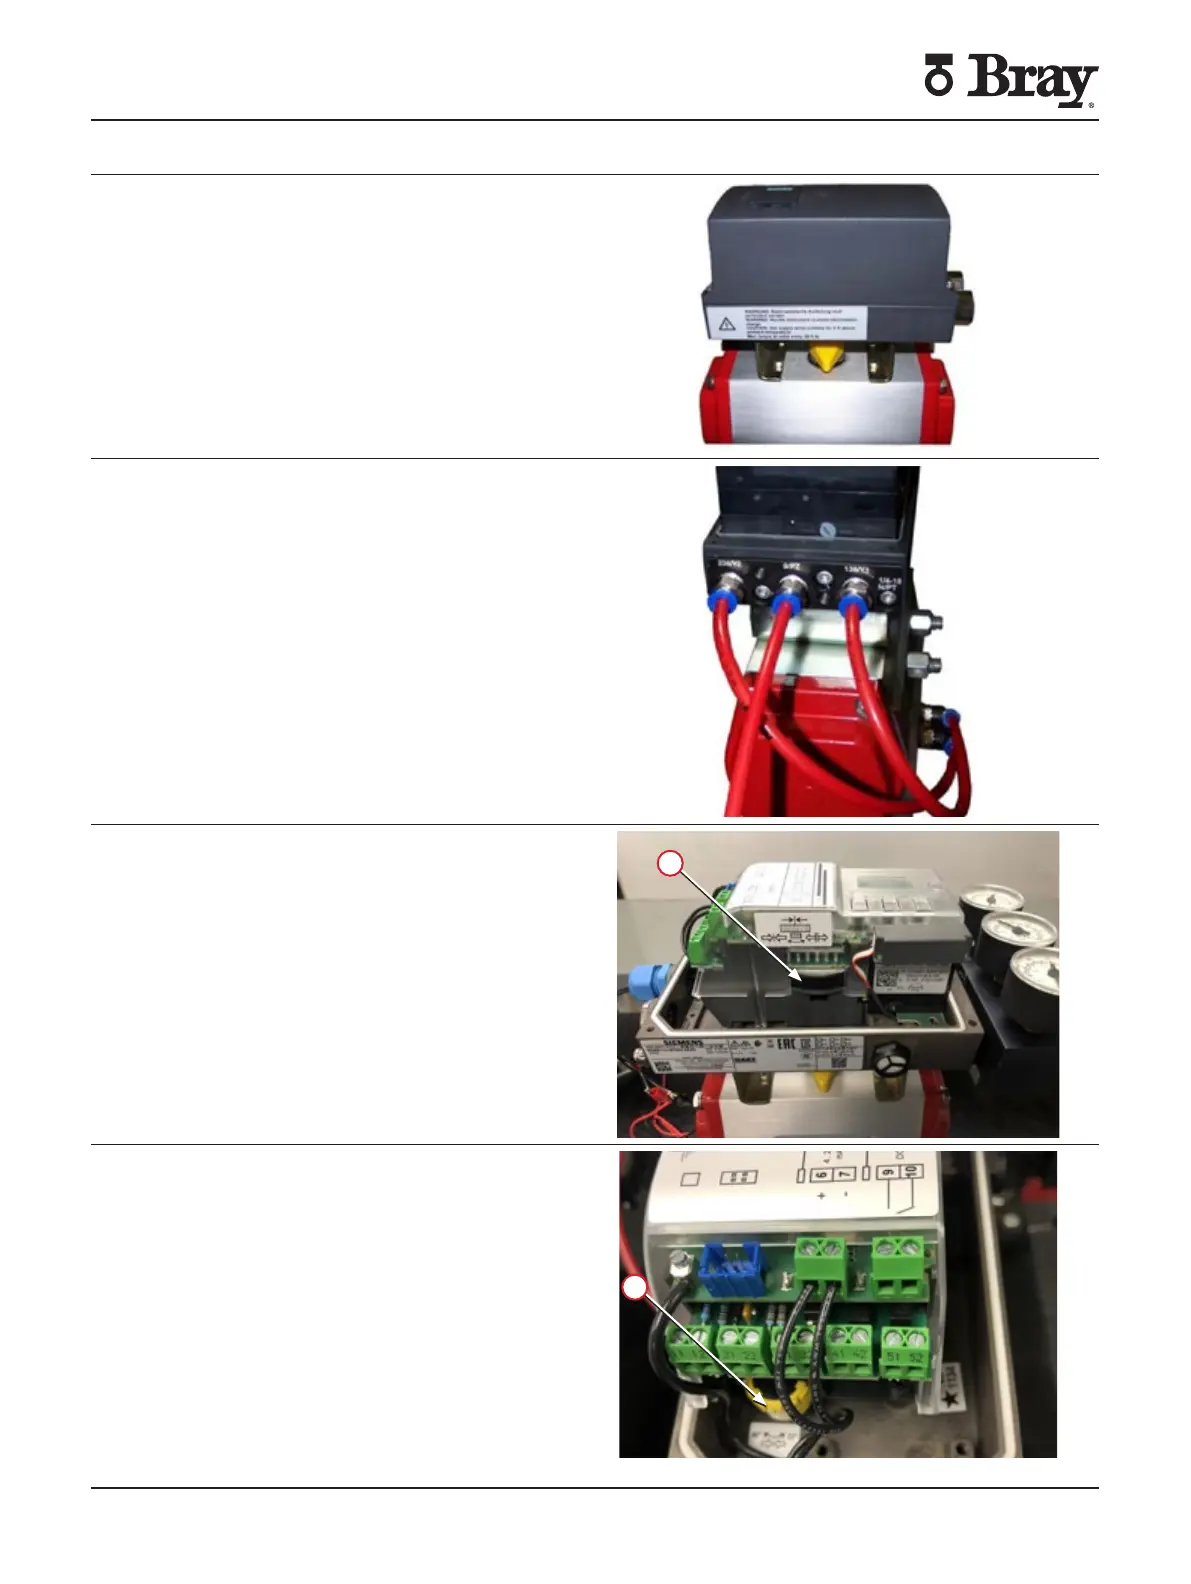
Step Position the yellow ‘Transmission Ratio
Selector’ tab () in the position by
pushing it away from the labeled side of
the device
Step Adjust the yellow clutch wheel () on the
underside of the terminals using a mm
wide screwdriver to the position
 Loading...