10 11EN EN
• Strength of ready coee depends on the quality and
grinding degree of coee beans.
• If coee is pouring out too long, this means the
coee powder is too ne it is tamped too strongly; in
this case use coarse-ground coee and choose the
tamping degree experimentally.
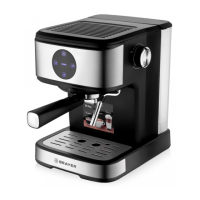
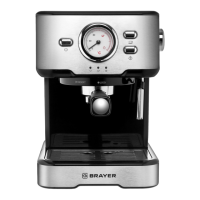
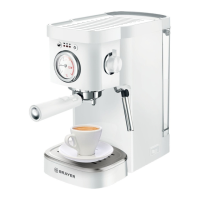
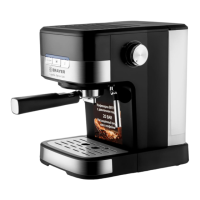
MAKING ESPRESSO
ATTENTION!
Do not remove the lter holder (18) during making
coee.
Do not remove the lter holder (18) right after
making coee, as there is redundant pressure
inside, wait a little before removing the lter holder
(18).
• Remove the lid (9), remove the water tank (10).
• Fill the tank (10) with cold water, do not exceed the
maximal level mark, install the tank (10) back to its
place.
• Install one of the coee lters (19 or 20), depending
on the amount of ready coee, into the lter holder
(18) matching the ledge on the lter (19 or 20) with
the hole on the holder (18) and turn the lter (19 or
20) counter/clockwise.
• Add the required amount of ground coee into the
lter (19 or 20) with a measuring spoon (21) and
slightly tamp the coee in the lter (19 or 20) with the
back side of the measuring spoon (21) (pic. 5, 6, 7).
• Install the lter holder (18) into the installation place «
» and turn the handle (4) to the right as far as it will go
« » (pic. 2, 3, 4).
• Place a cup of suitable height and capacity (see the table
CHOOSING THE APPROPRIATE CUP) on the grid (2); if
you use small cups, take the pullout tray (3) by the lower
part and pull it towards yourself, place the cups on it.
• Insert the power plug into the mains socket.
• Switch the coee maker on by setting the power switch
(11) «0/I» to the position «I», the indicator (6) will light up
and start ashing.
• When the coee maker is ready for operation, the light
indicator (6) will glow constantly.
• To make one cup of espresso, use the small lter (19)
and press the «Espresso»-button (5) once; the light
indicator « » will light up.
• To make two cups of espresso, use the larger lter (20)
and press the «Espresso»-button (5) twice; the light
indicator « » will light up. In this case set one big or
two small cups on the grid (2 or 3).
Notes:
- if you need to switch the coee maker o during the
espresso making, press the «Espresso»-button (5) again;
– successive making of coee should be performed with
intervals 2-3 min.
• Remove the cup with ready drink from the grid (2 or 3).
• After you nish using the coee maker, switch the coee
maker o by setting the switch (11) «0/I» to the position
«0».
• Wait until the coee maker cools down, remove the
lter holder (18) and wash the installed lter (19 or 20).
ESPRESSO PORTION SETTING
• During making espresso press and hold the button (5)
for 3 seconds. When the cup is lled with necessary
amount of espresso, press the button (5) again.
• Next time when you make espresso, the preset amount
of ready coee will be poured into the cup.
Notes:
- minimal and maximal amount of espresso are specied
in the table «CHOOSING THE APPROPRIATE CUP»;
- if you need to make a lesser amount of coee then it was
set, press the button (5) again when the cup is lled with
necessary amount of ready coee.
Return to the factory settings
• To return to the factory settings switch the coee maker
o by setting the switch (11) «0/I» to the position «0».
• Press and hold the «Espresso»-button (5) and switch
the coee maker o by setting the power switch (8)
«0/I» to the position «I».
• The coee maker is ready for operation with the factory
settings.
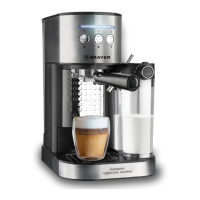
MAKING CAPPUCCINO
ATTENTION! When making cappuccino be careful to
avoid burns by outgoing hot steam.
• Make sure that the removable tray (1) and the tray grid
(2) are installed to their places.
• Fill the tank (10) with cold water, do not exceed the
maximal level mark, install the tank (10) back to its
place.
• Take the container (16), pull it towards yourself and
remove it (pic. 1), remove the cappuccinator lid (14)
from the container (16).
• Fill the container (16) with milk, do not exceed the
maximal level mark.
• Install the cappuccinator lid (14) on the container (16)
and install the cappuccinator back to the installation
place until the lock clicking.
• Install one of the coee lters (19 or 20) into the lter
holder (18) matching the ledge on the lter (19 or 20)
with the hole on the holder (18) and turn the lter (19 or
20) counter/clockwise.
• Add the required amount of ground coee into the lter
(19 or 20) with a measuring spoon (21) and slightly
tamp the coee in the lter (19 or 20) with the back side
of the measuring spoon (21) (pic. 5, 6, 7).
• Install the lter holder (18) into the installation place «
» and turn the handle (4) to the right as far as it will go «
» (pic. 2, 3, 4).
 Loading...