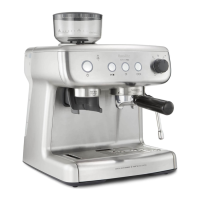
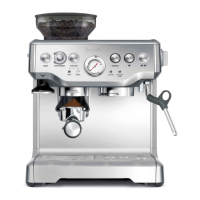
What to do if Breville Barista Max VCF126X grinds are too fine?
- TTina BlackAug 12, 2025
If the grind is too fine, change to a coarser grind setting.
What to do if Breville Barista Max VCF126X grinds are too fine?
If the grind is too fine, change to a coarser grind setting.
What to do if Breville Barista Max VCF126X Coffee Maker grind is too coarse?
If the grind is too coarse, change to a finer grind setting.
What to do if Breville Coffee Maker squirts from the side of the Head during extraction?
If coffee squirts from the side of the head during extraction, the coffee grind may be too fine. Change to a coarser grind setting.
Why is Breville Barista Max VCF126X Coffee Maker Head loose during extraction?
If the head is loose during extraction, ensure a filter basket is inserted.
What to do if my Breville Barista Max VCF126X is making an unusual noise?
Check there is nothing obstructing the back of the unit.
What to do if Breville Coffee Maker GRINDER LIGHT flashes?
Grind beans.
How to fix tight Head on Breville Barista Max VCF126X?
The head might be tight to turn due to bedding in. It should become easier to turn with use.
What to do if Breville Coffee Maker outlet is blocked?
Cleaning.
Adjustable 250g capacity bean hopper with 30 grind settings for optimal taste.
LED illumination shows coffee grinds being delivered into the filter basket during grinding.
Allows one-touch, on-demand grinding directly into the filter basket for precise amounts.
Dedicated space behind the drip tray for storing filter baskets, cleaning disc, brush, and pin.
Includes a water level indicator and a separate grind bin for overflowed coffee grounds.
Convenient internal storage to stow excess power cord, keeping the benchtop tidy.
Ensures the espresso machine remains stable and secure on the benchtop during use.
Preheats cups and stores the tamper conveniently on top of the machine.
Easy-to-remove water tank for convenient filling and cleaning, with an internal handle.
Larger 58mm commercial size for more even extraction of coffee grinds.
Commercial size 58mm portafilter for even coffee distribution and easier tamping.
Ball-joint movement with silicone cover for safe and flexible positioning for milk texturing.
Accommodates tall mugs and glasses with a 105mm clearance for direct coffee extraction.
Easily removable top burr for convenient cleaning of the grinder.
Indicates grinder status: ready (white), fault (flashing), or motor protection (red).
Turns the machine on/off; light pulses when heating, solid when ready, turns off in sleep mode.
Buttons for single, double, or custom shot volumes, allowing manual start/stop.
Controls steam/hot water; lights indicate ready status, warming, or cooling.
Illuminates blue when a cleaning cycle for the group head/shower head is required.
3-way system delivering accurate, stable water temperature for consistent espresso.
Ensures fast heat-up and precise water temperature for optimal espresso extraction & milk steaming.
Monitors and controls Thermoblock to maintain precise water temperature for coffee delivery.
Introduces small amounts of water to bloom coffee grinds before steady flow for richer flavour.
Commercial sized 58mm group head and handle for maximum flavour extraction and even results.
On-demand grinding technology delivers coffee directly into the group handle with one touch.
Automatically dispenses preset shot volumes or allows customisation for precise espresso amounts.
Allows adjustment of water temperature (88-96°C) for personal preference and bean type.
Instructions for removing all packaging materials and the red plug from the water reservoir.
Guidance on placing the machine on a dry, stable, flat, and horizontal benchtop.
Instructions for washing removable parts in mild detergent and warm water before first use.
Guidance on storing accessories in the designated storage home and inserting the grind bin.
Instructions for correctly seating the Top Burr and securing the Bean Hopper.
Steps to fill the water reservoir and insert the group handle before priming.
Procedure for priming the machine by running water through the group head and steam wand.
Ensuring the water reservoir is filled and fresh coffee beans are in the hopper before starting.
Turning on the machine and waiting for the ready indicator lights to illuminate.
Using hot water from the steam wand or warming plate to preheat cups for optimal coffee temperature.
Choosing between the one-cup or two-cup filter basket for the desired espresso shot.
Preheating the group head, handle, and basket assembly for optimal extraction temperature.
Instructions for filling the group handle with the correct amount of coffee grinds.
Guidance on tamping coffee grinds evenly to the indicated level with appropriate force.
Ensuring the edges of the group handle and drip tray are clear of excess coffee grounds.
Steps for correctly inserting and turning the group handle into the group head.
Placing the cup correctly on the drip tray under the group handle for extraction.
Initiating espresso extraction using single, double, or manual shot buttons.
Procedure for turning the group handle and removing the used coffee cake.
Filling the milk jug with cold milk to the correct level for texturing.
Preparing the steam wand and machine for milk texturing, ensuring steam readiness.
Correctly positioning the steam wand tip into the milk for optimal texturing.
Starting the milk texturing process by engaging the steam wand and adjusting milk flow.
Guidance on texturing milk to achieve desired microfoam and temperature.
Procedure to set a custom volume for a single espresso shot, saving the preference.
Ensuring machine is ready and checking water reservoir level before customising shot volumes.
Verifying power connection, dial position, and machine readiness before customisation.
Procedure to set a custom volume for a double espresso shot, saving the preference.
Setting custom pour volumes for manual shot extraction by pressing and holding the button.
Entering custom mode by pressing specific buttons to adjust extraction temperature settings.
Using buttons to increase or decrease temperature in 2°C increments (88-96°C).
Saving the selected extraction temperature by pressing the confirm button.
Choosing between Gentle, Distinct, or Constant pre-infusion profiles for different espresso characteristics.
Saving the selected pre-infusion profile setting by pressing the confirm button.
Resetting all custom settings (shot volumes, temperature, pre-infusion) back to factory defaults.
Procedure for performing a cleaning cycle using cleaning tablets for the espresso machine.
Steps to ensure sufficient water and correct placement of parts before starting a cleaning cycle.
Initiating the cleaning cycle by pressing specific buttons; light indicators and water flow described.
Confirmation of cycle completion and return to ready state; how to exit early.
Post-cleaning steps: purging group head, washing parts, and cleaning the drip tray.
Information on the group head seal, its maintenance, and when replacement might be needed.
Daily and periodic cleaning procedures for the steam wand to maintain performance.
Steps to clear blockages in the steam wand tip using cleaning pins and hot water.
Procedure for cleaning filter baskets, including soaking with cleaning tablets.
How to clear blockages in dual wall filter baskets using a cleaning pin.
Weekly cleaning of the grinding cradle and outlet using a brush and damp cloth.
Procedure for cleaning the bean hopper, including removal, washing, and reinstallation.
Steps to turn off the machine and note the grind setting before cleaning the hopper.
Detailed steps for removing, washing, and drying the bean hopper.
Instructions for correctly aligning, inserting, and locking the bean hopper back into place.
Guidance on when and how to adjust the bottom burr for optimal grind consistency.
Monthly cleaning of burrs, chamber, and outlet for optimal grinder performance.
Process for grinding off excess beans after cleaning to reset the grinder.
Procedure for washing and drying the removable top burr.
Cleaning the grind chamber and bottom burr using a brush or vacuum cleaner.
Cleaning the grind outlet from below using a brush to remove coffee grounds.
Instructions for correctly aligning and inserting the top burr into the grinder collar.
Steps for aligning and locking the bean hopper back into the grinder collar.
| Type | Espresso Machine |
|---|---|
| Model | VCF126X |
| Color | Stainless Steel |
| Power | 1600W |
| Pump Pressure | 15 bar |
| Grinder | Integrated Conical Burr Grinder |
| Bean Hopper Capacity | 250 g |
| Grind Settings | 30 |
| Milk Frother | Yes |
| Coffee Strength Selector | Yes |
| Steam Wand | Yes |
| Cup Warmer | Yes |
| Water Tank Capacity | 2.0 L |
