Operation and Safety Manual
™
Model 330IK SA Semi-Automatic Gear Driven Gravity Feed Slicer
Operation
Things to keep in mind
1. The foodstuff should only be loaded onto the meat table with the thickness control set
to zero and the power switched off at the control panel.
Aside from being essential to your safety, these conditions keep the foodstuff to be
sliced (particularly if it is solid) from being accidently knocked against the cutting
edge of the blade, which could be damaged.
2. The recommended, and only safe way of moving the meat table during slicing
operations is either with the meat table handle or by setting the machine to AUTO
mode.
3. The manual slicing movement should be done with a speed that is constant and
appropriate to the density and/or hardness of the foodstuff to be sliced. The general
rule-of-thumb is that the harder the foodstuff, the slower the slicing.
Following this rule will result in a slice with a good, clean appearance, without putting
undue strain on either the cutting blade or the motor.
4. Sharpen the blade as soon as the sliced foodstuff begins to look ragged or roughened,
or when the effort required to slice increases significantly. Refer to the Maintenance
section for the correct procedure for blade sharpening.
Manual operation
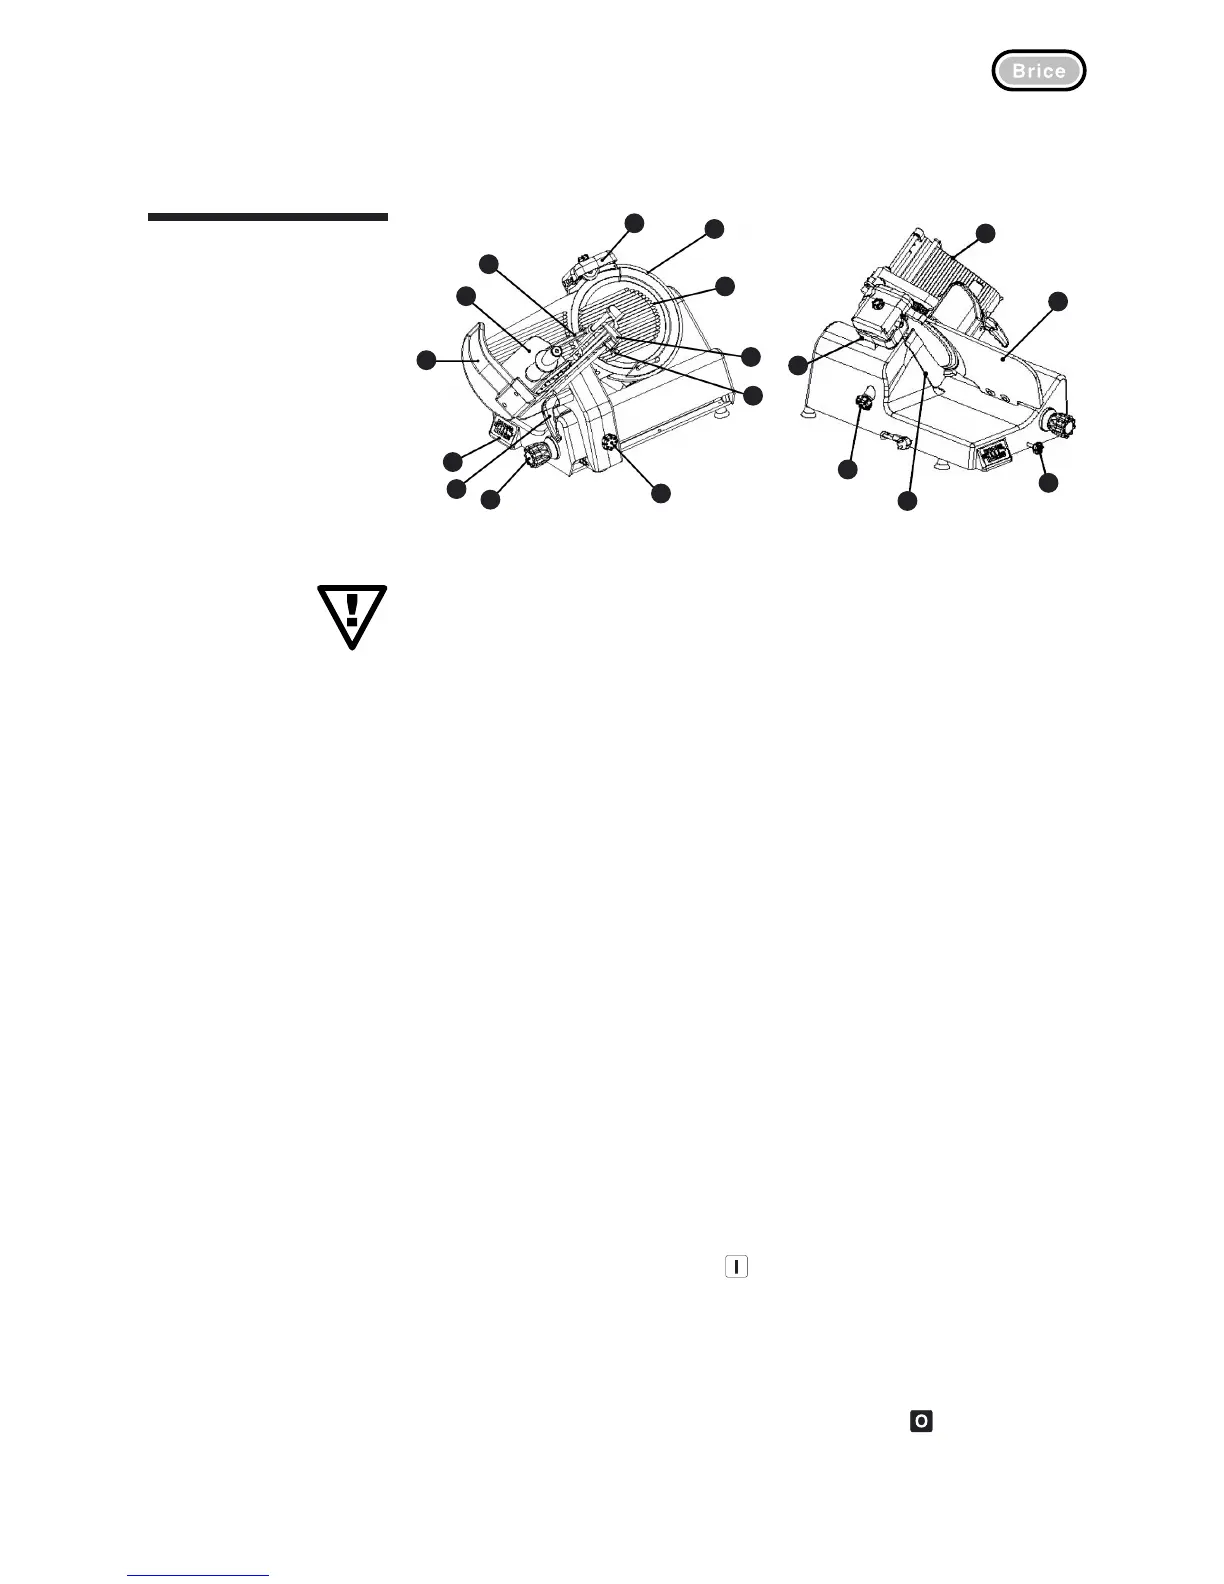
Begin using the slicer by returning the thickness control (2) to zero and making sure that the
meat tray carriage is pulled to the front of the slicer.
1. Place the foodstuff on the meat tray with the side to be sliced touching the thickness plate
(13) and up against the meat tray fence (7).
2. Swing the meat grip/Last Slice device (11) over so that it rests on top of the foodstuff.
3. Set the desired thickness of slice using the thickness control (2).
4. Push the Auto/Manual Carriage selector knob (17) fully in to the MANUAL position.
5. On the control panel, press and hold the
key until the blade motor starts. The white
indicator light above the key will illuminate.
6. Grasp the meat table handle (3) firmly and push the meat table away from you towards the
back of the slicer. Once the slice has been cut, pull the meat table back towards you.
7. Repeat step 6 as often as required to obtain the number of slices needed.
8. When you have finished slicing, make sure that the meat table is pulled to the front of the
slicer and switch off the power at the control panel by pressing the key.
Operation 2.1
1
2
3
4
6
7
8
9
10
5
11
12
14
13
14
15
16
17


 To Next Page