Operation and Safety Manual
™
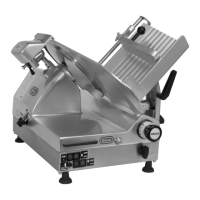
Model 330IK SA Semi-Automatic Gear Driven Gravity Feed Slicer
Automatic operation
Begin by setting the thickness control (2) to zero and making sure that the meat tray carriage is
pulled to the front of the slicer.
1. Place the foodstuff on the meat tray with the side to be sliced touching the thickness plate
(13) and up against the meat tray fence (7).
2. Swing the meat grip/Last Slice device (11) over so that it rests on top of the foodstuff.
3. Set the desired thickness of slice using the thickness control (2).
4. Pull out the Auto/Manual Carriage Selector knob to the AUTO position.
5. On the control panel, press and hold the
key until the blade motor starts. The white
indicator light above the key will illuminate..
6. Select the desired stroke speed and stroke length on the control panel (1). For example
- Medium speed and Medium stroke length . Blue indicator lights should illuminate
below the selected speed and above the selected stroke length.
7. Press the key. The carriage should now begin to move smoothly and continuously.
8. When you have finished slicing, press the
button to stop the carriage and switch off the
power at the control panel (2) by pressing the key.
Using the Last Slice device
Cleanly slicing the last 1 or 2 centimetres of foodstuffs on a slicer without wastage can be
difficult. This is particularly the case when slicing packaged foodstuffs with rounded-off ends (or
stubs). The Last Slice device overcomes the problem.
1. When the foodstuff is sliced down to the last 1 or 2 centimetres, raise the meat grip (11)
to its fully-open position and turn the foodstuff around so that the uncut end of the stub is
pressed against the thickness plate (13).
2. Lower and position the meat grip (11) behind the foodstuff so that the spikes of the Last
Slice device press into the cut face of the foodstuff.
3. Continue slicing until the remaining foodstuff has been cut.
The Adjustable Product Fence
The adjustable product fence (7) is designed to help hold the foodstuffs being sliced more
securely, in particular, smaller diameter products such as salami.
1. Raise the meat grip (11) to its fully-open position.
1. Place the foodstuff to be sliced firmly against the meat tray fence and adjust the position of
the product fence (7) by loosening the securing knob (6). Slide it against the product to be
sliced so that the foodstuff is securely held against the end of the meat tray.
2. Swing the meat grip (11) over and press down to insert spikes into the foodstuff about to
be sliced. The meat grip is not always required, if the foodstuff is heavy enough to self feed
down the meat tray.
2.2 Operation


 To Next Page