11
22
STARTER SYSTEM
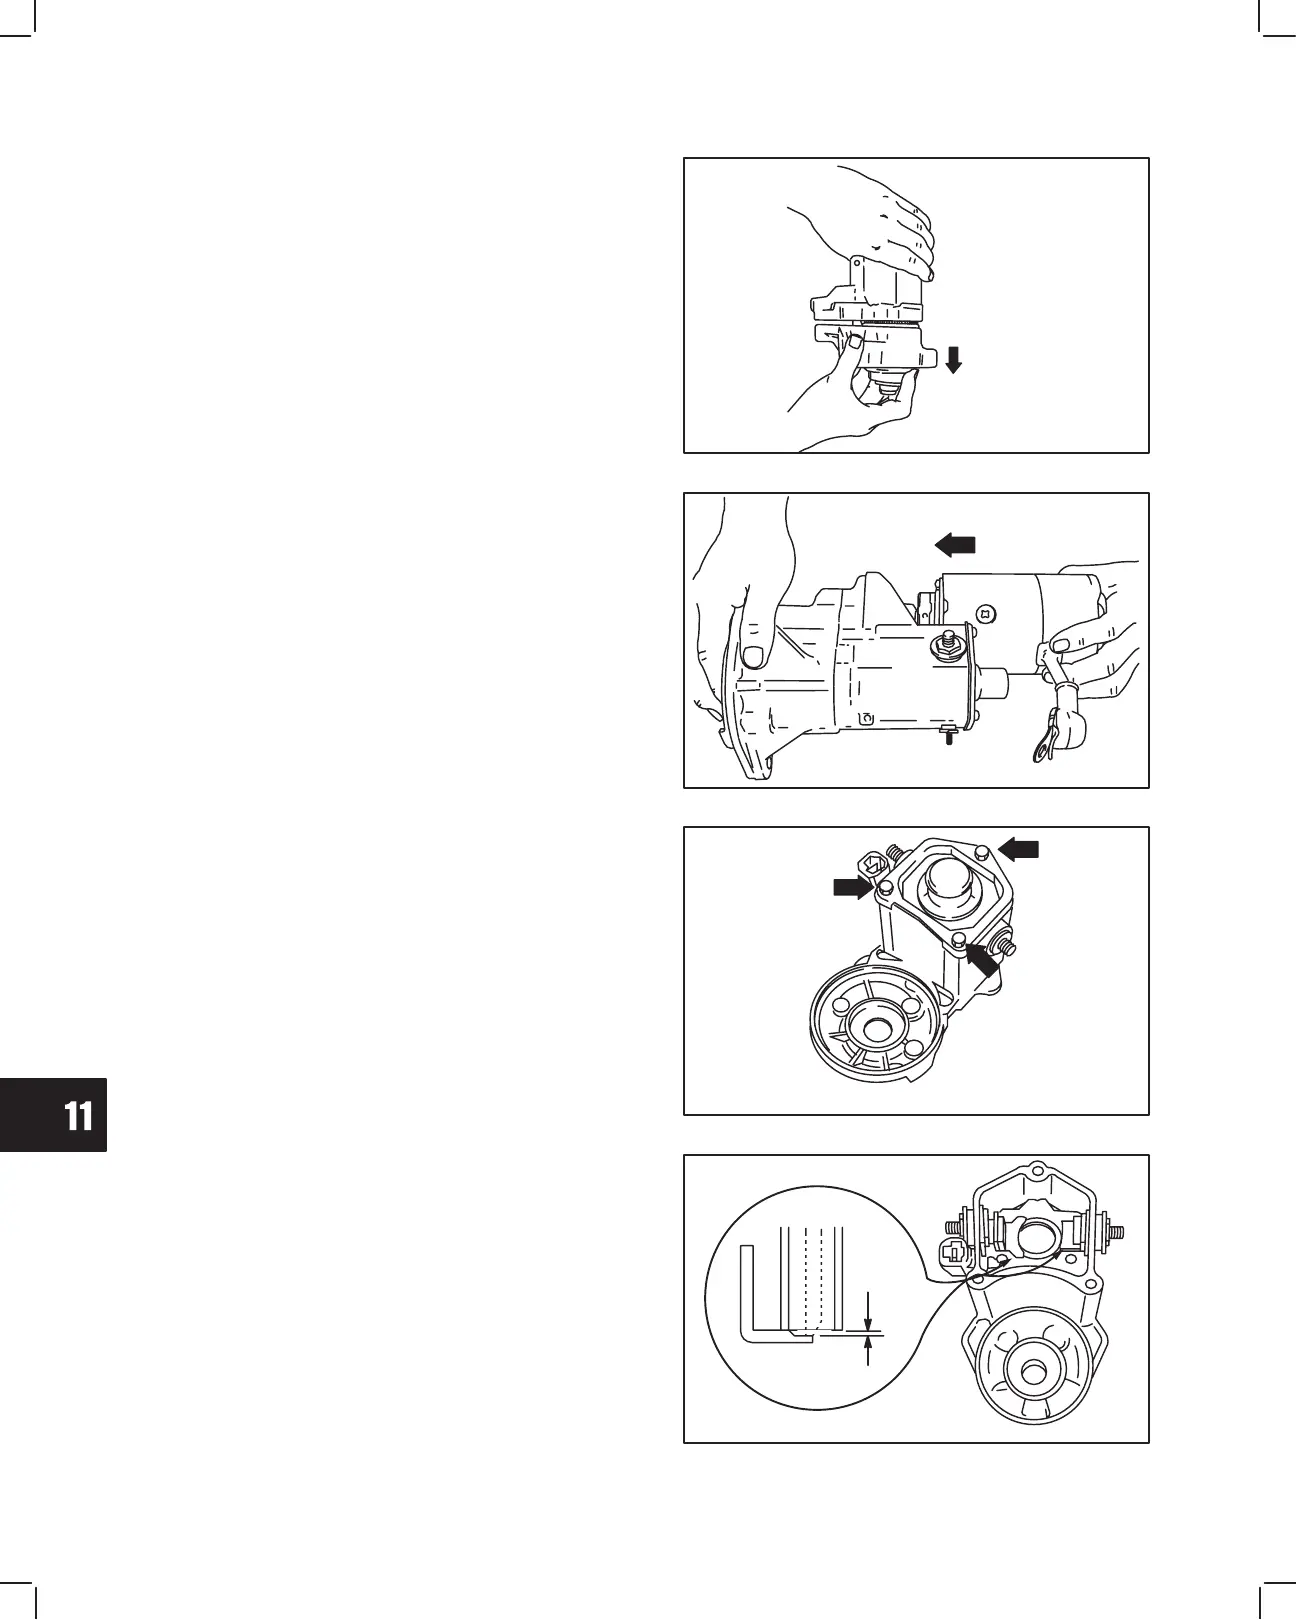
Install Solenoid
1. Insert return spring into solenoid plunger.
2. Align pilot hole in solenoid with drive gear shaft
and assemble solenoid to drive housing, Fig. 60.
a. Torque screws to 9.0 Nm (80 in. lbs.).
Fig. 60 – Installing Solenoid
DRIVE
HOUSING
DOWN
3. Assemble starter motor to drive housing. Align tab
on starter with notch in drive housing, Fig. 61.
a. Torque screws to 9.0 Nm (80 in. lbs.).
4. Install field coil wire.
a. Torque nut to 8 Nm (70 in. lbs.).
Fig. 61 – Installing Starter Motor
Replace Solenoid Plunger And Contacts
Place starter in a vise with cover plate up.
1. Remove three screws and cover plate.
a. Discard gasket.
2. Remove plunger and spring.
Fig. 62 – Remove Plunger
3. Replace contacts if burned or worn.
Note: Contacts and plunger must be replaced
as an assembly.
4. Measure thickness of contact plates with calipers.
Reject Dimension: 0.9 mm (0.035”).
Fig. 63 – Checking Contacts
WEAR
 Loading...