Revised May 2012
6
OPERATING INSTRUCTIONS
1) INTRODUCTION
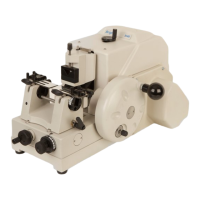
The Bright 5040 is a rotary rocking microtome with specimen retraction on the return stroke. In standard form it
can cut sections up to 60µm thick and will accept specimens up to 50 x 70mm.
Suitable for paraffin wax and plastic embedded specimens, the microtome is fitted with a standard specimen
vice clamp or a quick release holder for cassettes, A wide range of options and accessories are available,
including motor drive and feed screws for cutting sections up to 300µm
Knife/Blade guards are fitted to protect the operator from the knife/blade during normal operation. All controls
are also placed clear of the knife/blade to permit all settings to be made in comfortable safety.
1.1 RECEIPT AND UNPACKING
All packing must be carefully removed and parts checked against enclosed packing list. If any damage or
discrepancy is noted, please inform our agent/distributor or Bright Instrument Company Limited immediately.
1.1.2 UNPACKING PROCEDURE
The following should be followed when the instrument is received:
a) At least two people are required during the unpacking. The microtome weighs 15Kg.
b) Check that the outer packing is in good order and does not show signs of serious damage.
c) Remove the microtome from the case and unpack it.
d) Remove and unpack the accessories.
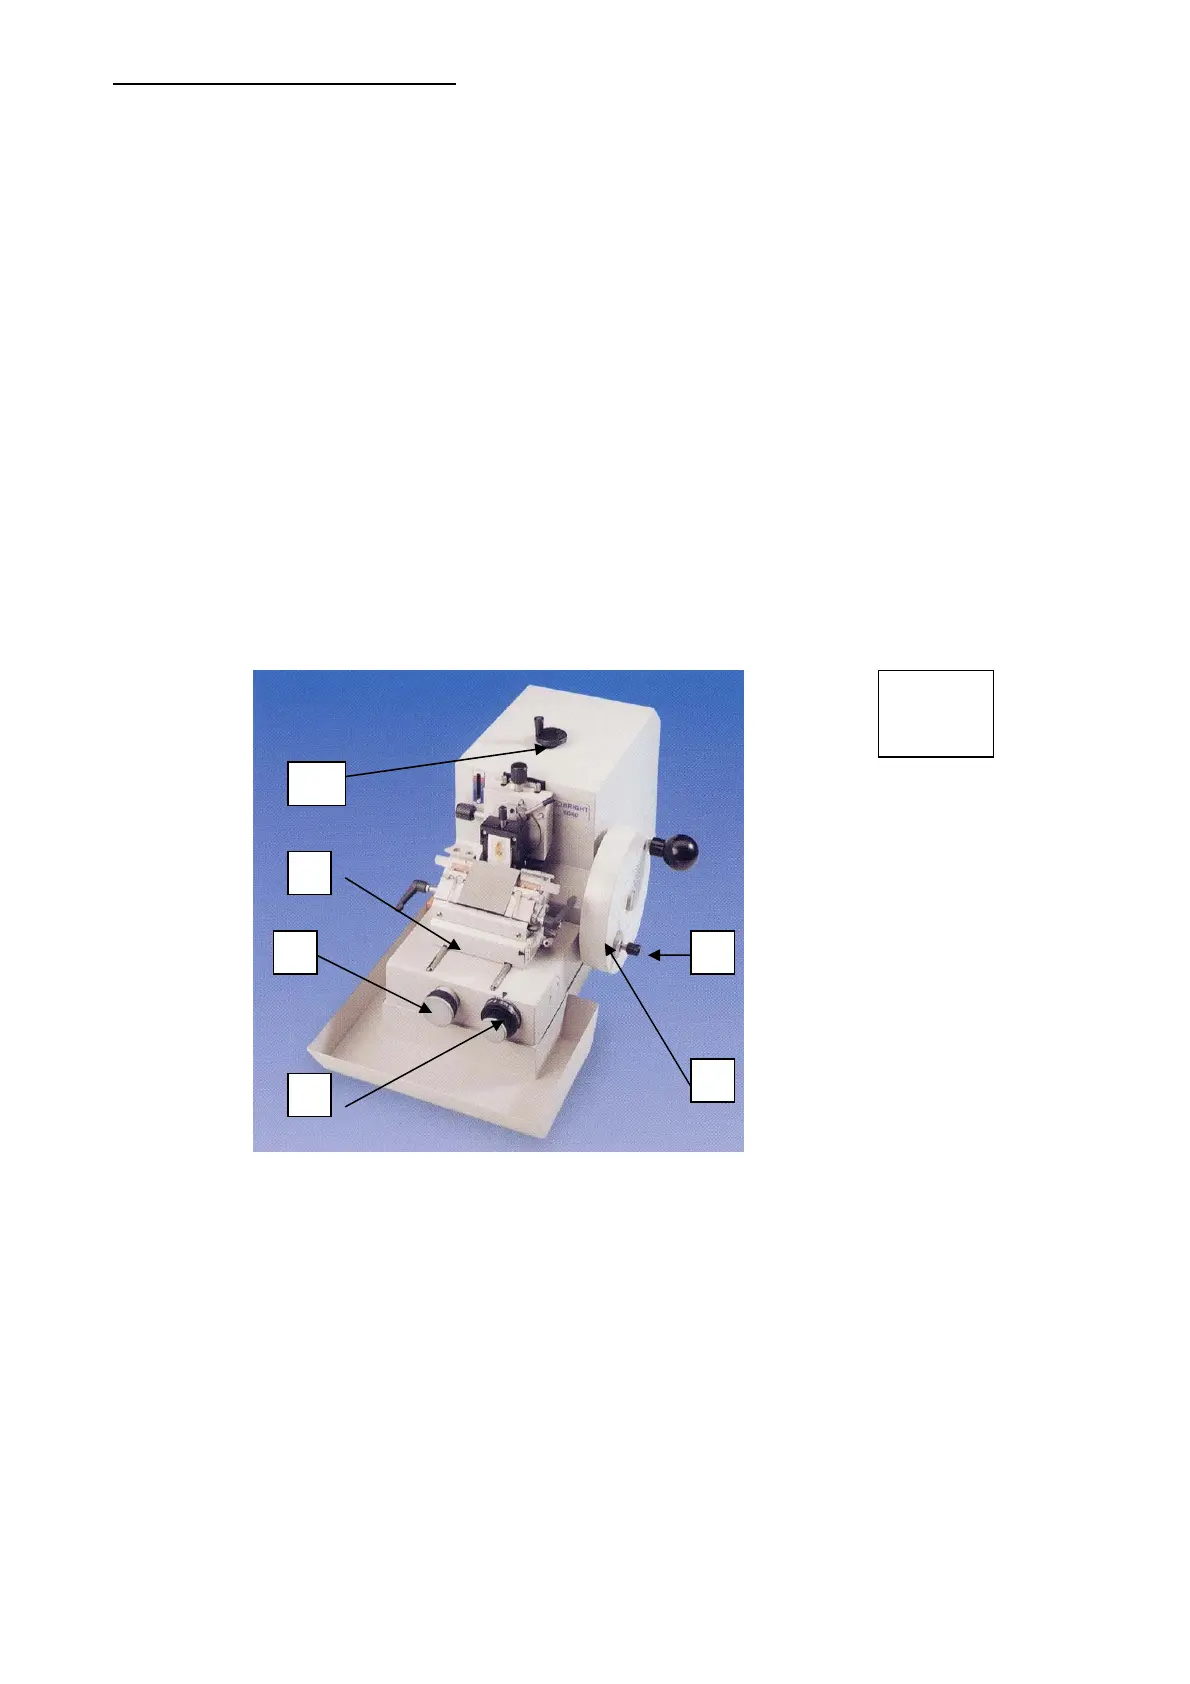
FITTING THE CUTTING HAND WHEEL
Push the hand wheel FIG 1(1) over the shaft on the side of the microtome. Ensure pin on shaft engages slot in
centre of hand wheel, press home firmly then fit centre screw.
1.1.3 FITTING THE COARSE ADVANCE/REWIND CONTROL
The rewind knob is fitted FIG 1(3) into the top of the microtome, ensuring it engages properly.
1.2 FEATURES
Refer to FIGs 1 and 2.
1.2.1 CUTTING HAND WHEEL
The hand wheel can be locked with the cutting arm in the upper position. Move the handle on the wheel to the
top, pull the small lock knob FIG 1(2) and rotate it quarter of a turn, release and ensure it locates correctly.
To operate the microtome, release the lock and turn the hand wheel in a clockwise direction.
1
3
FIG 1
2 4
5
6