7 1018959-B
==================================================================================================
ASSEMBLY
English Manual
Assembly Tips
- Illustrations on page 6 are to-scale.
For faster identification of hardware during assembly, lay the
hardware on top of the illustrations on page 6.
Additional
info & videos
are available
on our website:
brinly.com
This QR code
links directly to the
15-Gallon Sprayer
product page:
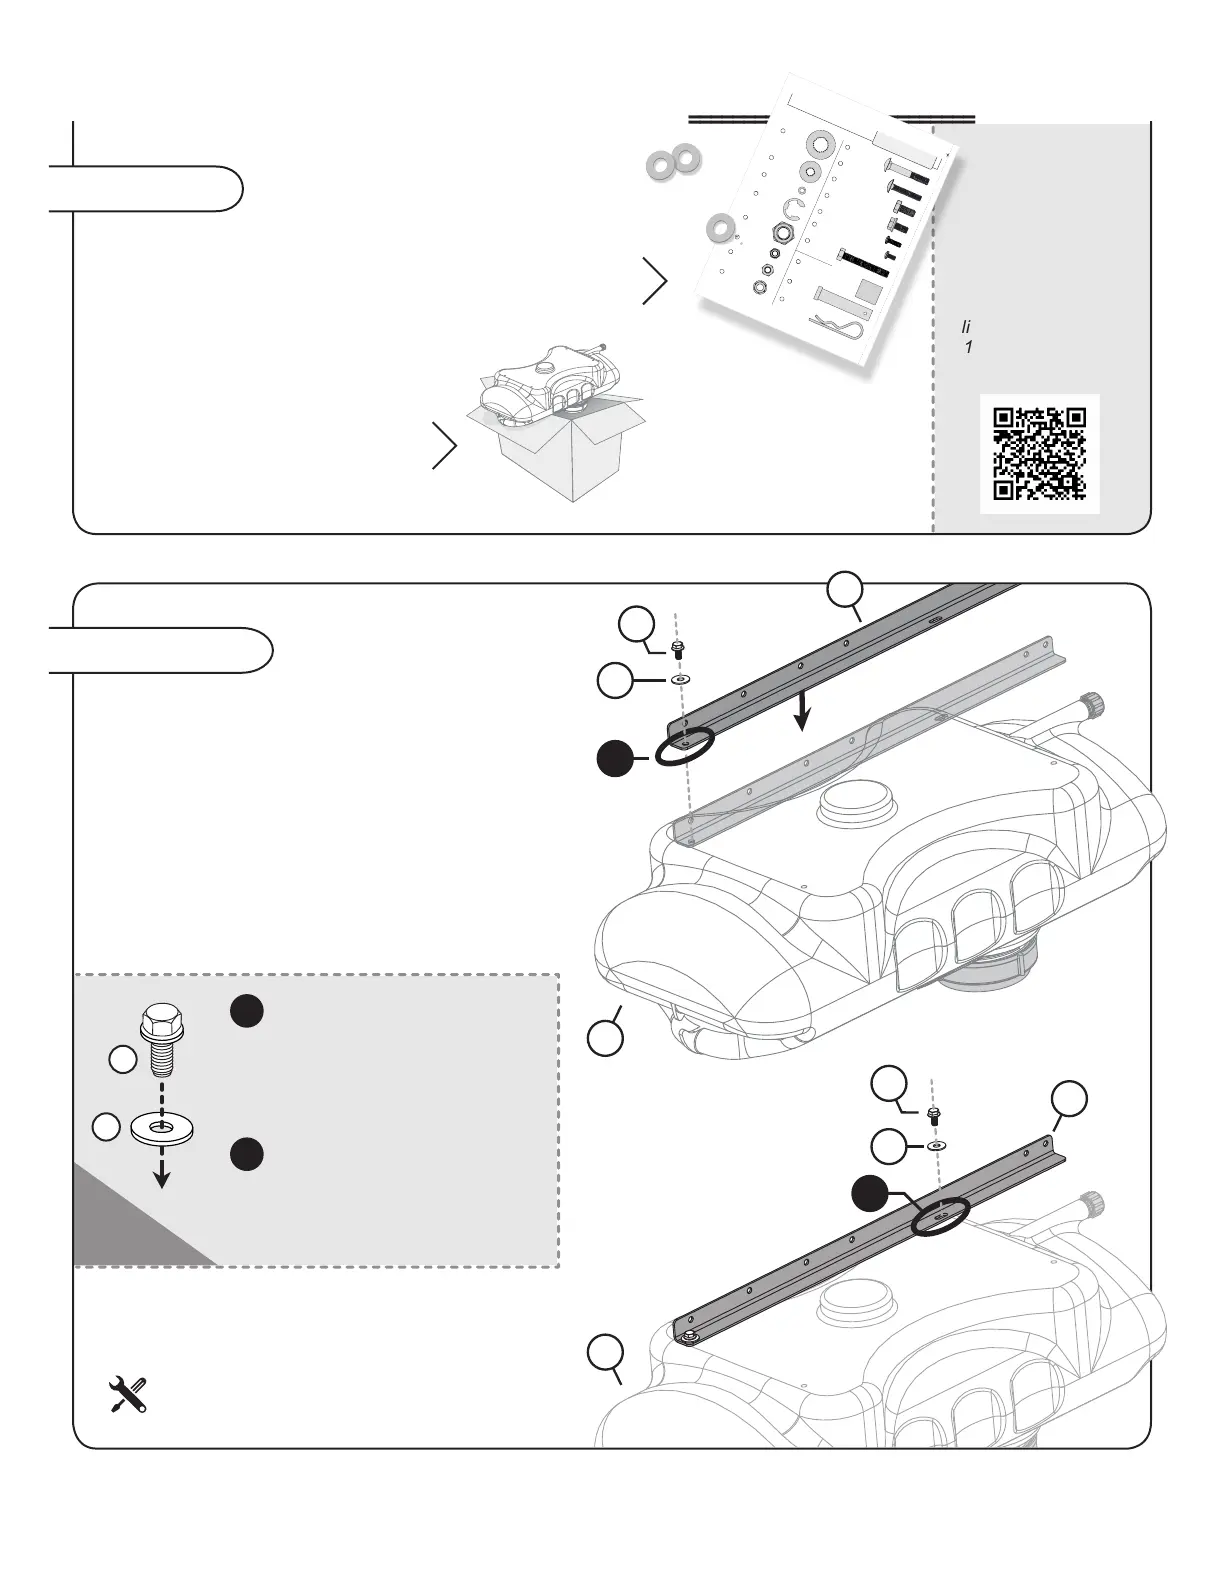
x4
50
48
A. Add a 5/16” at washer (50)
to a 5/16” ange bolt (48).
Run bolt through the circular
opening at the base of the
Left-Hand Bracket (1).
B. Add a 5/16” at washer (50)
to a 5/16” ange bolt (48).
Run bolt through the OVAL
OPENING of the Bracket (1).
A
B
Assembly Step 1
Attaching the Frame Brackets
NOTE: One edge of each of the
Frame Brackets (1 & 2 ) will have two holes,
one of which is an OVAL OPENING.
(
This edge lays at against the sprayer tank
)
.
Align the Left-Hand Frame Bracket (1) with
the Sprayer tank (3) as illustrated.
48
1
A
50
1
48
B
50
3
3
Repeat this step on the other side of the tank (3)
with the Right-Hand Frame Bracket (2).
SECURE ALL BOLTS FULLY.
Oval Opening >
Round
Opening >
6
1018959-B
==================================================================================================
DO NOT RETURN PRODUCT IF YOU ARE MISSING PARTS.
Please Call: 1 (877) 728-8224
HARDWARE IDENTIFIER
Illustrations on this page are to scale for faster
identication of hardware during assembly.
English Manual
Washer:
Flat 5/8”
(x4) . . . . . .
45M2121P
7
Hitch Pin
(x1) . . . . . . . .
45
B-3861
Hitch Pin
Cotter (x 1) . . . . . . .
49
D-14 6P
E-Ring
5/8” (x2). . . . . . .
9
F-577
Washer:
Special (x4) . . . . .
R-618
50
Spacer: Axle (x2) . . . . . . . . . . . . . . . . .
B-5691
6
Nut: Nylon Lock
5/16 ” (x14). . . . . . .
47
B-478 6
46
Nut: Lock
1/4” (x1) . . . . . . . .
B-478 5
Nut: Jam
Plastic
(x2) . . . . . . . . .
20
B-6 041
Washer: Lock
SS #10 (x4) . . . . . . .
1007005
52
Bolt: Carriage
5/16 x 2” (x2) . . . . . .
10M1032P
42
Bolt: Hex Head
5/16 x 3/4” (x12) . . . . . . . . . . . . . . . . . .
2M1012P
44
Bolt: Hex Fl. Head,
5/16 x 5/8” (x4) . . . . . . . . . . . . . . . . . . . .
B-5695
48
Screw: Round Head #10 (x1) . . . . . . . . . . . . .
22M0606P
54
Screw: Round Head #10 (x4) . . . . . . . . . . . .
1016890
53
Bolt: Hex Head
5/16” x 2-1/4”
(x2) . . . . . . . . . .
2M1036P -FT
55
Nut: Whiz Lock
5/16”-18 (x6) . . . . .
B-4355
56
Bolt: Carriage, SS
1/4 x 1-1/2” (x1) . . . . . . . . . . . .
11M0 824P
43
- Use the Sprayer box.
The sprayer tank is upside-down
and can easily shift for Steps 1-5.
During assembly you can work
with the sprayer tank resting on
top of the box, letting the tank cap
nestle down inside the box.
 Loading...