3.4 Splitting Classic 2PWN Heaters
The Classic 2PWN model heaters can be split in two to allow for ease of installation. To split the heater, follow these
simple instructions:
• Remove the access panel located on top of the fan cabinet compartment by removing the two screws.
• Disconnect the fan motor loom active and neutral from the terminal block located inside the recess.
• Remove the fan motor loom earth terminal secured to the fan motor cabinet inside the recess.
• Remove the four screws, two screws on each side of the heater, fastening the fan cabinet to the heat
exchanger cabinet.
• The heater can now be split in two.
• Protect the exposed looms from damage while the heater is split in two parts.
• Once in position, reassemble in reverse order.
4.0 Classic 2PWN Model Guidelines
4.1 Heater Dimensions DF320 XA, UF320 XA & UP326 XA
Model
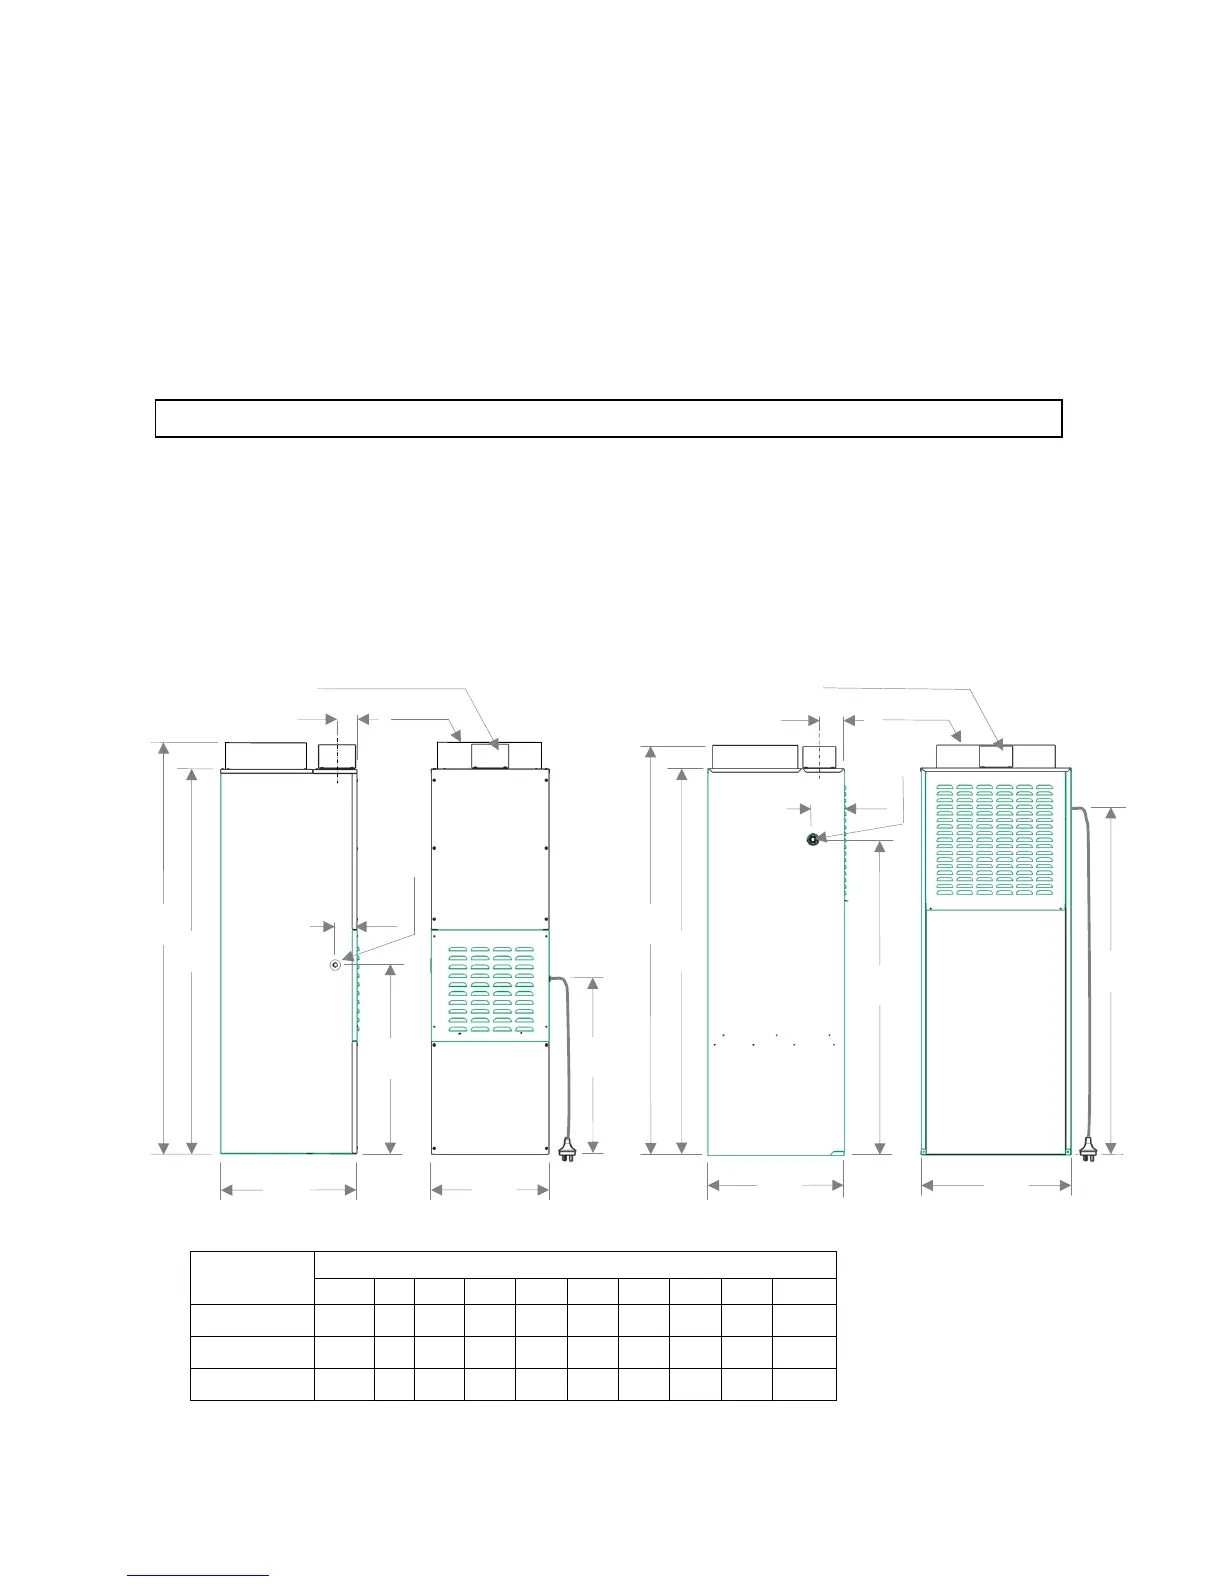 Loading...