EasyManua.ls Logo

Broan ERVS100S - User Manual

Broan ERVS100S
36 pages
Print Icon
To Next Page IconTo Next Page
Loading...
22077 rev. L
INSTALLATION AND USER GUIDE FOR
BROAN ERVS100S AND ERVS100S-HW
RESIDENTIAL USE ONLY
! !
VB0342
READ AND SAVE THESE INSTRUCTIONS
INSTALLER: LEAVE THIS MANUAL WITH HOMEOWNER
Broan-NuTone LLC, 926 west State Street, Hartford, Wisconsin, USA 800-558-1711 broan-nutone.com
REGISTER YOUR PRODUCT ONLINE AT: www.broan-nutone.com/register
For additional information - visit www.broan-nutone.com

Questions and Answers

  • P
    Paige MaldonadoAug 4, 2025
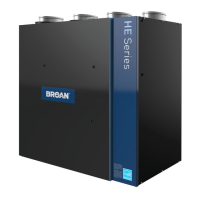
    What to do if my Broan ERVS100S Fan does not start?
    • R
      Richard PetersAug 4, 2025
      If your Broan Fan doesn't start, there are several potential causes: * There may be no power to the outlet or the wires on the power cable. Check the breaker in the distribution panel. * The unit door may not be properly closed. Ensure that the unit door is properly closed. * The PCB plastic holder tabs may be unclipped. Ensure the PCB plastic holder tabs are engaged in their slots and the PCB is well seated on its holder.
  • K
    Kristen HolderAug 15, 2025
    Why is the LED blinking slowly on my Broan ERVS100S Fan (RH and temperature sensor error)?
    • N
      Natalie FletcherAug 15, 2025
      If the LED is blinking slowly on the push button of your Broan Fan, it indicates an RH and temperature sensor error. This could be due to: * A misconnected RH and temperature sensor. Check the sensor harness connection, ensure that the connector is connected to its appropriate place, the wires are not damaged, and the connector pins are not corroded. * A defective RH and temperature sensor. If the LED is still blinking slowly, replace the defective RH and temperature sensor.
  • R
    Robin NguyenAug 20, 2025
    Why does my Broan Fan unit stop ventilating too often?
    • D
      Devin SalazarAug 20, 2025
      If your Broan Fan unit stops ventilating too often, it might be caused by a wrong setting of the RH limit. Verify the RH limit adjustment (factory setting is "N" for South and humid climate). Adjust the RH limit to the "+" position to increase the humidity limit of ventilation (allowing more ventilation time), or set the RH limit to the "OFF" position to deactivate the sensor.
  • G
    Gary MurphyAug 25, 2025
    What to do if the wall control does not work for my Broan Fan?
    • A
      Anthony HughesAug 25, 2025
      If the wall control for your Broan Fan is not working, consider these potential issues: * The unit may not be compatible with the control. Check the compatibility table. * The wires may be in reverse position. Ensure that the color-coded wires have been connected to their appropriate places. * The wires may be misconnected. Ensure the wires are correctly connected. * The wires may be broken. Inspect every wire and replace any damaged ones. If wires are hidden in walls, test the control using a shorter wire. * The wall control may be defective. Replace the wall control.
  • A
    Alicia GibsonAug 29, 2025
    Why does my Broan ERVS100S Fan unit let too much moisture enter the building during ventilation?
    • R
      richardandrewsAug 30, 2025
      If your Broan Fan unit allows too much moisture to enter the building during ventilation, it could be due to: * A malfunctioning unit backdraft damper. Check if the unit backdraft damper is closed when the unit is off. If not, verify the orientation of the damper assembly (the “TOP” engraving on the damper support must be on top), verify if the magnet is in place in the damper support, and verify if the metal clip is in place on the damper. The damper must open freely. * An incorrect setting of the RH limit. Verify the RH limit adjustment (the factory setting is "N" for South and humid climates). Adjust the RH limit to the "-" position to reduce the humidity limit of ventilation. Ventilation speed can be reduced by changing the mode, allowing less moisture to enter the building.
  • D
    Dennis SmithNov 8, 2025
    Why is the LED blinking rapidly on my Broan Fan, indicating a motor error?
    • C
      Christina SmithNov 8, 2025
      If the LED is blinking rapidly on the push button of your Broan Fan, it indicates a motor error. This can be due to: * A damaged or misconnected motor harness. Check both motor harness connections, ensure that connectors are connected to their appropriate places, the wires are not damaged and connector pins are not corroded. * A defective PCB, motor assembly, or low-speed capacitor. If both motors do not go on high speed, replace the PCB. * You can open the door and push on the door switch spring to reset the error and activate the unit self-test during the booting sequence. Both motors must start at high speed for 10 seconds, then go on low speed for 10 seconds. * If one motor does not start on high speed, inverse both motor connections and start the self-test again. If the motor...

Summary

About This Manual

Warning Symbols Explained

Explains warning and caution symbols used in the manual to highlight important information.

About These Units

Unit Limitation

Specifies that the unit is for residential use only and requires qualified installation according to codes.

General Safety Warnings

Lists critical safety warnings to reduce risk of fire, electric shock, or injury during operation.

Operational Cautions

Provides cautions regarding installation and operation, such as avoiding dust and extreme temperatures.

Safe Installation Zone

Zone A and B Installation Requirements

Details installation requirements differing between zones A and B, referencing specific sections for clarity.

Unit Preparation

Initial Inspection and Preparation

Covers inspecting the unit for shipping damage and preparing it for installation.

Choosing an Appropriate Location

Provides guidelines for selecting a suitable installation location based on temperature, access, and hazards.

Electrical Connection Type

Differentiates between cord-connected and hardwired models for electrical connection.

Installation

Positioning the Unit

Details how to position the unit, including installation between trusses.

Zone A Ceiling Installation

Instructions for installing the unit in Zone A ceilings, including insulation requirements.

Zone B Ceiling Installation

Instructions for installing the unit in Zone B unconditioned spaces, requiring a sealed enclosure and insulation.

Zone A Attic Installation

Guides installation in Zone A attics, emphasizing damper orientation and insulation for heat protection.

Installation Under the Ceiling

Instructions for installing the unit under the ceiling in a conditioned space, noting ERVS100S-HW requirement.

Combining with an AHU

Explains recommended and prohibited configurations when connecting the ERV to an Air Handling Unit (AHU).

Installing Registers

Provides guidelines for installing stale air exhaust and fresh air distribution registers.

Ductwork Installation

Details how to connect ducts, emphasizing insulation and avoiding condensation.

Installing Hoods

Offers recommendations for installing intake and exhaust hoods, including minimum distances and height.

Installing Tandem Transition Kit

Explains the installation of a Tandem Transition kit as an alternative to two exterior hoods.

Connecting Controls

Details how to connect different types of controls, including standby switches and push-button timers.

Hardwire Connection

Provides step-by-step instructions for connecting the ERVS100S-HW unit via hardwiring.

Hardwire Connection (contd)

Continues instructions for hardwiring, including fastening conduit and restoring power.

Getting the Unit Started

Unit Settings Configuration

Explains how to configure unit settings after installation, including modes and RH limits.

Controls Location

Shows the location of MODE and RH adjustable controls within the unit.

Choosing Right Settings

Advises on selecting appropriate MODE and RH LIMIT settings based on local conditions.

Prepare and Boot the Unit

Covers final preparation and the unit's booting sequence, including troubleshooting blinking LEDs.

Maintenance

Quarterly Maintenance

Details the steps for performing quarterly maintenance, including cleaning filters and the core.

Annual Maintenance

Outlines annual maintenance steps, including cleaning core, sensors, dampers, and exterior hoods.

Warranty

Warranty Terms and Conditions

Specifies the 5-year warranty for parts, conditions, limitations, and exclusions.

Wiring Diagram

Service Parts

Troubleshooting

Broan ERVS100S Specifications

General IconGeneral
TypeEnergy Recovery Ventilator
Airflow Capacity100 CFM
Voltage120 V
Dimensions25.5 x 14.5 x 12.5 inches
Weight37 lbs
Hertz60 Hz
ENERGY STAR CertifiedYes
Duct Size6 inches
Warranty5 years
Housing MaterialSteel
Mounting TypeCeiling

Related product manuals