BRONKHORST
®
9.17.022 page 31
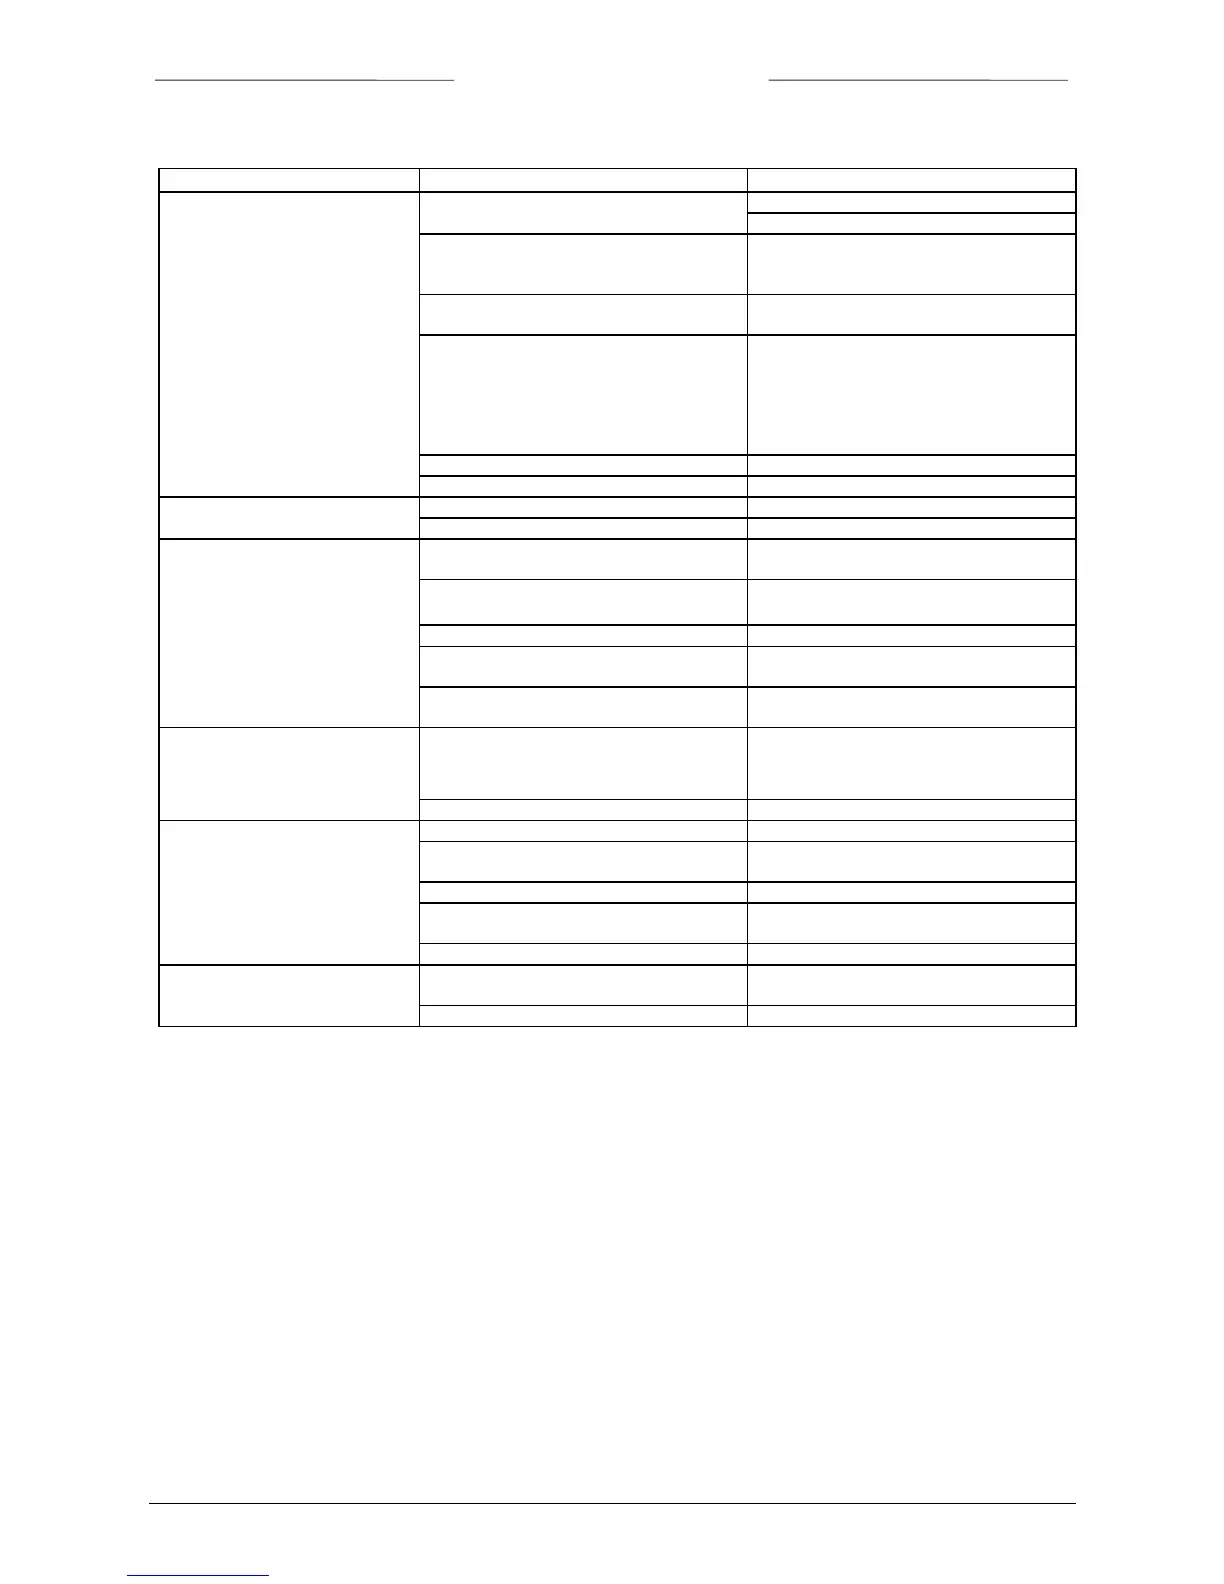
7.2 Troubleshooting summary general
Symptom Possible cause Action
No output signal No power supply 1a) check power supply
1b) check cable connection
Output stage blown-up due to long
lasting shortage and/or high-voltage
peaks
1c) return to factory
Supply pressure too high, or differential
pressure across meter too high
1d) lower supply pressure
Valve blocked/contaminated 1e) connect 0 .. 15 Vdc to valve and
slowly increase voltage while supply
pressure is ‘on’. The valve should open
at 7V
3V; if not open, then cleaning
parts and adjust valve (qualified
personnel only)
Screen in inlet fitting blocked 1f) clean screen
Sensor/capillary failure 1g) return to factory
Maximum output signal Output stage blown-up 2a) return to factory
Sensor/capillary failure 2b) return to factory
Output signal much lower than
setpoint signal or desired flow
Screen blocked/contamined 3a) clean screen
LFD blocked/contaminated and/or liquid
in meter
3b) remove LFD and clean; dry meter
with air or
N
2
Valve blocked/contaminated 3c) clean valve
Valve internals damage (swollen seat in
plunger)
3d) replace plunger assembly and adjust
valve or return
Incorrect type of gas is used and/or
pressure/diff. pressure
3e) try instrument on conditions for which
it was designed
Flow is gradually decreasing
Condensation, occurs with
NH
3
,
hydrocarbons such as
CH,CH
38 410
etc.
4a) decrease supply pressure and/or
heat gas to be measured
Valve adjustment has changed 4b) see ‘1e’
Oscillation Supply pressure/diff. pressure too high 5a) lower pressure
Pipeline too short between pressure
regulator and MFC
5b) increase length or diameter of piping
upstream
Pressure regulator is oscillating 5c) replace pressure regulator or try ‘5b’
Valve sleeve or internals damaged 5d) replace damaged parts and adjust
valve, see ‘1e’ or return to factory
Controller adjustment wrong 5e) adjust controller
Small flow at zero setpoint Valve leaks due to damaged plunger or
dirt in orifice
6a) clean orifice and/or, when replacing
plunger assembly, see ‘1e’
Pressure too high or much too low 6b) apply correct pressure
Note: For other (more specific) problems see also troubleshooting parts in other documents.