Setup Complete
7
Connect your computer or mobile device
Connect your Brother machine and computer/mobile device to the
same network.
Install Brother software to use your machine. Visit one of the following websites:
For Computers:
For Windows only, CD installation is also
available.
For Mobile Devices:
Follow the on-screen instructions.
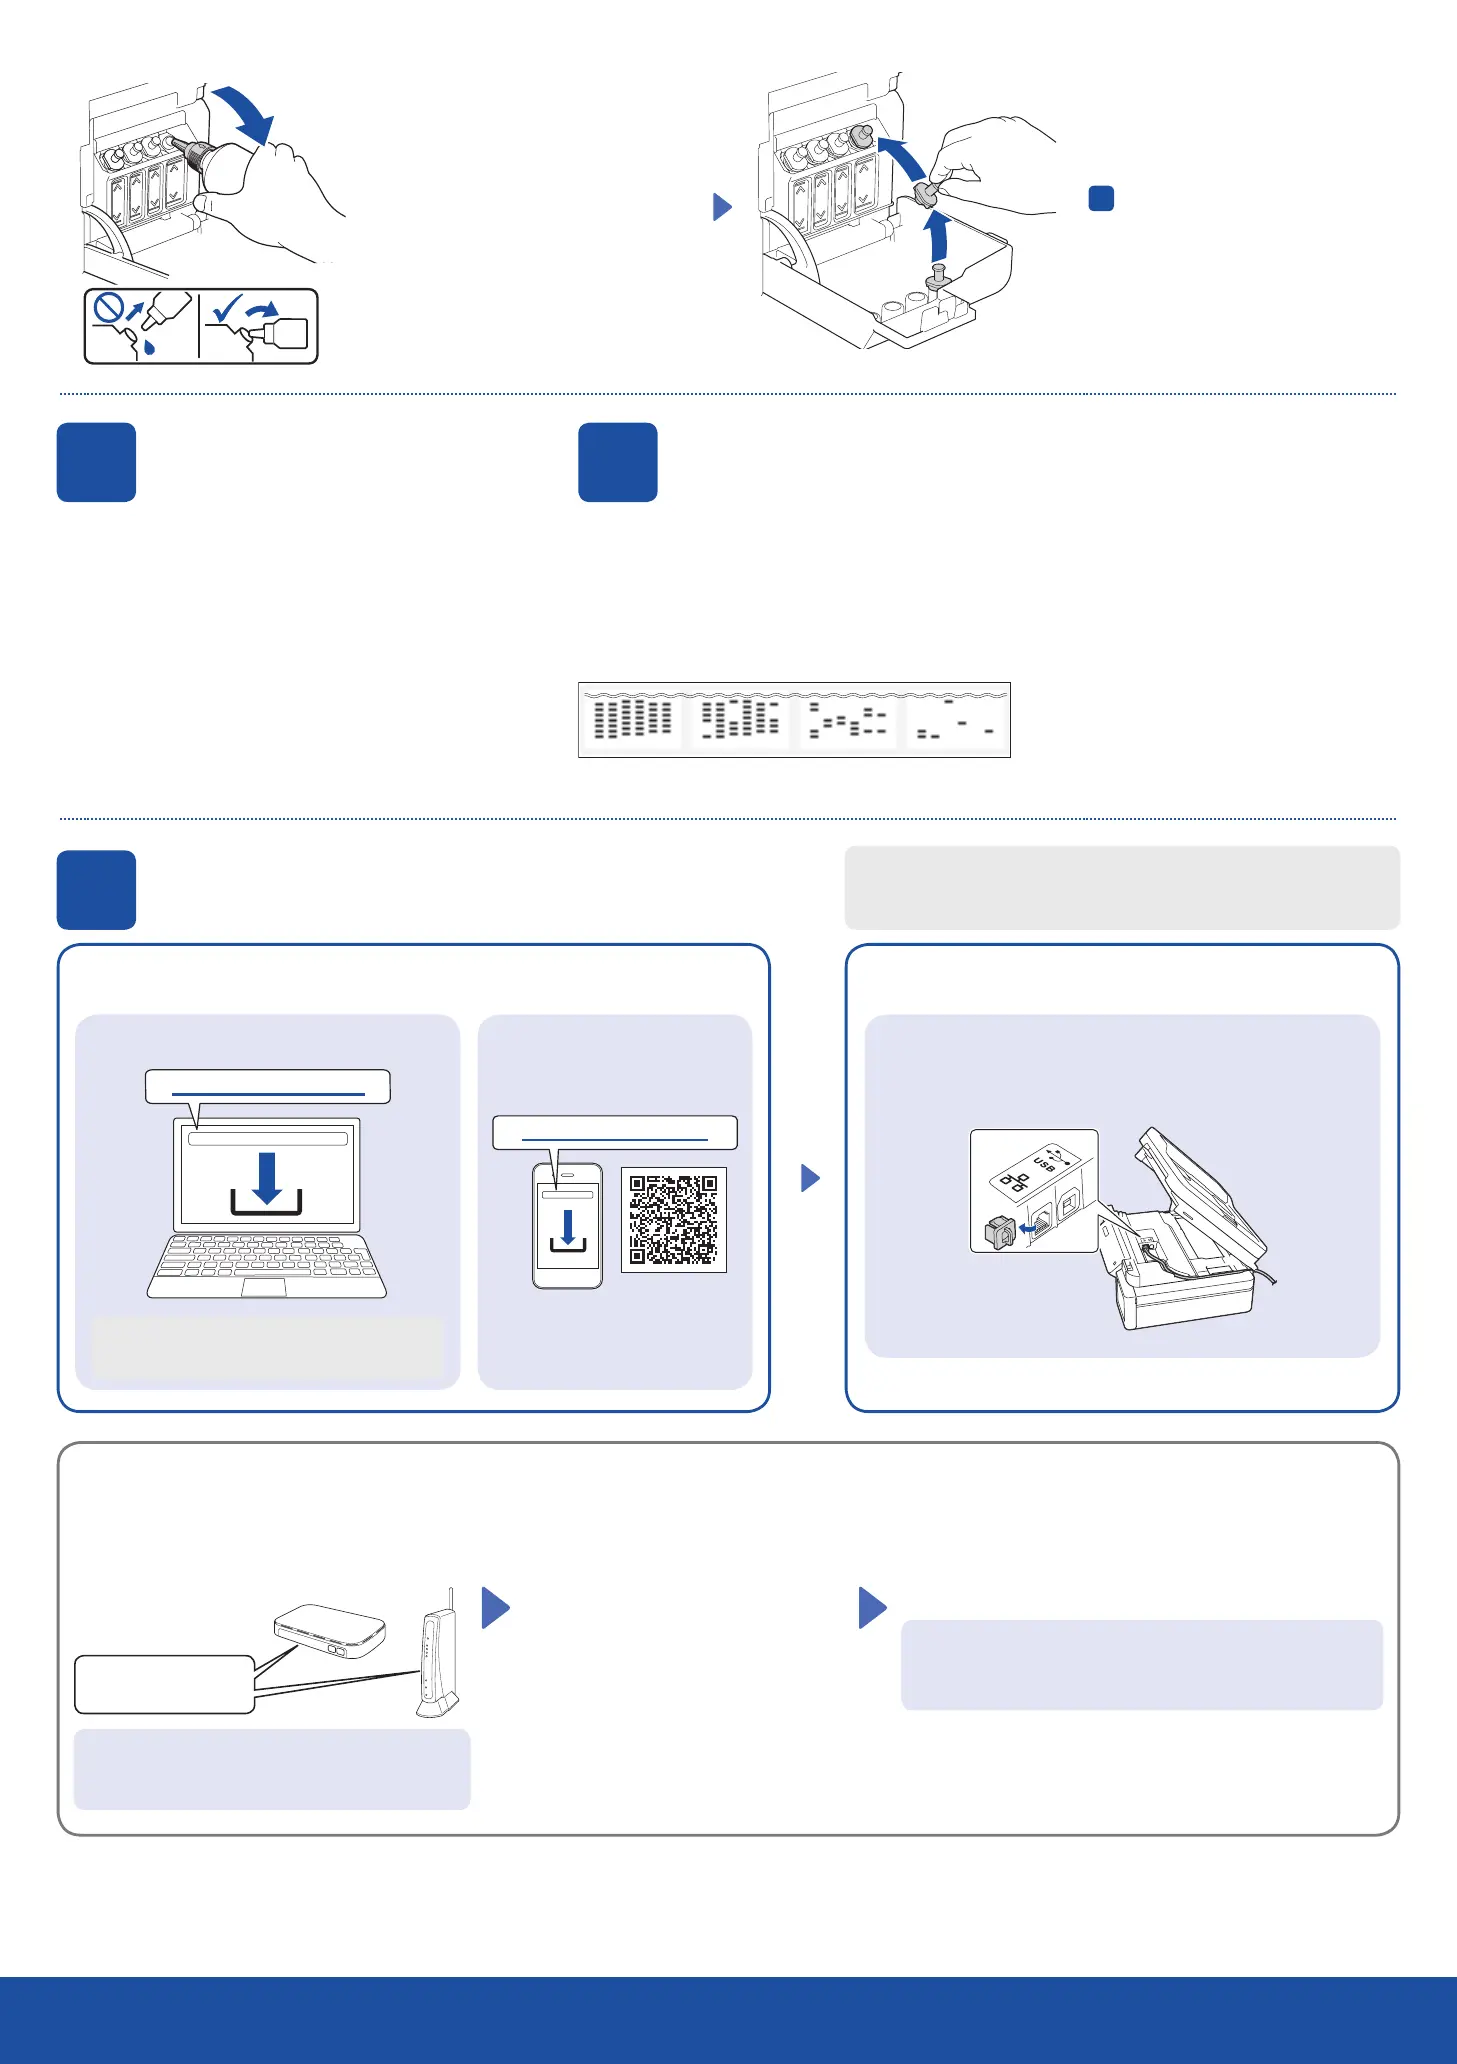
For Wired Network Connection* and USB Connection:
Use the correct port (based on the cable you are using)
inside the machine, as shown.
Install the Brother iPrint&Scan
application.
1. Press OK to set the date and time.
2. Press a or b to select the number, and then press
OK to set the date and time.
5
Set the date and time
When the machine has finished the initial cleaning process, follow the steps on the LCD to configure
the machine settings.
• Check the print quality DCP-T820DW:
• Configure the paper tray settings
6
Machine settings
None A Few About Half Many
*DCP-T820DW
When finished, remove the bottle,
pointing the nozzle upward so the ink
does not spill.
Replace the ink tank cap. Repeat step
4
for the other ink tanks, and then
close the ink tank cover.
setup.brother.com
1
brother.com/apps
Find the SSID (Network Name) and Network Key
(Password) on your wireless access point/router.
1. Go to your machine and press WiFi.
2. Press OK to select [Find
Network].
The [WLAN Enable?] message
appears on the LCD.
3. Press a to select [On].
Select the SSID (Network Name) for your access point/
router and enter the Network Key (Password).
To enter the Network Key, hold down or repeatedly press a
or b to select a character from the list below:
abcdefghijklmnopqrstuvwxyzABCDEFGHIJKLMNOPQR
STUVWXYZ0123456789(space)!”#$%&’()*+,-./:;<=>?@
[\]^_`{|}~
When the wireless setup is successful, the LCD displays
[Connected].
If you cannot find this information, ask your
network administrator or wireless access point/
router manufacturer.
Manual wireless setup (if needed)
SSID: XXXXXXX
Network Key: XXXX

 Loading...