Application of
Assembly
3 - 52
Feed unit
Application o
Assembly
Application of
Assembly
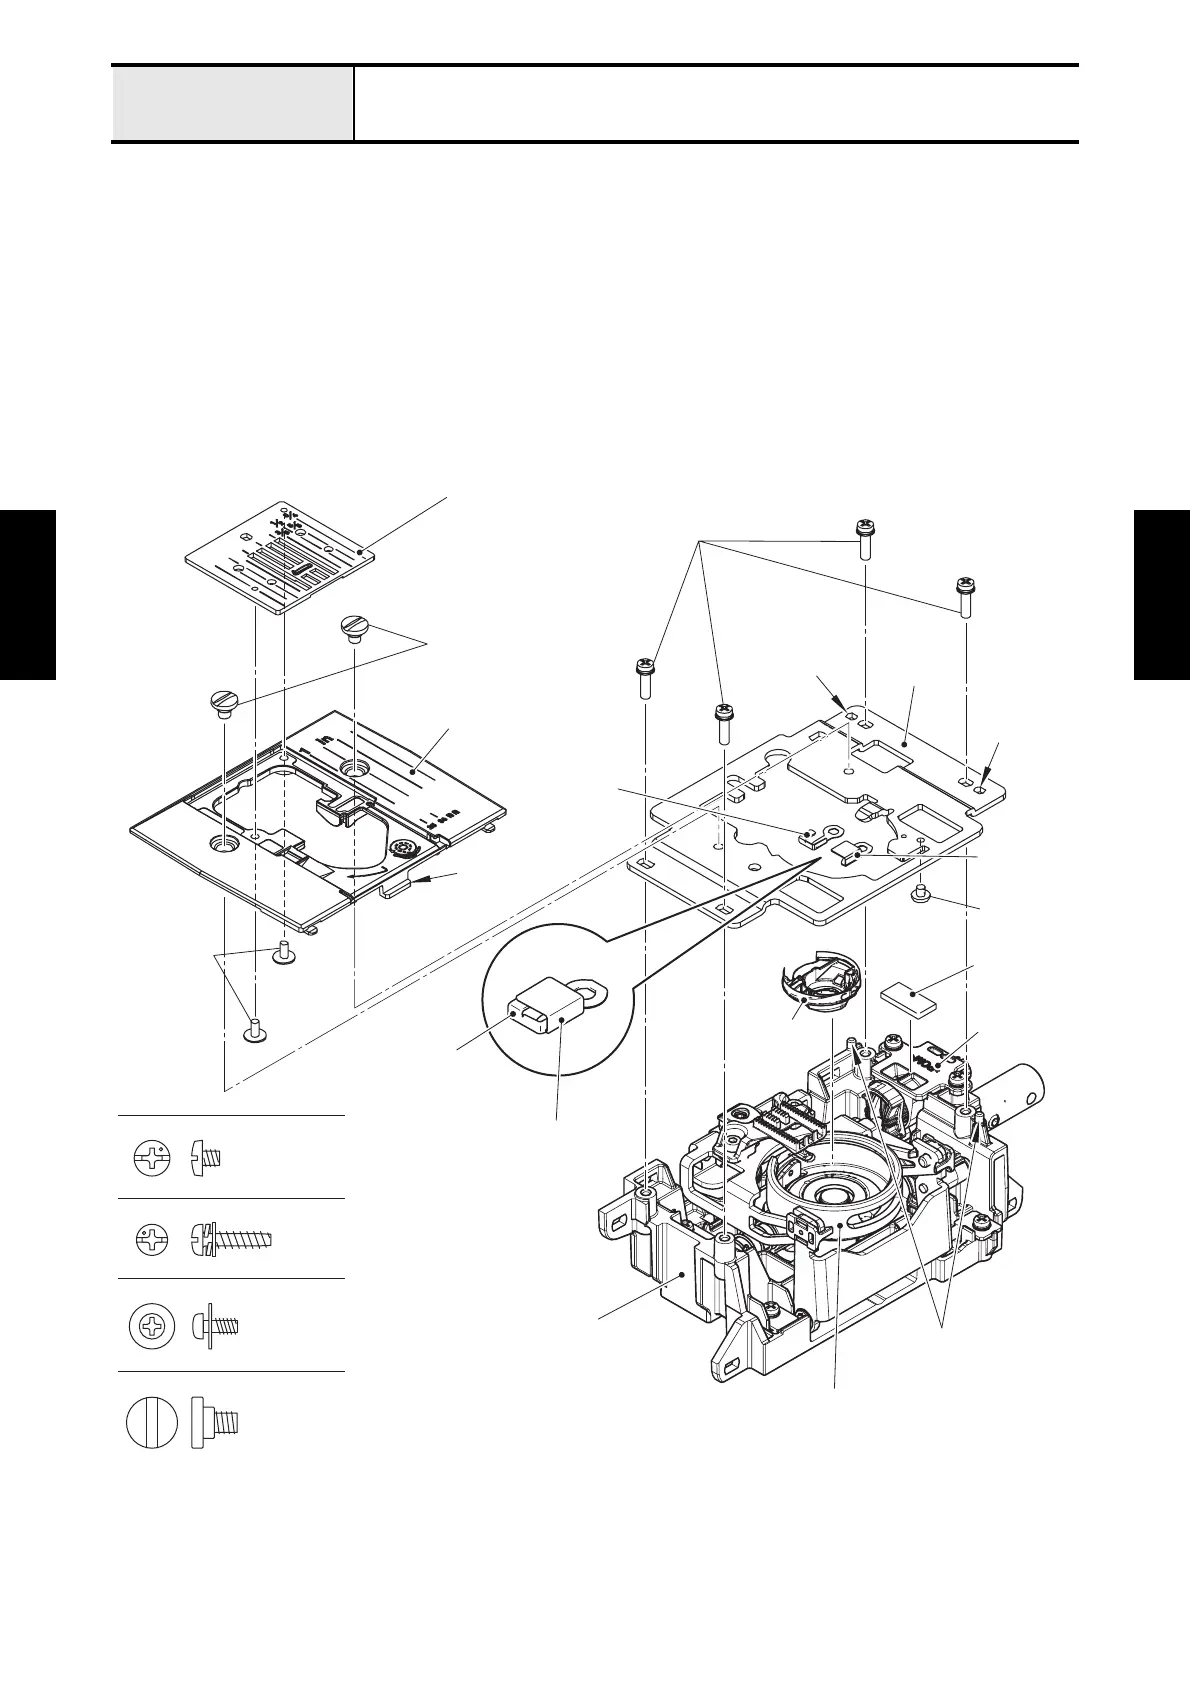
16.Attach the sheet to the feed adjuster holder.
17.Set the inner rotary hook assy to the outer rotary hook assy.
18.Assemble the spring plate and the spring assist plate as shown in the illustration below, and set them to
the needle plate holder, and secure them with the screw (screw, bind M3X3).
19.Insert the two pins of feed holder into the two positioning holes of needle plate holder, and set needle
plate holder to the feed holder, and secure it with the four screws (taptite, pan P (S/P W) 3X12).
20.Set the needle plate A to the needle plate B, and secure it with the two screws (screw, pan (P washer)
M2.6X6).
21.Hang the hook of needle plate B on the needle plate holder assy, and set the needle plate B to the
needle plate holder assy, and secure it with the two screws (screw needle plate).
Screw, Pan (P washer) M2.6X6
Screw, Bind M3X3
Taptite, Pan P (S/P W) 3X12
Screw needle plate
Taptite, pan P (S/P W) 3X12
Needle plate A
Screw needle plate
Needle plate B
Screw, pan
(P washer)
M2.6X6
Spring plate
Spring assist
plate
Spring plate
Screw, bind
M3X3
Sheet
Pins
Outer rotary hook assy
Feed holder
Positioning hole
Positioning
hole
Needle
plate holder
Spring assist plate
Hook
Feed
adjuster
holder
Inner rotary
hook assy
 Loading...