EasyManua.ls Logo

Brother P-touch 85 - User Manual

Brother P-touch 85
10 pages
Print Icon
To Next Page IconTo Next Page
Loading...
Care and precautions
1) Use a soft, dry cloth to clean the machine.
2) Use only
AA-size (LR6) alkaline batteries
.
3) Do not expose the machine or the tape cassette to high
temperatures, high humidity, or excessive dust.
4) If you do not intend to use the machine for an extended
period of time, remove the batteries.
5) Do not touch the tape cutter button while printing or
replacing the cutter unit.
6) Do not touch the cutter blade.
7) Do not put labels in your mouth.
8) Do not stick labels onto skin.
9) If the machine “locks up” (i.e., it does not respond
when a key is pressed), press to turn off the
machine; then, while holding down and , press
once to turn the machine on again.
Declaration of Conformity
We Brother International Europe
Brother House
1, Tame Street
Audenshaw
Manchester, M34 5JE
United Kingdom
declare that the Labelling System P-Touch 85 is in con-
formity with the following normative documents:
EMC: EN 55022 1987 Class B
EN 50082-1 1992
following provisions of the Electromagnetic Compatibil-
ity Directive 89/336/EEC (as amended by 91/263/EEC
and 92/31/EEC).
Issued by: BIE Ltd.
European Development
And Technical Services
Division
Code
x
Clear
How to make a label
1) Insert the batteries.
2) Insert a tape cassette.
3) Turn on the P-Touch by pressing .
4) Type in and format the text.
Your message can be up to 55 characters long including
spaces. See “Advanced functions” for more details on for-
matting your text.
5) Print the label by pressing .
Before printing, be sure that the back cover is attached,
otherwise the label cannot be printed.
6) Cut off the label.
The tape cutter button is equipped with a safety mecha-
nism. Do not try to force the cutter button since it cannot
be operated if no cassette is installed and the back cover is
removed. If the cutter button is forcefully operated, correct
printing may no longer be possible.
7) Peel off the backing.
Changing the batteries
1) Remove the back cover by pressing in on the rough
area at the top end of the machine and pulling off the
back cover.
2) If batteries are already installed, remove them and
insert
six new AA-size (LR6) alkaline batteries
in the
direction shown by the illustration on the bottom of the
battery compartment. The positive end of the three bat-
teries in the bottom row point downward, while the
positive end of the top three batteries point in the
opposite direction.
Print
Back cover
When inserting new batteries, always insert them positive
end first. When removing old batteries, always remove
them negative end first.
Always replace all six batteries at the same time with
brand new ones.
3) Attach the back cover by inserting the two hooks on the
bottom end of the back cover into the slots on the bot-
tom end of the machine, then pushing down firmly on
the cover until it snaps into place.
Changing the tape cassette
1) Remove the back cover by pressing in on the rough
area at the top end of the machine and pulling off the
back cover.
2) If a tape cassette is already installed, pull it straight out
and remove the paper tab from the new tape cassette.
Make sure that the end of the tape in the new cassette
feeds under the tape guides.
3) Insert the tape cassette, making sure that it clicks into
place.
Check that the cassette fits properly around the two
metal guides in the cassette compartment.
The 9-mm-wide and 4-m-long tape cassette is only
available enclosed with the P-Touch 85 and cannot be
purchased separately.
4) Attach the back cover by inserting the two hooks on the
bottom end of the back cover into the slots on the bot-
tom end of the machine, then pushing down firmly on
the cover until it snaps into place.
5) Feed the tape by holding down and pressing ,
then cut the tape by pressing in on the tape cutter but-
ton.
The amount of tape remaining is visible through the
window in the back of the P-Touch.
When there is only a small amount of tape left, green
tape appears.
Changing the cutter unit
When the cutter becomes blunt and ceases to cut the tape
cleanly, replace it.
1) Remove the back cover and the tape cassette.
2) Grasp the tab on the top of the cutter unit and pull out
the cutter, taking care not to touch the blade.
3) Grasp the tab on the new cutter unit and insert it as
shown below.
Cleaning the print head
If dust accumulates on the print head, blank horizontal
lines may appear through the printed label. If this hap-
pens, clean the print head as follows:
1) Turn off the P-Touch.
2) Remove the back cover and the tape cassette.
3) Use a dry cotton swab to gently wipe the print head
and rubber pinch roller with an up-and-down motion.
4) Re-insert the tape cassette, attach the back cover, turn
on the machine, hold down and press to feed
the tape, and then try printing.
5) If blank lines remain in the printed label, repeat steps 1
through 4, this time using a cotton swab dipped in iso-
propyl (rubbing) alcohol.
Accessories
The following accessories are available:
Back cover
Tape guides
Metal guides
Tape cutter button
Code
Feed
Sym.
CAUTION
When changing the cutter unit, be sure not to
touch the cutter blade.
Keep the cutter unit in a safe place that is out of
the reach of small children.
Tape cassettes 12 mm 9 mm
Black on white
Black on silver
Black on gold
Black on blue
Black on green
Black on pink
M-K231
M-931
M-831
M-531
M-731
M-E31
M-K221
M-921
M-821
M-521
M-721
M-E21
Replacement
cutter unit
TC7
Cutter unit
Tape exit slot
Tab
Thermal print
head
Rubber pinch
roller
Code
Feed
Sym.
With the P-Touch 85, you can make labels quickly and easily. Simply switch on the P-Touch, type in your message, then print out
your label. You can choose from five different text sizes, nine character styles, and seven framing settings. Messages can be printed on
either one or two lines and can include accented characters and special symbols. In addition, nine preset layout formats are available
for you to type in and print out labels quickly. Six tape colours (white, silver, gold, blue, green and pink) and two tape widths (9 mm
and 12 mm) are available for creating personalized labels.
85
UN8685001
B
Printed in Japan
®
Please read this instruction leaflet before using the P-Touch. Keep
it in a handy place for future reference.
Use only tape cassettes bearing the logo with this machine.
TAPE
Question and Answer IconNeed help?

Do you have a question about the Brother P-touch 85 and is the answer not in the manual?

Summary

Care and Precautions

How to Make a Label

Changing the Batteries

Changing the Tape Cassette

Changing the Cutter Unit

Cleaning the Print Head

Accessories

Function Keys Overview

Advanced Functions

Changing Text Size

Select and apply one of five available text sizes to the message for printing.

Changing Text Style

Select and apply one of nine available text styles (e.g., normal, bold, italic) to the message.

Adding Underlining

Apply underlining to the entire text message, which is cancelled if framing is selected.

Adding Framing

Apply decorative frames around the entire text message, which is cancelled by underlining.

Declaration of Conformity

Overview

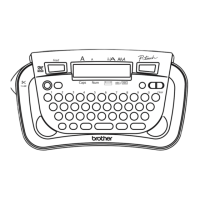
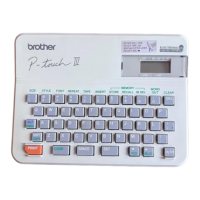
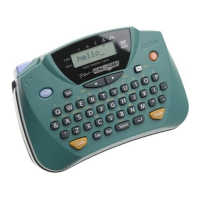
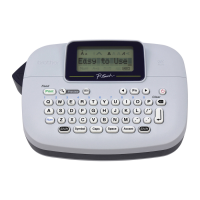
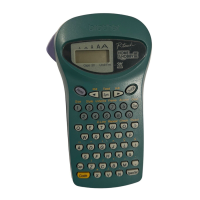
The Brother P-Touch 85 is a portable labeling system designed for quick and easy label creation. It allows users to produce personalized labels by simply typing in a message and printing it out. The device offers a range of customization options to suit various labeling needs.

Function Description

The core function of the P-Touch 85 is to create adhesive labels. Users can input text, select various formatting options, and then print the label. The device supports messages up to 55 characters long, including spaces, and can print on either one or two lines. It also includes support for accented characters and special symbols, expanding its utility for diverse text requirements.

Usage Features

To begin using the P-Touch 85, users first need to insert six AA-size (LR6) alkaline batteries and a tape cassette. The device is powered on by pressing the power button. Once on, users can type their desired message. The P-Touch 85 offers five different text sizes, allowing for varying degrees of prominence for the label text. Additionally, nine character styles are available, including normal, outline, bold, shadow, italic, italic+outline, italic+bold, italic+shadow, and vertical, providing aesthetic flexibility. Seven framing settings are also available to add decorative borders around the text.

The device includes nine preset layout formats, enabling quick label creation without extensive manual formatting. These auto-formatted layouts simplify the process for common labeling tasks. The P-Touch 85 uses tape cassettes available in six colors (white, silver, gold, blue, green, and pink) and two widths (9 mm and 12 mm), offering options for personalized and visually distinct labels.

Navigation and editing are facilitated by cursor movement keys, allowing users to view or edit parts of the text on the LCD display. Characters can be deleted using the delete key. The "Caps" function allows for easy toggling between uppercase and lowercase letters. The "Space/set" key is used to add spaces and also to select settings for accented characters, symbols, label length, or automatically formatted layouts.

Special characters and functions are accessed via the "Code" key. This includes composite characters, which combine an accent with a letter, and a dedicated "Accented characters" function for direct input of various accented letters. Symbols can also be added from a predefined list, categorized into groups for easier selection.

For more complex labels, the P-Touch 85 supports double-line printing. This feature allows a message to be split into two lines, indicated by a marker on the display. However, double-line messages are restricted to the smallest text size (SIZE1) and the NORM style.

The label length can be set manually between 50 and 300 mm, or the device can automatically determine the length. This provides flexibility for creating labels of specific dimensions or letting the device optimize for the content.

The P-Touch 85 is designed to conserve battery power by automatically switching itself off if no key is pressed within five minutes. It also indicates low battery status ("BATT" on display) and will automatically turn off if batteries are critically low during printing or tape feeding. The current message, text style, size, underline/frame setting, and Caps setting are retained when the machine is turned off and on again.

Maintenance Features

Regular maintenance helps ensure the longevity and optimal performance of the P-Touch 85. The device should be cleaned with a soft, dry cloth. It is important to avoid exposing the machine or tape cassette to high temperatures, high humidity, or excessive dust. For extended periods of non-use, batteries should be removed to prevent leakage.

The tape cutter button is equipped with a safety mechanism, preventing operation if no cassette is installed or the back cover is removed. Users are advised not to force the cutter button, as this could impair printing accuracy. The cutter blade itself should not be touched.

The cutter unit is replaceable when it becomes blunt and no longer cuts the tape cleanly. To replace it, the back cover and tape cassette are removed, and the old cutter unit is pulled out by its tab. A new cutter unit is then inserted. Caution is advised not to touch the cutter blade during this process, and the old unit should be kept out of reach of children.

The print head may accumulate dust, leading to blank horizontal lines on printed labels. To clean the print head, the P-Touch 85 should be turned off, and the back cover and tape cassette removed. A dry cotton swab can be used to gently wipe the print head and the rubber pinch roller with an up-and-down motion. If blank lines persist, the cleaning process can be repeated using a cotton swab dipped in isopropyl (rubbing) alcohol.

When changing batteries, all six AA-size (LR6) alkaline batteries should be replaced simultaneously with new ones. Batteries should always be inserted positive end first and removed negative end first. The back cover is attached by aligning hooks with slots and pressing firmly until it snaps into place.

To feed tape, the "Code" and "Feed/Sym" keys are held down, and the tape is then cut using the tape cutter button. The amount of remaining tape is visible through a window at the back of the device, with green tape appearing when only a small amount is left.

Brother P-touch 85 Specifications

General IconGeneral
TypeLabel Maker
ModelP-touch 85
Maximum Print Width9 mm
Print Speed7.5 mm/sec
Number of Fonts1
Number of Styles9
Tape Width9 mm, 12 mm
Print MethodThermal transfer
Print Resolution180 dpi
Label Width9 mm, 12 mm
KeyboardQWERTY
Display1 line, 12 characters
Power SourceAC adapter

Related product manuals