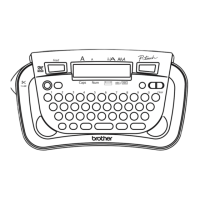
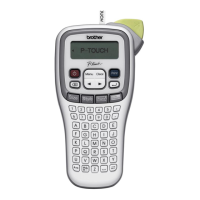
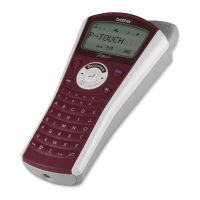
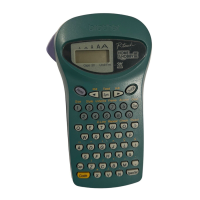
Function keys
• On/off ( )
To switch the P-Touch on or off, press .
The P-Touch conserves battery power by automatically
switching itself off if no key is pressed within five minutes.
When the batteries are low, appears on the display
after printing. When the batteries are very low, the P-
Touch will automatically turn itself off when you try to
print a message or feed the tape.
If the P-Touch is turned off and then on again, the current
message, text style and size, underline/frame setting, and
Caps setting remain unchanged.
• Caps ( )
To turn the Caps function on or off, press . When the
display indicator above Caps is on, you can add capital let-
ters to your message by simply pressing the character
keys. When the Caps indicator is off, pressing a character
key will enter a small letter in your message.
• Space/set ( )
To add a space to your message, press . This key can
also be used to select some settings, such as an accented
character, a symbol, the label length, or an automatically
formatted layout.
• Code ( )
To access those functions or enter those characters printed
in yellow above the keys, press . See the following
explanations and “Advanced functions” for more details
on how this key is used.
• Cursor movement ( , )
You can move the cursor ( _ ) to view or edit parts of the
text to the left or right of the 5 characters shown in the
LCD display. To move the cursor to the left, press ; to
move the cursor to the right, press . Move the cursor
several characters in a row by holding down the appropri-
ate key.
To position the cursor under the first character of the mes-
sage, hold down and press ; to position the cursor
immediately after the last character, hold down and
press . If you try to move past the start or end of the
message, the error message “ERROR” appears.
• Delete ( )
To delete the character to the left of the cursor, press .
This key can also be used to quit any function and return
to the current message.
To erase the current message text, hold down and
press . The text style, size, underline/frame setting, and
Caps setting are not cleared.
• Text ( )
To view the entered text, hold down and press . All
of the entered text, starting from the beginning, scrolls
along the display, then the length of the message appears
in millimetres.
• Feed ( )
To feed out about 24 mm of tape at a time, hold down
and press . The message “FEED” appears while the tape
is fed.
Do not press the tape cutter button while the P-Touch is
feeding the tape, as this will cause the tape to jam.
• Print ( )
To print out the entered text, press . The message
“PRINT” appears while printing.
• Composite characters ( , , , , )
To enter a composite character, first make sure the Caps
function is turned on or off as desired, then hold down
and press the key of the desired accent ( , , ,
or ). Finally, press the key of the letter that you wish to
combine with the accent. The accented character appears
in your message.
The following composite characters are available:
Some accented characters can be entered directly using
(see “Code”) or using (see “Accented characters
below).
• Accented characters (
)
To enter an accented character, first make sure the Caps
function is turned on or off as desired, then hold down
and press . After the message “A–Y?” appears,
press the key of the desired letter (A, C, E, I, N, O, U or Y).
If you press any other key, the error message “ERROR”
appears. In the displayed list of available accented charac-
ters, press or to position the cursor under the
desired accented character, then press . Your message
reappears on the display with the selected character
added.
To clear the list of available accented characters and return
to the current message, press (or hold down and
press ) instead of pressing .
The following accented characters are available:
85
64
R
2
W
0
P
8
IY
53
E
1
Caps
Q
9
O
7
x
U ?T
FS -KH
DA LJ !G
/
£
X
∗
Code
/NV
Z MB .
:
ÆÅ Ä
~
¨
^
`
`
ÖOEØ
Size
D.Line Length Text A/F<>
Style
Feed
Print
Sym.
Accent Clear
ABC ABC
)(
,
C
TAPE
Caps Stl
ABC ABC
A
A
A
A
A
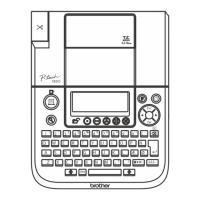
LCD display
Delete key
On/off key
Print key
Tape cutter button
Space key
Code key
Caps key
“BATT”
Caps
Caps
/
/
Code
Code
Code
Code
x
Clear
x
Clear
Accent Characters Accent Characters
` aeiou AEIOU ^ aeiou AEIOU
´ aeiou AEIOU ˜ aon AON
¨ aeiouy AEIOU
Accented characters Accented characters
A
äáàâãåæ
ÄÁÀÂÃÅÆ
Nñ Ñ
Cç ÇO
öóòôõøœ
ÖÓÒÔÕØŒ
E ëéèê ËÉÈÊ U üúùû ÜÚÙÛ
I ïíìî ÏÍÌÎ Y ÿ
Code
x
Clear
T
Text
Code
T
Text
Feed
Sym.
Code
Feed
Sym.
Print
Print
W
`
R
`
Y
¨
I
^
P
~
Code
W
`
R
`
Y
¨
I
^
P
~
Code
9
Accent
9
Accent
Code
9
Accent
/
x
Clear
Code
9
Accent
/
Some accented characters can be entered directly using
(see “Code”) or using the accent keys (see “Compos-
ite characters” above).
Advanced functions
• Changing text size ( + )
To select a text size, hold down and press once. The
name of the currently selected size is displayed and is
shown by the indicator at the top of the display. Keep
held down and continue pressing until your desired
text size appears and is indicated at the top of the display.
The selected text size applies to the entire message.
The following five text sizes are available:
• Changing text style ( + )
To select a text style, hold down and press once.
The name of the currently selected style is displayed. Keep
held down and continue pressing until your
desired text style appears. The selected text style applies to
the entire message.
The following nine text styles are available:
• Add underlining ( + )
To select underlining, hold down and press once.
The name of the currently selected setting is displayed.
Keep held down and continue pressing until your
desired setting appears and is shown by the
ABC/
indicator. The underline is printed under all of the text, but
is not printed when the
VERT
style is selected. If a frame
was chosen before selecting underlining, the frame is can-
celled and the underline is printed.
The following underline settings are available:
• Add framing ( + )
To select a frame, hold down and press once. The
name of the currently selected setting is displayed. Keep
held down and continue pressing until your
desired setting appears and is shown by the
ABC/
indicator. The frame is printed around the entire message,
but is not printed when the
VERT
style is selected. If
underlining was chosen before selecting a frame, the
underline is cancelled and the frame is printed.
The following frame settings are available:
(no frame)
• Add a symbol ( )
To enter a symbol, press . After the message “A–K?”
appears, press the letter key of the group containing the
desired symbol. In the displayed list of available
symbols, press or to position the cursor under the
desired symbol, then press . Your message reappears
on the display with the selected symbol added.
To clear the list of available symbols and return to the cur-
rent message, press (or ) instead of pressing .
The following symbols are available:
• Double-line printing ( + )
To print a message as a two-line label, press or to
position the cursor under the character that will start the
second line. Hold down and press . A marker (
▼
)
appears to the left of the character above the cursor. Two-
line messages are only printed with the
SIZE1
text size
and the
NORM
style.
To change a message back to a single-line label, delete the
marker.
• Setting the label length ( + )
To set the length of the label, hold down and press
to display the currently selected setting. Keep held
down and continue pressing until either “L ON”
appears (indicating the label length function is on) or “L
OFF” (indicating the function is off), then release the keys
to display the current length in millimetres. Use the
number keys or press or to enter the desired length
between 50 and 300 mm, then press . Labels will now
be of the set length.
To set the label length automatically, turn off the function
by holding down and pressing twice.
• Using automatically formatted lay-
outs ( + )
To select an auto format, hold down and press .
After the message “1–9?” appears, press the number key of
the desired preset format. After the format name appears,
press to view each of the format settings (text size, style
and underline/frame). Press to select the displayed
format, then enter the text. The label will be printed with
the format settings of the selected auto format.
The following automatically formatted layouts are
available:
Symbols Symbols
A
+±÷×=
G
µ
ij
˚
%
B\ [ ] < >H
1
$ £ DM Fr
C•?¿I
←→
↑↓
D
i
:
;
”
&
J
U
E#
§
@ß
ª
K
F
º
Feed
Sym.
Feed
Sym.
/
x
Clear
Feed
Sym.
/
 Loading...