EasyManua.ls Logo

Brother P-touch PT-65 - User Manual

Brother P-touch PT-65
2 pages
Print Icon
To Next Page IconTo Next Page
Loading...
Care and precautions
1) Use a soft, dry cloth to clean the machine.
2) Use only
AA-size (LR6) alkaline batteries
.
3) Do not expose the machine or the tape cassette to high
temperatures, high humidity, or excessive dust.
4) If you do not intend to use the machine for an extended
period of time, remove the batteries.
5) Do not touch the tape cutter button while printing or
replacing the cutter unit.
6) Do not touch the cutter blade.
7) Do not block the tape exit slot.
8) Do not put labels in your mouth.
9) Do not stick labels onto skin.
10) If the machine “locks up” (i.e., it does not respond
when a key is pressed), press to turn off the
machine; then, while holding down and ,
press once to turn the machine on again.
How to make a label
1) Insert the batteries.
2) Insert a tape cassette.
3) Turn on the P-Touch by pressing .
4) Type in and format the text.
Your text can be up to 55 characters long including spaces. See
“Advanced functions” for more details on formatting your text.
5) Print the label by pressing .
Before printing, be sure that the back cover is attached,
otherwise the label cannot be printed.
6) Cut off the label.
The tape cutter button is equipped with a safety mecha-
nism. Do not try to force the cutter button since it cannot
be operated if no cassette is installed and the back cover is
removed. If the cutter button is forcefully operated, correct
printing may no longer be possible.
7) Peel off the backing.
Canadian Department of Communications Compliance Statement
This digital apparatus does not exceed the Class B limits for
radio noise emissions from digital apparatus as set out in the
interference-causing equipment standard entitled “Digital Appa-
ratus”, ICES-003 of the Department of Communications
Changing the batteries
1) Remove the back cover by pressing in on the rough
area at the top end of the machine and pulling off the
back cover.
2) If batteries are already installed, remove them.
Before removing the batteries, pull out the tape cas-
sette if one is installed.
3) Insert
six new AA-size (LR6) alkaline batteries
in the
direction shown by the illustration on the bottom of the
battery compartment. The positive end of the three bat-
teries in the bottom row point downward, while the
positive end of the top three batteries point in the
opposite direction.
When inserting new batteries, always insert them pos-
itive end first. When removing old batteries, always
remove them negative end first.
Always replace all six batteries at the same time with
brand new ones.
4) Attach the back cover by inserting the two hooks on the
bottom end of the back cover into the slots on the bot-
tom end of the machine, then pushing down firmly on
the cover until it snaps into place.
Back cover
Changing the tape cassette
1) Remove the back cover by pressing in on the rough
area at the top end of the machine and pulling off the
back cover.
2) If a tape cassette is already installed, pull it straight out
and remove the paper tab from the new tape cassette.
Make sure that the end of the tape in the new cassette
feeds under the tape guides.
3) Insert the tape cassette, making sure that it clicks into place.
Check that the cassette fits properly around the two
metal guides in the cassette compartment.
The 3/8” (9 mm) wide and 13’ 1 1/2” (4 m) long starter
tape cassette is included with the P-Touch
HOME&HOBBY and cannot be purchased separately.
4) Attach the back cover by inserting the two hooks on the
bottom end of the back cover into the slots on the bot-
tom end of the machine, then pushing down firmly on
the cover until it snaps into place.
5) Feed the tape by holding down and pressing ,
then cut the tape by pressing in on the tape cutter button.
The amount of tape remaining is visible through the
window in the back of the P-Touch.
When there is only a small amount of tape left, green
tape appears.
Changing the cutter unit
When the cutter becomes blunt and ceases to cut the tape
cleanly, replace it.
1) Remove the back cover and the tape cassette.
2) Grasp the tab on the top of the cutter unit and pull out
the cutter, taking care not to touch the blade.
3) Grasp the tab on the new cutter unit and insert it as
shown below.
Cleaning the print head
If dust accumulates on the print head, blank horizontal
lines may appear through the printed label. If this hap-
pens, clean the print head as follows:
1) Turn off the P-Touch.
2) Remove the back cover and the tape cassette.
3) Use a dry cotton swab to gently wipe the print head
and rubber pinch roller with an up-and-down motion.
4) Re-insert the tape cassette, attach the back cover, turn
on the machine, hold down and press to feed
the tape, and then try printing.
5) If blank lines remain in the printed label, repeat steps 1
through 4, this time using a cotton swab dipped in iso-
propyl (rubbing) alcohol.
Accessories
Most retailers and distributors carry a full line of tape cas-
settes. If you wish to order accessories for your P-Touch
direct from Brother, please refer to the “Accessory Order
Form” included separately.
Tape guides
Metal guides
Tape cutter
button
Cutter unit
Tape exit slot
Tab
CAUTION
When changing the cutter unit, be sure not to
touch the cutter blade.
Keep the cutter unit in a safe place that is out of
the reach of small children.
The following accessories are available:
Tape cassettes 1/2” (12 mm) 3/8” (9 mm)
Black on silver
Black on gold
Black on blue
Black on green
Black on pink
M-931
M-831
M-531
M-731
M-E31
M-921
M-821
M-521
M-721
M-E21
Black on white M-K231 M-K221
Replacement cutter
unit
TC7
Thermal print head
Rubber pinch
roller
With the P-Touch HOME&HOBBY, you can make labels quickly and easily. Simply switch on the P-Touch, type in your text, then
print out your label. You can choose from five different text sizes, nine character styles, and seven framing settings. The text can be
printed on either one or two lines and can include accented characters and special symbols. In addition, nine preset layout formats are
available for you to type in and print out labels quickly. Six tape colours (white, silver, gold, blue, green and pink) and two tape widths
(3/8” (9 mm) and 1/2” (12 mm)) are available for creating personalized labels.
LA3100001
Printed in China
®
Please read this instruction leaflet before using the P-Touch. Keep
it in a handy place for future reference.
Use only tape cassettes bearing the logo with this machine.
TAPE
Question and Answer IconNeed help?

Do you have a question about the Brother P-touch PT-65 and is the answer not in the manual?

Summary

Care and Precautions

How to Make a Label

Changing Printer Components

Changing the Batteries

Instructions for replacing AA-size alkaline batteries in the P-Touch machine.

Changing the Tape Cassette

Guide on how to remove and insert tape cassettes, including feeding and cutting.

Changing the Cutter Unit

Procedure for replacing a blunt cutter unit to ensure clean tape cuts.

Cleaning the Print Head

Steps to clean the print head and roller to resolve printing issues like blank lines.

Function Keys and Basic Operations

Key Functions Overview

Explanation of primary keys like On/Off, Caps, Num, Space, Backspace, and Code.

Cursor Movement and Text Editing

How to navigate and edit entered text using cursor keys and backspace.

Printing and Feeding Tape

Instructions for printing labels and feeding tape using specific key combinations.

Advanced Text Formatting

Text Size and Style

Guide to changing text size and selecting from nine different text styles.

Adding Symbols and Underlining

Methods for inserting symbols and applying text underlining.

Applying Frames and Repeat Printing

Instructions on adding frames to labels and performing repeat print jobs.

Using Auto Formatted Layouts

Selecting and using nine preset automatically formatted layouts for labels.

Overview

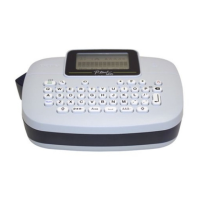
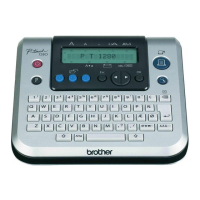
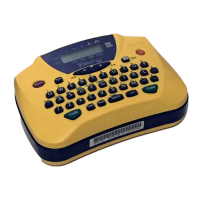
The Brother P-Touch HOME&HOBBY PT-65 is a portable labeling device designed for quick and easy label creation. Users can simply switch on the device, type in their desired text, and print out a personalized label.

Function Description

The P-Touch HOME&HOBBY allows for a variety of customization options. Users can choose from five different text sizes, nine character styles, and seven framing settings to personalize their labels. Text can be printed on either one or two lines and can include accented characters and special symbols. Additionally, nine preset layout formats are available for quick label creation. The device supports six tape colors (white, silver, gold, blue, green, and pink) and two tape widths (3/8" (9 mm) and 1/2" (12 mm)).

The device features an LCD display that shows the current text and settings. It has a full QWERTY keyboard for text input, along with dedicated function keys for various settings and operations.

Usage Features

Basic Operation:

  • Power On/Off: The device is turned on or off by pressing the dedicated On/Off key. To conserve battery power, the P-Touch automatically switches off if no key is pressed within five minutes.
  • Text Input: Text is entered using the character keys. The device supports up to 55 characters, including spaces.
  • Caps Function: The Caps key toggles between uppercase and lowercase letters. When the Caps indicator is on, pressing character keys will input capital letters.
  • Num Function: The Num key toggles between number input and letter input for certain keys. When the Num indicator is on, pressing the corresponding keys will input numbers.
  • Space: The Space key adds a space to the text.
  • Return: The Return key is used to select settings, such as accented characters or symbols, or an automatically formatted layout. It can also be used to end the first line of text and start a second line, creating a two-line label. Two-line text is only supported with SIZE1 text size and NORMAL style.
  • Cursor Movement: The cursor can be moved left or right using the arrow keys to view or edit parts of the text not visible on the 8-character LCD display. Holding down the Code key with the arrow keys allows for faster cursor movement to the beginning or end of the text.
  • Backspace: The Backspace key deletes the character to the left of the cursor. It can also be used to exit any function and return to the current text. Holding down the Code key with Backspace erases the entire current text, but does not clear text size, style, underline/frame, or Caps/Num settings.
  • Text View: Holding down the Code key with the Text key allows users to view the entire entered text, which scrolls across the display. While scrolling, the units can be changed by pressing the arrow keys.
  • Feed Tape: Holding down the Code key with the Space key feeds out approximately 1" (24 mm) of tape at a time. It is important not to press the tape cutter button during feeding to prevent tape jams.
  • Print: Pressing the Print key prints the entered text. As with feeding, avoid pressing the tape cutter button during printing to prevent jams.
  • Accented Characters: To enter accented characters, hold down the Code key and press the Accented Characters key. After selecting the desired letter (A, C, E, I, N, O, or U), users can navigate through a list of available accented characters using the arrow keys and select the desired one.
  • Symbols: To add a symbol, press the Symbol key. After selecting the desired group, users can navigate through a list of available symbols and select the desired one.
  • Repeat Printing: Holding down the Code key with the Repeat Printing key allows users to print multiple copies of the current text. Users can specify the number of labels (1-9) to print.
  • Auto Format Layouts: Holding down the Code key with the Auto Format key allows users to select from nine preset format layouts. After selecting a format, the device displays its settings (text size, style, underline/frame), and users can then enter their text.

Advanced Formatting:

  • Text Size: Holding down the Code key with the Text Size key allows users to cycle through five different text sizes (SIZE1 to SIZE5). The selected size applies to the entire text.
  • Text Style: Holding down the Code key with the Text Style key allows users to cycle through nine different text styles: Normal, Outline, Bold, Shadow, Italic, Italic+Outline, Italic+Bold, Italic+Shadow, and Vertical. The selected style applies to the entire text.
  • Underlining: Holding down the Code key with the Underlining key toggles underlining on or off. Underlining is printed under all text but is not applied with the VERTICAL style. If a frame was previously selected, it is cancelled when underlining is chosen.
  • Framing: Holding down the Code key with the Framing key allows users to cycle through seven different frame settings: Text (no frame), Round, Wooden, Pointing, Candy, Dot, Diamond, and Slant. Frames are printed around the entire text but are not applied with the VERTICAL style. If underlining was previously selected, it is cancelled when a frame is chosen.

Language Settings:

To change the display language (English or French), turn off the P-Touch, then hold down the Code key and On/Off key simultaneously. While holding them, press the arrow keys to cycle through the languages until the desired setting appears.

Maintenance Features

Battery Replacement:

The device uses six AA-size (LR6) alkaline batteries. To replace them, first remove the back cover by pressing on the rough area at the top and pulling it off. If a tape cassette is installed, it should be removed before taking out the batteries. When inserting new batteries, always insert them positive end first, and when removing old batteries, always remove them negative end first. All six batteries should be replaced at the same time with brand new ones. The back cover is then reattached by inserting the two hooks at the bottom into the slots and pushing down until it snaps into place.

Tape Cassette Replacement:

To replace the tape cassette, first remove the back cover. If a cassette is already installed, pull it straight out. When inserting a new tape cassette, ensure the end of the tape feeds under the tape guides. Insert the cassette until it clicks into place, making sure it fits properly around the two metal guides. Reattach the back cover. After inserting a new cassette, feed the tape by holding down the Code key and pressing the Space key, then cut the tape using the tape cutter button. The amount of remaining tape is visible through a window in the back of the P-Touch, and green tape appears when only a small amount is left.

Cutter Unit Replacement:

If the cutter becomes blunt and no longer cuts the tape cleanly, it should be replaced. First, remove the back cover and the tape cassette. Grasp the tab on the top of the cutter unit and pull it out, taking care not to touch the blade. Insert the new cutter unit by grasping its tab and inserting it as shown. The cutter unit should be kept in a safe place, out of reach of small children.

If dust accumulates on the print head, blank horizontal lines may appear on printed labels. To clean the print head:

  1. Turn off the P-Touch.
  2. Remove the back cover and the tape cassette.
  3. Use a dry cotton swab to gently wipe the print head and rubber pinch roller with an up-and-down motion.
  4. Re-insert the tape cassette, attach the back cover, turn on the machine, hold down the Code key, and press the Space key to feed the tape, then try printing.
  5. If blank lines persist, repeat steps 1 through 4, this time using a cotton swab dipped in isopropyl (rubbing) alcohol.

General Precautions:

  • Use a soft, dry cloth to clean the machine.
  • Avoid exposing the machine or tape cassette to high temperatures, high humidity, or excessive dust.
  • Remove batteries if the machine will not be used for an extended period.
  • Do not touch the tape cutter button while printing or replacing the cutter unit.
  • Do not touch the cutter blade.
  • Do not block the tape exit slot.
  • Do not put labels in your mouth or stick them onto skin.
  • If the machine "locks up" (does not respond to key presses), turn it off, then while holding down the Code key and On/Off key, press the On/Off key once to turn it on again.

Brother P-touch PT-65 Specifications

General IconGeneral
Print TechnologyThermal Transfer
Maximum Tape Width9 mm
Keyboard TypeQWERTY
ModelPT-65
SeriesP-touch
DisplayLCD
Print Speed7.5mm/sec
Tape Size9mm
Label Width9 mm
Power Supply4 x AA batteries
Power SourceAC Adapter or 4 AA Batteries

Related product manuals