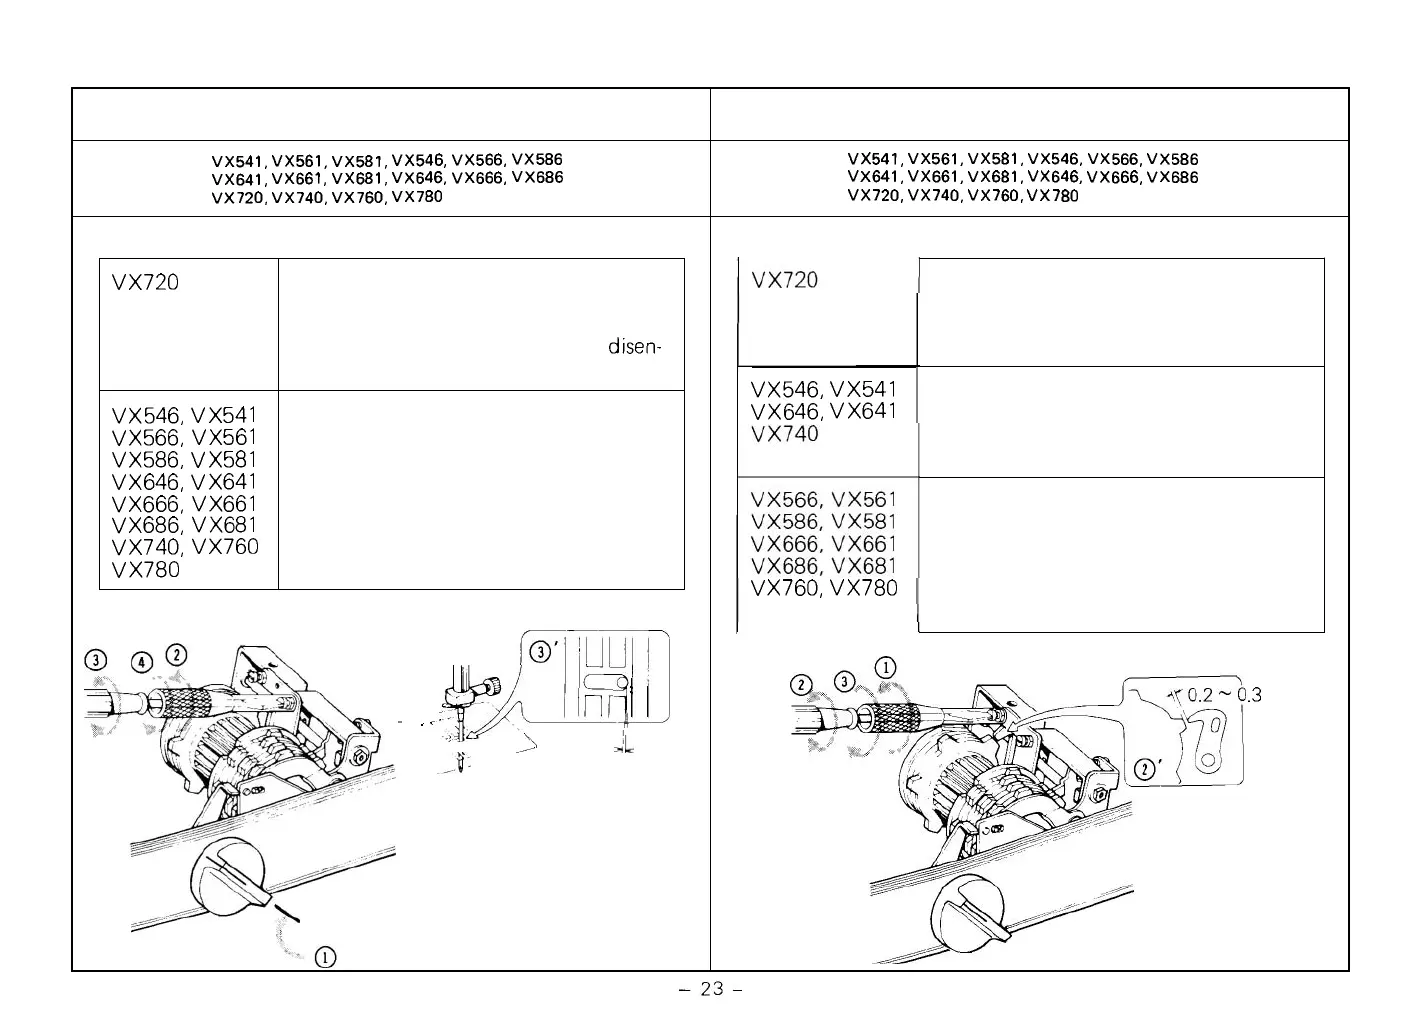
19
-
1
B.
Clearance between cam finger and feed cam
VX541, VX561, VX581, VX546. VX566, VX586
VX641, VX661, VX681, VX646, VX666, VX686
VX720, VX740, VX760, VX780
Before adjustment:
Set the pattern dial between SS
(stretch stitch) and BS (blind stitch)
so that cam finger becomes disen
-
gaged.
VX546, VX541
Set the pattern dial between No. 2
VX646, VX641
(stretch stitch) and No. 3 (blind stitch)
so that cam finger becomes disen
-
gaged.
Set the pattern dial between No.
2
(stretch stitch) and No. 3 (elastic
blind stitch) so that cam finger
becomes disengaged.
VX760, VX780
.3
mm
19
-
1A. Clearance between cam finger and pattern cam
VX541, VX561, VX581, VX546, VX566, VX586
VX641, VX661, VX681, VX646, VX666, VX686
VX720, VX740, VX760, VX780
Before adjustment:
VX720
VX546, VX541
VX566, VX561
VX586, VX581
VX646, VX641
VX666, VX661
VX686, VX681
VX740, VX760
VX780
Set the stitch width regulator at
"
5
"
.
Set the pattern dial between SS
(stretch stitch) and BS (blind stitch)
so that cam finger becomes
disen-
gaged. Then, lower the needle.
Set the stitch width regulator at
"
5
"
.
Set the pattern dial between BH
(buttonhole) and manual cam (general
zigzag and straight) so that cam finger
becomes disengaged. Then, lower the
needle.
ppg
-@<
,
In,
I
~
-
'
J'
\
,
.-
L
.
.,a-
almost
o