EasyManua.ls Logo

Brother XR3340 User Manual

Brother XR3340
2 pages
To Next Page IconTo Next Page
Page #1 background imageLoading...
Page #1 background image
42344
8d560b
e
_
g79ac
9a
J
1
12
34
23
4
5
8
6
7
9
0abd
f
e
g
Operation keys and LCD
Teclas de operación y pantalla de LCD
Selecting a stitch
Selección de una puntada
c
Example:
Ejemplo:
(05)
Refer to the Operation Manual for detailed instructions about sewing.
Consultar el Manual de instrucciones detalladas acerca de la costura.
1 LCD (liquid crystal display)
1 Number of the selected stitch
2 Presser foot to be used
3 Stitch length (mm)
4 Stitch width (mm)
5 Auto reverse/reinforcement
2 Stitch selection keys
3 Stitch length adjustment key
4 Stitch width adjustment key
5 Character stitch indicator
6 Satin stitch indicator
7 Utility stitch indicator
8 Stitch category selection key
9 Sewing speed controller
0 Needle position button
A Reverse/reinforcement stitch button
B Start/stop button
1 LCD (pantalla de cristal líquido)
1 Número de la puntada seleccionada
2 Pie prensatela que se va a utilizar
3 Longitud de la puntada (mm)
4 Anchura de la puntada (mm)
5 Costura en reversa/remate automática
2 Teclas de selección de puntada
3 Tecla de ajuste de longitud de la puntada
4 Tecla de ajuste de anchura de la puntada
5 Indicador de puntada con caracteres
6 Indicador de puntada para satén
7 Indicador de puntada con aplicaciones
8 Tecla de selección de la categoría de puntada
9 Control de velocidad manual
0 Botón de Posición de aguja
A Botón de Costura en reversa/remate
B Botón de Inicio/parar
1
2
1
123
2
3
2
2
1
3
1
11.5 mm
(7/16 inch)
11,5 mm
(7/16 pulg.)
9
0
B
7 85 6
3
4
5
2
1
A
Preparing the bobbin thread
Preparación del hilo de la bobina
Question and Answer IconNeed help?

Do you have a question about the Brother XR3340 and is the answer not in the manual?

Brother XR3340 Specifications

General IconGeneral
Needle ThreaderYes
Drop FeedYes
LCD DisplayYes
LightingLED
Free ArmYes
Bobbin TypeDrop-in

Summary

Operation Keys and LCD Overview

LCD Display and Indicators

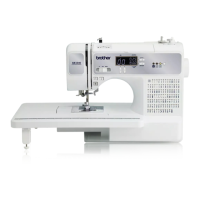
Details on the liquid crystal display (LCD) and its indicators for stitch selection, length, width, and stitch types.

Stitch Selection and Adjustment Keys

Explanation of keys used for selecting and adjusting stitch types, length, and width, including category selection.

Sewing Control Buttons

Description of buttons for needle position, reverse/reinforcement stitching, and starting/stopping the sewing machine.

Preparing the Bobbin Thread

Bobbin Setup and Winding

Steps for preparing the bobbin, threading the winder, winding the bobbin, and cutting the thread.

Bobbin Insertion and Threading

Instructions for removing the wound bobbin, inserting it into the bobbin case, and threading the bobbin case.

Selecting a Stitch

Stitch Selection Process

Guide on how to access stitch selection, understand the display, and adjust stitch length and width.

Upper Threading Guide

Initial Thread Path and Tension

Instructions for guiding the thread through the initial path, including tension discs and thread guides.

Needle Threading

Detailed steps for threading the needle, including specific guides and loops.

Final Threading and Checks

Completing the upper threading process and performing final checks for proper thread flow.

List of Stitches Reference

Useful Features Overview

Related product manuals