Replacement Parts
Motor/Bearing Housing(continued)
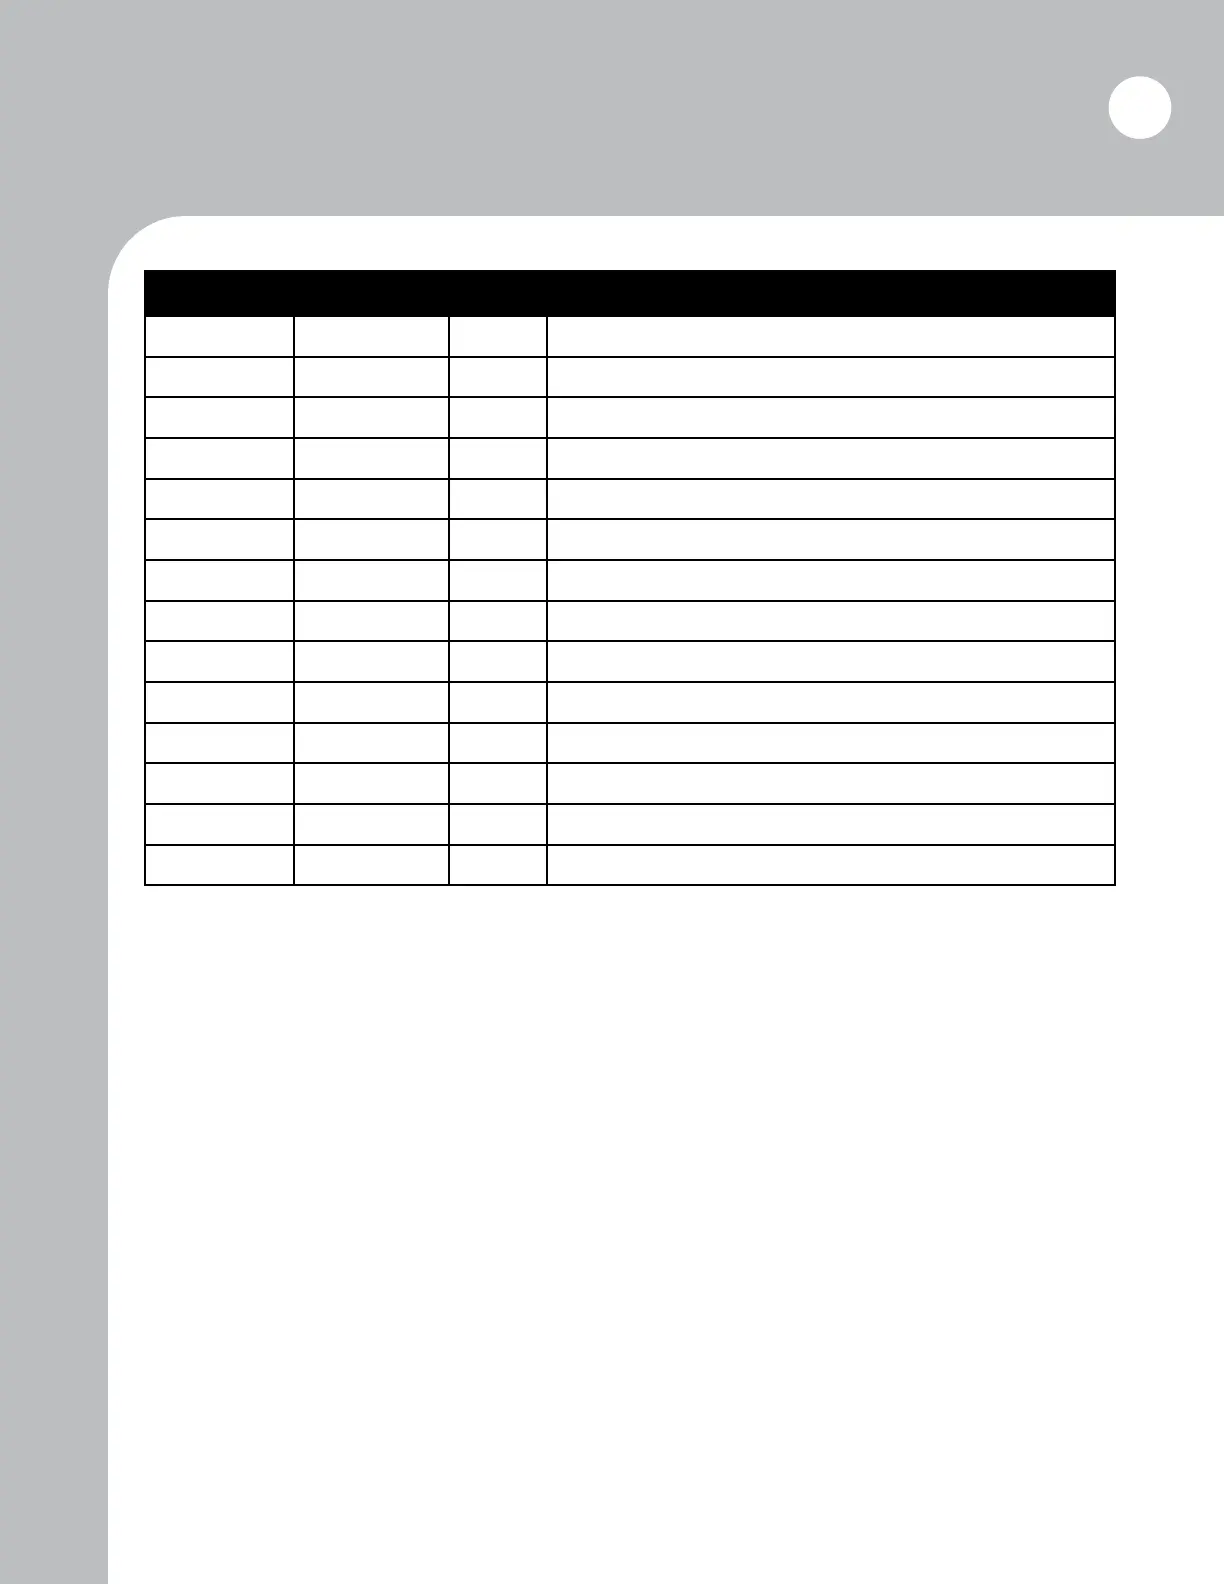
41
Ref. No. Part No. Qty Description
30 233-82027 1 Hydraulic Motor
31 235-6000 1 Bearing Housing (Complete, without Hub)
32 235-8014 1 Shaft
33 235-32012X 2 Bearing, Cup and Cone
34 235-6305 1 Washer w/ Tang
35 235-6124 1 Lock washer, M60
36 235-6012 1 Bearing Lock Nut, M60-2
37 235-6005 1 Set Screw M5
38 235-60319 1 Lower Seal
39 235-6801 1 Seal Protector
40 235-8018 1 Blade Bar Hub ( welded in 232-0860)
41 235-6114 1 Slotted Hex Nut, 1 1/4”, Washer Bottom
42 235-3015 1 Cotter Pin, 6.3mm x 60mm Zinc, Hammerlock
43 T5-068B 2 3/8” Pipe Plug NPT
START UP - Installation of new motor:
Before connecting any tubes ensure that they are clean, any excess material that could work loose
should be removed. There should not be any oxidation of surfaces that come into contact with the
oil. Make sure the motor casing is lled with oil. Before starting work, the hydraulic circuit
should be purged of air. This can be achieved by running the motor without load for 10-20 minutes,
during which time checks should be made for oil leaks. During the rst few hours of working under
load checks should be made for leakages from connections and ensure that all components remain
rmly xed to their supports.
The motors are factory tested and do not require a wear in period.
START UP - Installation of new or rebuilt bearing housing:
Place bearing housing on level surface, ll housing with approximately 1 pint of T5-LUBE, 85-140
Weight Oil. Settling will occur, especially in cold weather. Put a small bead of RTV sealant around
the inside perimeter of the top bearing housing mating ange, place the motor on top of the bearing
housing and install and torque bolts to 52 ft/lbs. Bolts are listed as item 9 on Page 39. Install this unit
with motor hydraulic ports facing the rear of the machine.