63
INSTALLATION AND PREDELIVERY
OUTBOARD RIGGING
2
Water Pressure Gauge
If a mechanical water pressure gauge is used,
install the water pressure hose fitting in the cylin-
der block. Use Pipe Sealant with Teflon,
P/N 910048, on the threads of the hose fitting.
Refer to installation instructions supplied with
gauge.
Route the water pressure hose around the star-
board side of the powerhead along the same path
as the battery cables.
IMPORTANT: After installation, make sure there
is enough clearance for all cables to avoid binding
or chafing through all engine steering and tilting
angles.
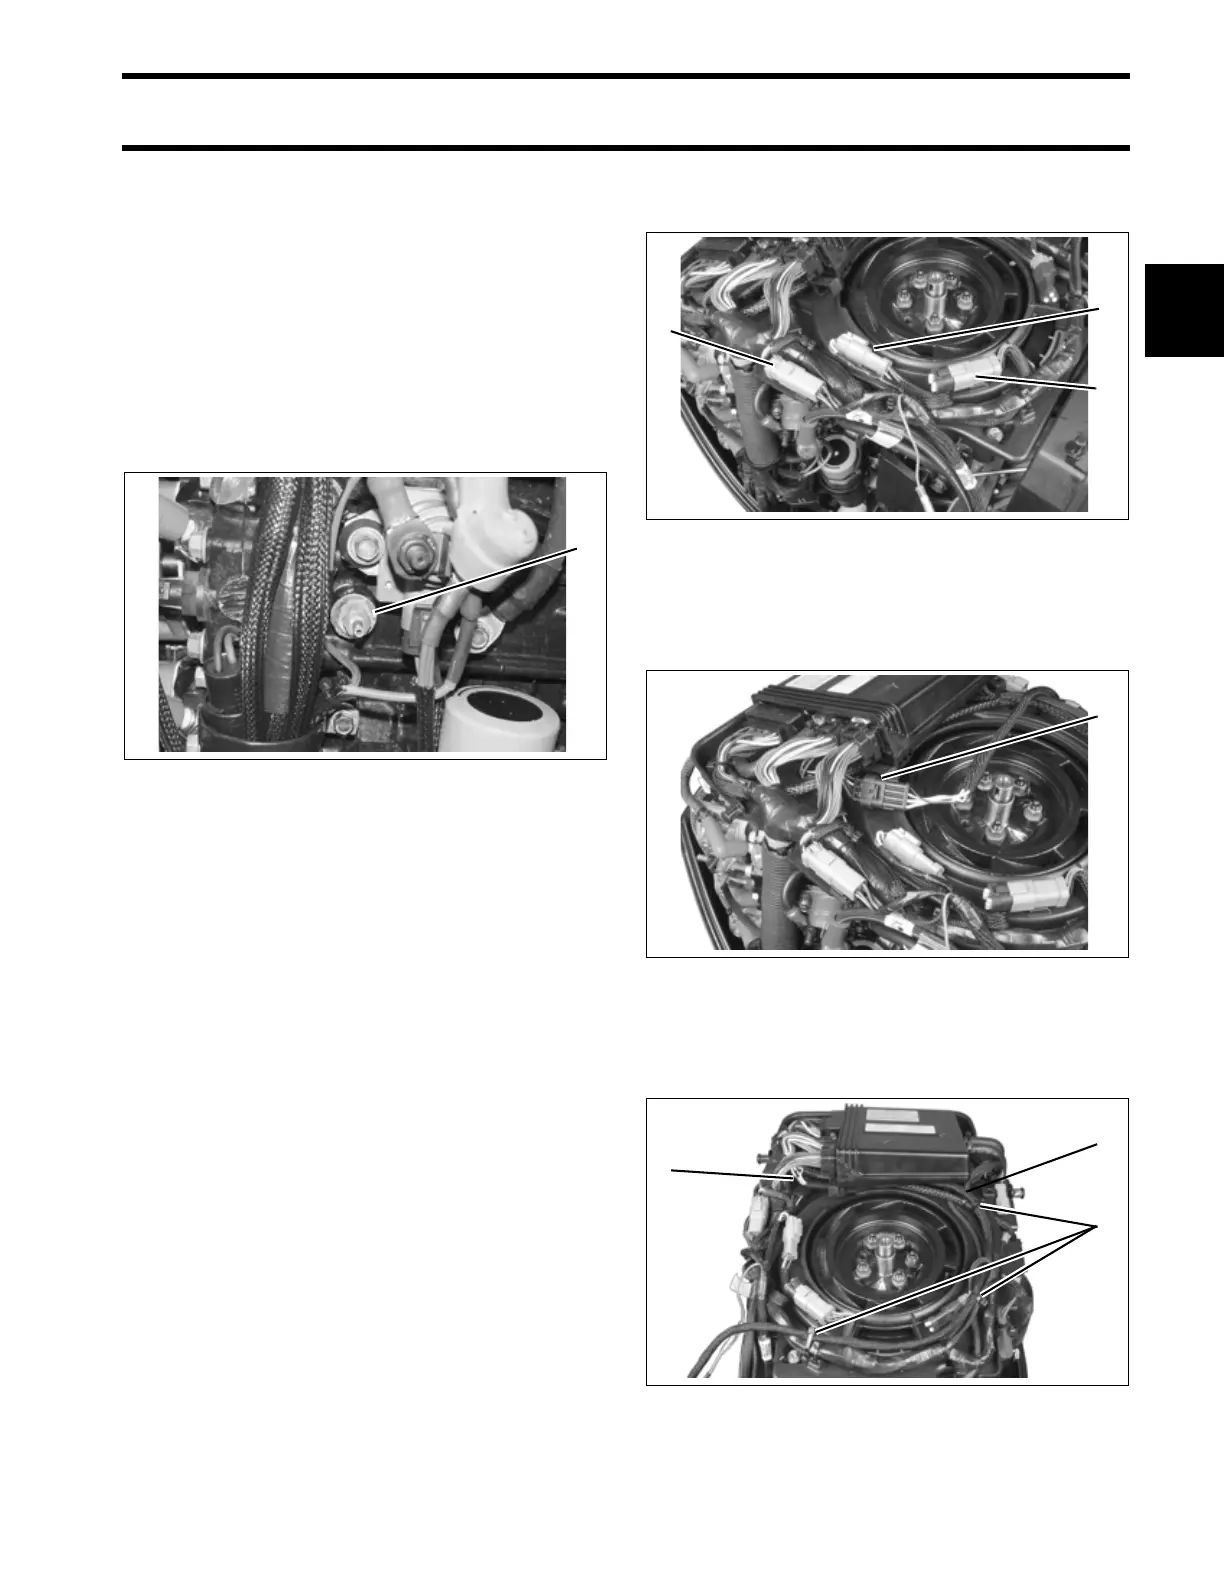
CANbus Connections
If the outboard will be used with an I-Command
†
system, or other NMEA 2000
†
compliant CANbus
instruments, the following connections will supply
information to the network:
Use a CANbus Ignition Harness, in place of the
standard MWS harness, to connect the outboard
to the key switch and trim/tilt control. Seal unused
SystemCheck connector with 6-Pin Connector
Seal, P/N 586076.
Connect the EMM CANbus connector to the CAN-
bus Network Harness.
Route the harness under the front of the EMM and
around the port side of the powerhead. Secure
with tie straps.
1. Water pressure hose fitting 004959
1
1. CANbus Ignition connector
2. Trim/Tilt connector
3. SystemCheck connector (with seal)
005266
1. EMM CANbus connector 005267
1. Harness routing
2. Tie straps
005268
2
3
1
1
1
2
1