9
en
Control And Operating Pictorials - Figure
24
J. Slow
K. Fast
L. Oil
M. Fuel
N. Engine/Blade -- Run/Stop
O. Drive Control Lever
Assembly
Illustrations and pictorials begin on page 2.
Unpacking Instructions - Figure
52 3 4 6
The mower was fully assembled at the factory. When the mower
was put in the carton, the handle was put in the storage position.
To put the handle in the operating position, follow the steps below.
1. Remove the mower from the carton.
2. Raise the lower handle (A) to the operating position
(Figure 2).
3. The handle bracket (B) has two mounting holes (Figure 3).
Use hole (C) to mount the handle in the high position. Use
hole (D) to mount the handle in the low position.
4. Mount the handle in either hole (C) or hole (D) with the
fasteners as shown. Tighten knobs (E) until the lower handle
is secure.
5. Remove knobs (F) and the fasteners from the lower handle
(A). See Figure 4. Put the upper handle (G) in the operating
position. Tighten the knobs (F) until the upper handle and
lower handle are locked in place.
6. To mount the recoil starter rope, you must fi rst engage the
engine stop lever (H). See Figure 5. Slowly pull the recoil
starter handle (I) and install the recoil starter rope into the
rope guide (J).
7. On all models, secure the cable to the handle with the wire tie
(K). See Figure 6.
NOTICE: Be careful when you fold or raise the handle. Do not
damage the cables. A cable that is bent will not work correctly.
Before you use the unit, replace a bent or damaged cable.
How To Assemble The Grass Bag - Figure
7 8
1. Slide the frame assembly (A) into the open end of the grass
bag (B). See Figure 7.
2. Make sure the handle (C) is on the outside of the grass bag
(Figure 8). Attach the clips (D) to the frame assembly (E).
How To Mount The Grass Bag - Figure
9
1. Raise the rear door (F). See Figure 9. Hold the handle (G) of
the grass bag and mount the grass bag hooks (H) onto the
rear door pivot rod (I).
2. Lower the rear door. Make sure the grass bag hooks (H) are
mounted on the rear door pivot rod (I).
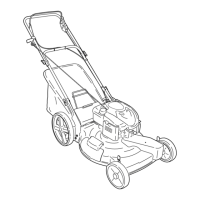
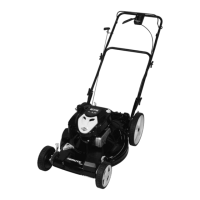
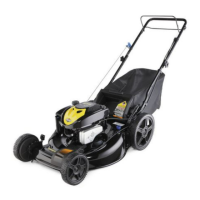
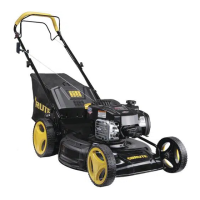
Description
The walk-behind lawn mower is an engine powered rotary type
mower. The engine drives a cutting blade located under the mower
housing. The blade lifts and cuts through the grass. The height
of cut can be adjusted to give the lawn the desired fi nish. The cut
pieces of grass are either collected into a rear mounted grass bag
or, on some mowers, it can be recycled to feed the lawn. Recycling
the cut grass is known as “mulching”. Push models require the
operator to push the mower. Self-propelled models have a rear
wheel drive system to make mowing easier.
Intended Use/Limits Of Use
The walk-behind lawn mower is designed to cut lawn grass. Any
other use is not permitted. It is not designed to cut grass over
15cm in length or grass mixed with tall weeds. The lawn mower is
only suitable for private use in a domestic garden. It is not suitable
for cutting grass in public parks or playing fi elds.
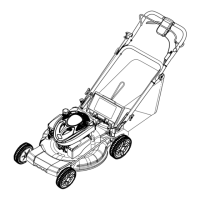
Features and Controls
Compare the following features and controls with your model
(Figure 1). Make sure that you know the location and understand
their purpose.
A. Engine Stop Lever
B. Upper Handle
C. Knob or Locking Lever
D. Lower Handle
E. Rear Door
F. Engine
G. Height Adjuster
H. Nameplate
I. Grass Bag
J. Recoil Starter Handle
K. Mulcher Plug
L. Side Discharge Chute
M. Mulch Plug
Pictorials
Important: The following pictorials are located on your unit or on
literature supplied with the product. Before you operate the unit,
learn and understand the purpose for each pictorial.
Safety Warning Pictorials and Decals - Figure
23
A. WARNING
B. IMPORTANT: Read Owner’s Manual Before Operating This
Machine.
C. WARNING: Thrown Objects. Keep Bystanders Away. Read
User Instructions Before Operating This Machine.
D. WARNING: Do Not Use This Machine On Slopes Greater Than
10 Degrees.
E. WARNING: Keep Feet And Hands Away From Rotating Blade.
F. WARNING: Disconnect Spark Plug Wire Before Servicing Unit.
G. WARNING: Crushed Fingers.
H. WARNING: Keep Hands And Feet Away.
I. WARNING And DANGER Instructions.
 Loading...