Do you have a question about the Bryant 575A and is the answer not in the manual?
Safety warnings for installing and servicing air-conditioning equipment.
Warning about turning off main power to prevent electrical shock.
Completing all necessary checks before starting the installation process.
Instructions for rigging and mounting the outdoor unit.
Steps for making refrigerant piping connections.
Procedure for making electrical connections to the unit.
Initial checks to perform before starting the unit.
Process for evacuating and dehydrating the refrigerant system.
Guidance on charging the system with refrigerant and oil.
Location and use of refrigerant service ports.
Description of how the unit operates in different modes.
Verifying the functionality of cooling and heating controls.
Information on identifying and addressing malfunctions.
Procedures for cleaning the unit components.
Lubrication requirements for the unit.
How to adjust the outdoor fan.
Steps for removing the compressor.
Recording basic information about the outdoor and indoor units.
Pre-start-up checks for the outdoor unit, controls, and indoor unit.
Procedure to check and calculate voltage imbalance.
Recording operational measurements after unit has run for 15 minutes.
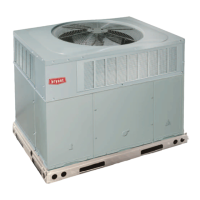
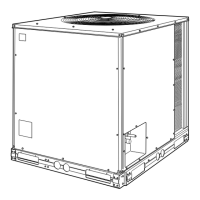
This document provides comprehensive installation, start-up, and service instructions for a commercial air-cooled split system heat pump, specifically the 575A Size 090, a 7.5-ton unit. It is designed for use with the 524A-H090 indoor unit and is UL and UL Canada approved. The manual emphasizes safety considerations, proper installation techniques, and detailed maintenance procedures to ensure optimal performance and longevity of the equipment.
The 575A090 is a commercial air-cooled split system heat pump designed to provide both cooling and heating for conditioned spaces. It operates by transferring heat between the indoor and outdoor environments, utilizing a semi-hermetic compressor and a refrigerant cycle. In cooling mode, it extracts heat from the indoor air and dissipates it outdoors. In heating mode, it absorbs heat from the outdoor air and transfers it indoors. The unit incorporates a reversing valve to switch between these modes. A defrost board (DB) manages the defrost cycle, which is initiated based on time and temperature to prevent frost buildup on the outdoor coil in heating mode. Supplemental electric heat can be integrated with the indoor unit to provide additional heating capacity when needed. The system includes various safety devices, such as high-pressure switches, loss-of-charge switches, and compressor overtemperature protection, all integrated into a Cycle-LOC™ circuit to prevent damage and ensure safe operation.
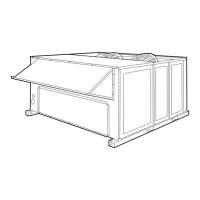
The unit is designed for overhead rigging, with specific instructions for safe handling and mounting to prevent damage during installation. It can be mounted on a level pad or raised supports, with considerations for airflow clearance and condensate drainage. For optimal performance, the outdoor unit airflow should be unrestricted on all sides and above. Elevated mounting may be necessary in areas with high snowfall.
Refrigerant piping connections require careful attention to line sizing based on linear length, liquid lift, and compressor oil return, with specific recommendations for the use of a liquid line solenoid valve (LLSV) for systems exceeding 75 feet in length. A filter drier and moisture indicator are field-installed in the liquid line to ensure system integrity. The thermostatic expansion valve (TXV) sensing bulb location is critical for reliable readings and proper refrigerant mixing after the indoor coil suction header.
Electrical connections must comply with local and national codes, including proper grounding and ensuring that the field power supply matches the unit's nameplate rating. Voltage to compressor terminals must be within the specified range and balanced within 2% to prevent damage to electrical components. The unit includes a crankcase heater that must operate for at least 24 hours before start-up to prevent liquid refrigerant migration to the compressor.
The system's operation is controlled by a thermostat, which initiates cooling or heating cycles based on space temperature. The thermostat also controls the indoor and outdoor fan motors. A compressor time delay is incorporated to protect the compressor during start-up. The defrost cycle is automatically managed by the defrost board, which includes field-selectable time periods between frost checks.
Regular maintenance is crucial for the efficient and safe operation of the heat pump. The manual outlines several key maintenance procedures:
The outdoor coil should be inspected monthly and cleaned annually, or more frequently depending on outdoor-air conditions. Cleaning involves removing the top panel and outdoor coil corner post, carefully separating the outer and inner coil sections, and flushing down between the coil sections with a water hose to remove dirt and debris. The outer surfaces can be cleaned with a stiff brush.
The compressor has its own oil supply, and oil should only be added if there is a loss due to a system leak. The manual specifies approved compressor oils (Suniso 3GS and WF32-150) and refers to a separate Refrigerant Service Techniques manual for detailed procedures on adding or removing oil. The fan motor bearings are permanently lubricated and do not require further lubrication.
The outdoor fan height can be adjusted by loosening the fan hub setscrews, repositioning the fan, and then tightening the setscrews. This adjustment ensures proper airflow and fan operation.
Detailed steps are provided for compressor removal, which is a significant service procedure. This includes shutting off power, removing refrigerant from the system, disconnecting electrical wiring and pressure switches, removing bolts from service valves and flanges, and lifting the compressor off the basepan. After installing a new compressor, the system must be cleaned, a new liquid line filter drier installed, and the unit evacuated and recharged.
Before initial start-up, a series of checks are required, including verifying internal wiring connections, ensuring all service valves are open, confirming that compressor holddown bolts are loosened (snug but not tight), and checking the compressor crankcase heater operation. The refrigerant system must be checked for leaks, and voltage imbalance must be within acceptable limits.
The unit is shipped with a holding charge only. Initial charging involves weighing in 15 lbs of R-22. Subsequent refrigerant charging is performed using a Cooling Charging Chart, which guides the technician to vary refrigerant until specific subcooling conditions are met. Accurate pressure gauges and temperature sensing devices are essential for this procedure.
After initial start-up, the unit should run for approximately 20 minutes before checking the compressor oil level in the sight glass. Oil should only be added if necessary to bring the level into view, and only approved compressor oils should be used.
The manual includes comprehensive troubleshooting charts for both heating and cooling cycles, providing diagnostic pathways for common issues such as compressor not running, compressor cycling off, and insufficient heating or cooling. These charts help service personnel identify the root cause of malfunctions, ranging from electrical problems and refrigerant issues to component failures.
Safety is paramount, with warnings about system pressure and electrical components. Only trained and qualified service personnel should install or service the equipment. Precautions include wearing safety glasses and work gloves, using a quenching cloth for brazing, having a fire extinguisher available, and following all safety codes and instructions. The unit cabinet must have an uninterrupted, unbroken electrical ground to minimize the possibility of personal injury from electrical faults.
| Model | 575A |
|---|---|
| Type | Heat Pump |
| SEER Rating | Up to 15 |
| HSPF Rating | Up to 8.5 |
| Refrigerant | R-410A |
| Voltage | 208/230 |
| Phase | 1 |
| Stages | Single-Stage |