NOTE: Read the entire instruction manual before starting the
installation.
TABLE OF CONTENTS
SAFETY CONSIDERATIONS .....................................................1
INTRODUCTION ..........................................................................2
RECEIVING AND INSTALLATION ..........................................2
Check Equipment......................................................................2
IDENTIFY UNIT ................................................................2
INSPECT SHIPMENT ........................................................2
Provide Unit Support ................................................................2
ROOF CURB.......................................................................2
SLAB MOUNT ...................................................................2
GROUND MOUNT ............................................................2
Provide Clearances....................................................................2
Rig and Place Unit....................................................................2
INSPECTION ......................................................................2
INSTALLATION ................................................................2
Select and Install Ductwork .....................................................5
CONVERTING HORIZONTAL DISCHARGE UNITS TO
DOWNFLOW (VERTICAL) DISCHARGE UNITS.........7
Provide for Condensate Disposal .............................................7
Install Electrical Connections...................................................7
HIGH-VOLTAGE CONNECTIONS..................................9
ROUTING POWER LEADS INTO UNIT ......................14
CONNECTING GROUND LEAD TO GROUND LUG.14
ROUTING CONTROL POWER WIRES (24-V) ............14
SPECIAL PROCEDURES FOR 208-V OPERATION ...14
PRE-START-UP ..........................................................................15
START-UP ...................................................................................15
Check for Refrigerant Leaks ..................................................15
Start-Up Adjustments..............................................................15
CHECKING COOLING AND HEATING
CONTROL OPERATION.................................................15
CHECKING AND ADJUSTING REFRIGERANT
CHARGE ...........................................................................16
REFRIGERANT CHARGE ..............................................16
NO CHARGE....................................................................16
LOW CHARGE COOLING .............................................17
TO USE COOLING CHARGING CHARTS ..................17
INDOOR AIRFLOW AND AIRFLOW ADJUST-
MENTS..............................................................................17
MAINTENANCE.........................................................................18
Air Filter..................................................................................18
Indoor blower and motor........................................................18
OUTDOOR COIL, INDOOR COIL, AND
CONDENSATE DRAIN PAN...............................................19
Outdoor fan .............................................................................19
Electrical controls and wiring ................................................20
Refrigerant circuit ...................................................................20
Indoor airflow .........................................................................20
Metering device ......................................................................20
Liquid line strainers ................................................................22
High Flow Valves...................................................................22
Time-delay relay .....................................................................22
Loss of charge switch.............................................................22
Check defrost thermostat ........................................................22
Defrost Thermostat .................................................................22
TROUBLESHOOTING ...............................................................22
START-UP CHECKLIST............................................................22
NOTE TO INSTALLER — READ THESE INSTRUCTIONS
CAREFULLY AND COMPLETELY before installing this unit.
Also, make sure the Owner’s Manual and Service Instructions are
left with the unit after installation.
SAFETY CONSIDERATIONS
Installation and servicing of air-conditioning equipment can be
hazardous due to system pressure and electrical components. Only
trained and qualified personnel should install, repair, or service
air-conditioning equipment.
Untrained personnel can perform basic maintenance functions of
cleaning coils and filters. All other operations should be performed
by trained service personnel. When working on air-conditioning
equipment, observe precautions in the literature, tags, and labels
attached to the unit, and other safety precautions that may apply.
Follow all safety codes. Wear safety glasses and work gloves. Use
quenching cloth for unbrazing operations. Have fire extinguisher
available for all brazing operations.
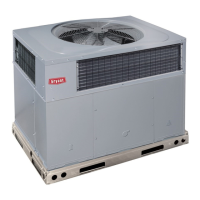
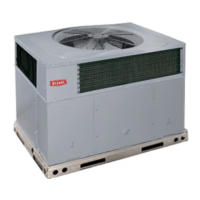
Fig. 1—Model 601A/602A
C99001
installation, start-up,
and service instructions
3-PHASE SINGLE-PACKAGED HEAT PUMPS
Cancels: New II 601A-30-1
2-06
601A
602A
030-060
—1—