18
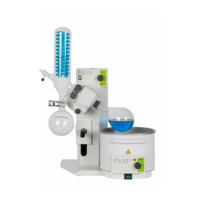
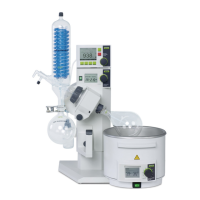
BÜCHI Rotavapor R-3000
6.2 Function test
Regular function checks will reduce the risk of your Rotavapor
breaking down and will prolong its useful life. We recommend
carrying out such a test once every three months.
Assemble the Rotavapor with dry and solvent-free glass com-
ponents.
Vacuum tightness
Evacuate the Rotavapor to at least 200 mbar with the flask in
rotation.
Close the connection from the vacuum source to the system
(e.g. clamp the vacuum hose). If the unit is vacuum-tight, the
rise in pressure per minute will amount to less than 3 mbar. If
the values are higher than this, check the glass connections
and the KD-22 seal.
Adjustability of the speed of rotation
Turn the controller for the speed of rotation slowly from the
minimum to the maximum setting (in clockwise direction). The
motor should rotate without interruption in every position of
the controller.
Bath temperature control
The bath must be properly controlled at every temperature.
The heat up time should not exceed 15 minutes.
6.3 Replacing the quick-lift spring
If the spring in the quick-lift should ever break, you can replace
it without any difficulty.
Never open the quick-lift when the evaporator is in the down
position because the spring is under tensioned.
1. Move the quick-lift to the maximum up position.
2. Remove the cover plate from the quick-lift (one slotted
screw).
3. Extend the quick-lift by around another 4 cm.
4. Un-hook the spring 햳.
5. Move the quick-lift upwards until the guide 햲 is at the top
end of the rod (no further !). Now pull the pin 햴 out of the
spring holder.
6. Take out the spring and replace with a new one. Reinsert
the pin.
7. Move the quick-lift down slightly until you can hook the
spring in place again.
8. Lower the quick-lift.
9. Reattach the cover plate on the quick-lift.
Figure 14: Replacing the spring
6 Maintenance
햲
햳
햴
 Loading...