13
4D LABS, Simon Fraser University 8888 University Drive, Burnaby, B.C. V5A 1S6
E nanoimaging@4dlabs.ca T 778.782.8158 F 778.782.3765 W www.4dlabs.ca
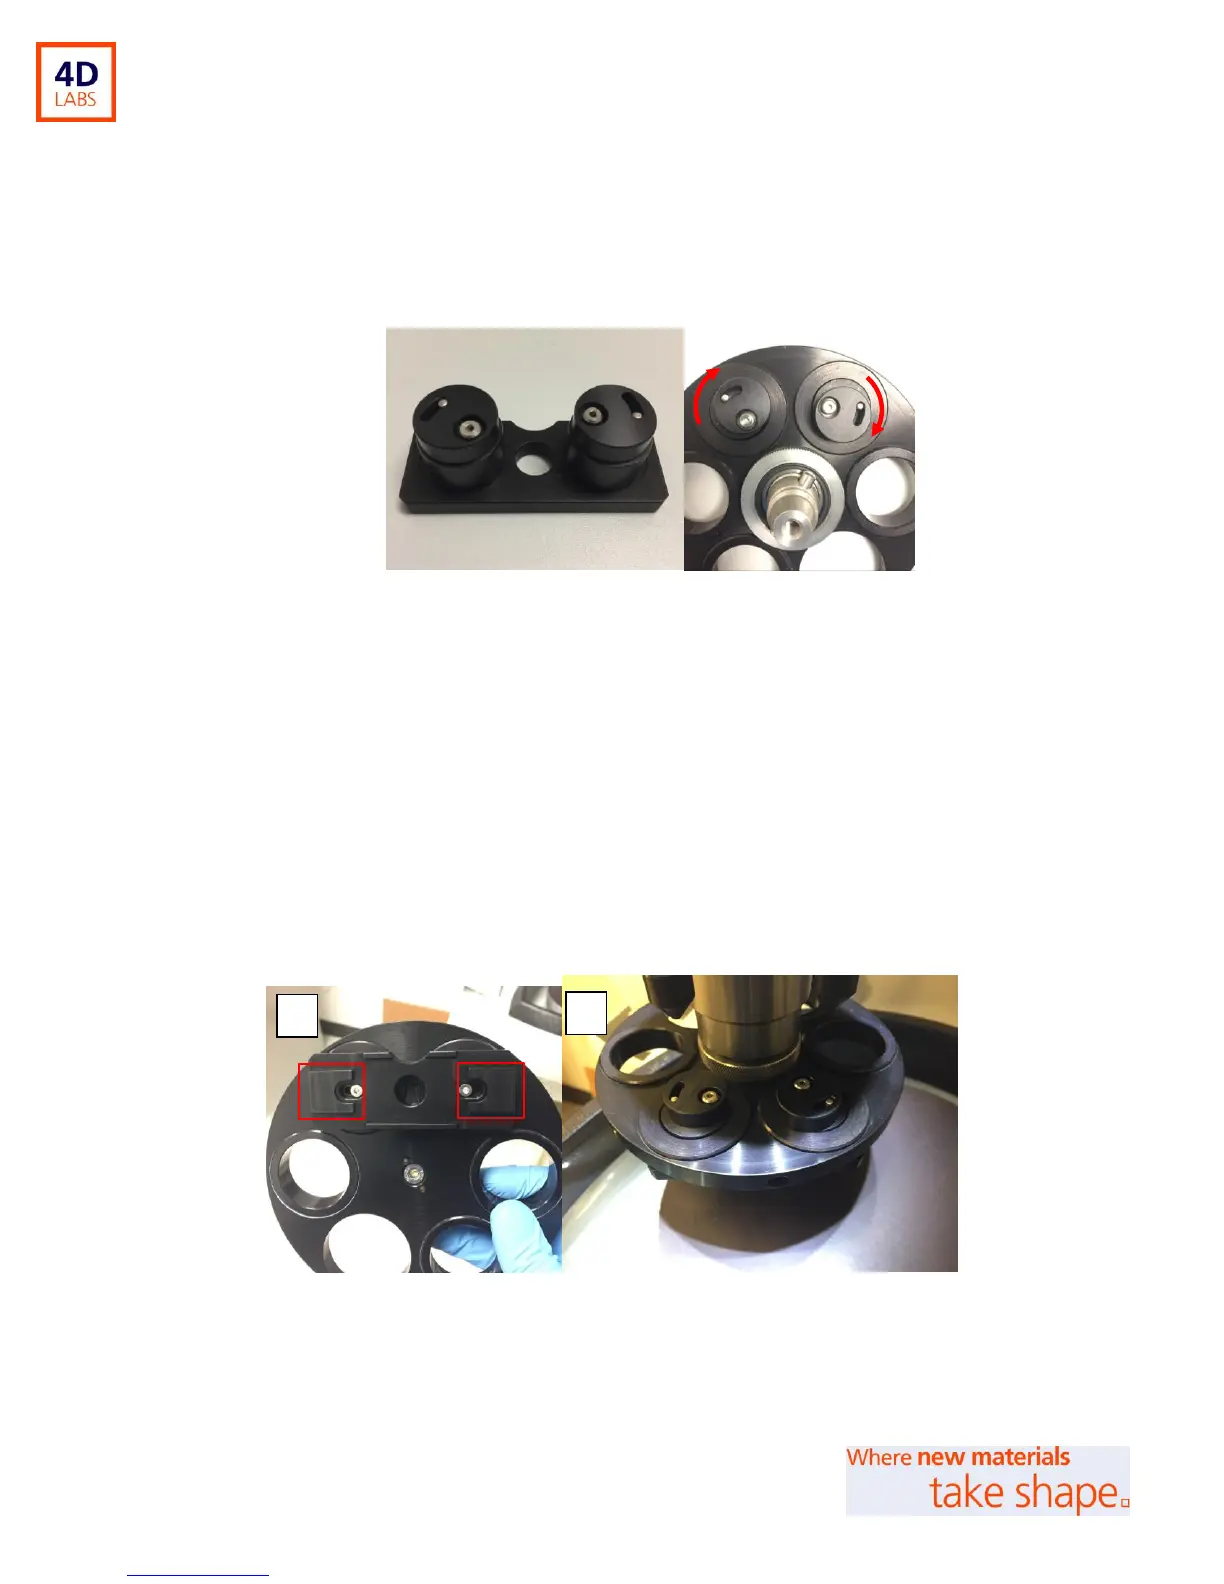
2. Place the glass slide holder into the 1” distance rings (sample side down). Lock the holder in place
by turning the locking caps of the glass-slide holder over the edges of the distance rings (Figure
8).
Figure 8: Positioning the glass-slide holder into the central force holder. Red arrows indicate locking position.
3. Attach your glass slide sample to the under-side of the glass-slide holder (positions for adhesion
are shown in Figure 9A). Use a double-sided adhesive tape, or wax to do this. Do check that your
choice of adhesive is fully removable from the glass-slide holder after polishing. Take care not to
use too much adhesive as your sample may be difficult to detach from the holder after polishing;
Note: the downward force of the Power Head will strengthen the adhesion).
4. Mount the full central-force holder with glass-slide holder onto the Power Head (Figure 9B). You
may need to counter balance the holder using balance pucks.
Figure 9: A: Sample attachment and B: mounting of holder to the Power Head. Attach samples at the red
marked areas of the glass-slide holder.