Do you have a question about the Buffalo LS-QVL and is the answer not in the manual?
Connect the LinkStation to the network, plug in the power adapter, and turn it on.
Launch the setup software via AutoPlay and complete the installation wizard.
Connect the LinkStation directly to your computer using a USB cable for setup.
Connect the LinkStation to the network, plug in the power adapter, and turn it on.
Install the Link Navigator software and complete the initial setup wizard.
Select and mount the desired storage volumes from the LinkStation onto your Mac.
Utilize NAS Navigator2 and access shared folders on the LinkStation.
Hold the power button for 3 seconds until the power LED turns off, then unplug the adapter.
Enter username and password when prompted for Windows access.
Enter administrator name and password for Mac OS access.
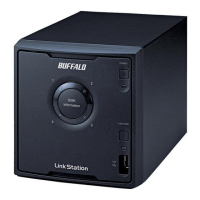
| Model | LS-QVL |
|---|---|
| Form Factor | Desktop |
| Drive Bays | 4 |
| RAID Support | RAID 0, 1, 5, 10, JBOD |
| Interface | Gigabit Ethernet |
| USB Ports | 2 x USB 2.0 |
| Power Supply | External AC adapter |
| Operating System Compatibility | Windows, macOS |
| Storage Capacity | 4TB, 6TB, 8TB |