EasyManua.ls Logo

Buffalo TeraStation Series - User Manual

Buffalo TeraStation Series
2 pages
Print Icon
To Next Page IconTo Next Page
Loading...
Computer
Computer
Remote Desktop
If a drive in the TeraStation fails, the error LED will glow red. Open the front cover and check the status
LEDs. The malfunctioning drive's status LED will be glowing red. This drive may be hot-swapped. Replace
with a Buffalo OP-HD series drive of the same size.
Only failed drives may be hot-swapped. If you need to remove a drive that has not failed and
whose status LED is not glowing red, either shut down the TeraStation, or dismount the drive in
Dashboard. Once the TeraStation is shut down, or the drive is dismounted, then it is safe to
replace the drive.
If the TeraStation is off, drives may be replaced without dismounting them first.
Installing or removing a hard drive while the system is still running is referred to as a hot-swap.
Enter the username and password,
then click OK.
The default settings are:
Username: Administrator
Password: password
Right-click the TeraStation icon (in
Mac OS, click while holding down
the Control key), then select Open
Remote Desktop.
Windows Storage Server will open in a Remote Desktop window.
2
3
5
The TeraStation is fragile. Handle it with care. Do not drop or bump the TeraStation.
Use caution when handling the unit in order to avoid personal injury.
Never disassemble any parts while you are replacing a hard drive unless instructed to do so in this manual. Any malfunction or damage caused by
disassembling the TeraStation will void your warranty.
To avoid damaging the TeraStation with static electricity, ground yourself by touching something made of metal before handling any sensitive
electronic parts.
Replacement drives should be Bualo OP-HD drives of the same capacity as the originals. These drives are available from www.bualotech.com.
Do not use any hard drive that has been used in another TeraStation or LinkStation, or another computer as a replacement drive. If you do, data on
the unit may be damaged or lost.
Do not change the order of the hard drives in the TeraStation. For example, pulling out drive 1 and replacing it with drive 2 may cause data to be
corrupted or lost.
In a RAID 1 conguration, the boot drive (C:) consists of the rst and second hard drives from the top. Do not replace both of these hard drives at
the same time.
If a hard drive is replaced while saving a le, the le can be corrupted. Be sure that the saving operation is completed before replacing the hard
drive.
6
>> Turn over this sheet to continue
Open NAS Navigator2.
・ In Windows, double-click the Bualo NAS Navigator2 icon on the
Desktop.
・ In Mac OS, click NAS Navigator2 icon in the Dock.
1
In Windows Storage Server, double-click the icon in the system
tray to launch Dashboard.
4
Drive Failures
Hard Drive Replacement Examples
When the message “Removal of the drive completed.” is displayed,
click OK.
If the TeraStation is on, begin from step 1. If the TeraStation is off, begin from step 7 on the back side.
Select Dismount Drive, then select
the hard drive to be removed and
click OK.
The failed drive will have a status
of “Error” and its status LED will
be glowing a steady red.
In this example, drive 2 has failed.
Status LED
1~2
Error LED
with cover opened
Hard Drive Replacement Procedure
English
35020114-01
Question and Answer IconNeed help?

Do you have a question about the Buffalo TeraStation Series and is the answer not in the manual?

Summary

Drive Failures

Hot-Swap Drive Failure Indicators

Indicates hot-swap drive failure with TeraStation LEDs and OP-HP drives.

TeraStation Hot-Swap Guidelines

Explains hot-swap limitations and procedures for TeraStation drives, including shutdown and removal.

Hard Drive Replacement Examples

Accessing Management Interface

Steps to access NAS Navigator or Dashboard on Windows/Mac for drive management.

Identifying and Confirming Failed Drive

Steps to identify the failed drive in Disk Management and confirm its removal.

Overview

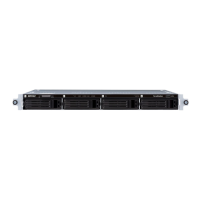
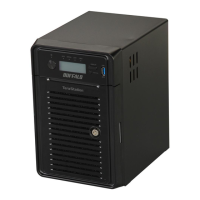
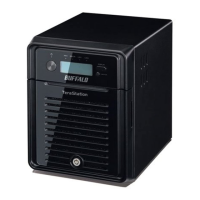
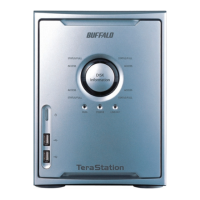
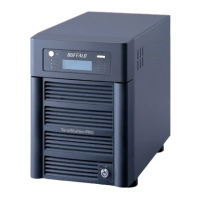
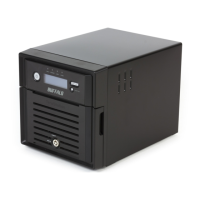
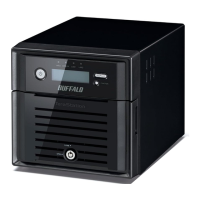
This document outlines the procedure for replacing a hard drive in a Buffalo TeraStation, a network-attached storage (NAS) device designed for data storage and management. The TeraStation is a robust storage solution, and this guide focuses on maintaining its functionality through proper hard drive replacement.

Function Description

The Buffalo TeraStation serves as a centralized storage unit, allowing users to store, access, and share files across a network. It is equipped with multiple hard drive bays, often configured in RAID (Redundant Array of Independent Disks) to enhance data redundancy and performance. When a hard drive fails, the TeraStation's error LED will illuminate red, indicating a need for replacement to maintain data integrity and system functionality. The device supports hot-swapping of failed drives, meaning a drive can be replaced while the TeraStation is still running, minimizing downtime.

Usage Features

The TeraStation is designed for ease of use, even during maintenance tasks like drive replacement.

  • Hot-Swapping Capability: A key feature is the ability to hot-swap failed drives. This means that if a drive fails and its status LED glows red, it can be removed and replaced without shutting down the entire TeraStation. This is crucial for environments requiring continuous data access. However, it's important to note that only failed drives should be hot-swapped. If a drive has not failed and its status LED is not red, the TeraStation must either be shut down or the drive dismounted via Dashboard before replacement to prevent data loss or system damage.
  • NAS Navigator2: For Windows users, the Buffalo NAS Navigator2 icon on the Desktop provides a convenient interface to manage the TeraStation. Mac OS users can access it via the NAS Navigator2 icon in the Dock. This tool allows users to open a Remote Desktop connection to the TeraStation, providing access to its Windows Storage Server environment.
  • Remote Desktop Access: Once connected via Remote Desktop, users can access the TeraStation's Dashboard, which is the primary interface for managing its storage. This includes tasks like dismounting drives, initializing new drives, and configuring RAID volumes.
  • Dashboard Interface: The Dashboard provides a clear overview of the TeraStation's status, including the health of individual drives. Failed drives are clearly indicated with an "Error" status and a red glowing status LED, making it easy to identify which drive needs replacement.
  • Drive Management Tools: Within the Windows Storage Server environment, users can access Computer Management and Disk Management. These tools are essential for initializing new hard drives, converting them to dynamic disks (a prerequisite for RAID configurations), and managing RAID volumes, such as creating new volumes or restoring mirrored volumes through RAID resynchronization.
  • RAID Configuration Support: The TeraStation supports RAID configurations, which are critical for data protection. When replacing a drive in a RAID setup, the process involves initializing the new drive, converting it to a dynamic disk, and then either creating a new volume or restoring a mirrored volume (RAID resynchronization) to integrate the new drive into the existing array.
  • Security: Access to the TeraStation's Remote Desktop requires authentication using a username and password, ensuring that only authorized personnel can perform maintenance tasks. The default credentials (Username: Administrator, Password: password) are provided for initial setup.

Maintenance Features

The TeraStation is designed with maintenance in mind, offering features that simplify the process of keeping the device operational and data secure.

  • Clear Error Indicators: The TeraStation's error LED and individual drive status LEDs provide immediate visual cues when a drive failure occurs. This allows for quick identification of the problem, reducing the time needed for diagnosis.
  • Guided Replacement Procedure: The manual provides a step-by-step guide for replacing hard drives, covering both scenarios where the TeraStation is on (hot-swap) or off. This detailed instruction set minimizes the chances of errors during the replacement process.
  • Use of Buffalo OP-HD Series Drives: The TeraStation is designed to work optimally with Buffalo OP-HD series drives of the same capacity as the originals. Using compatible drives ensures proper functionality and avoids potential issues with data corruption or system instability.
  • Data Integrity Warnings: The manual emphasizes critical warnings to prevent data loss, such as not replacing multiple drives in a RAID 1 configuration simultaneously, not changing the order of hard drives, and ensuring that no files are being saved during a drive replacement. These warnings highlight the importance of careful execution to maintain data integrity.
  • RAID Resynchronization: For RAID configurations, the TeraStation supports RAID resynchronization, which automatically rebuilds the data on the new drive from the remaining healthy drives in the array. This feature is vital for restoring data redundancy after a drive replacement. The Dashboard's status will show "Getting..." during this process and will change to "Normal" once completed.
  • Physical Access and Security: The front cover of the TeraStation can be opened with an included key, providing secure access to the hard drive bays. The locking tabs on the drive cartridges ensure that drives are securely held in place and can be easily released for removal.
  • Handling Precautions: The manual stresses the importance of handling the TeraStation with care, avoiding drops or bumps, and taking precautions against static electricity when handling sensitive electronic parts. These guidelines help prevent further damage to the device during maintenance.
  • Warranty Information: Users are reminded that disassembling parts not instructed in the manual will void the warranty, encouraging adherence to the official replacement procedure.

In summary, the Buffalo TeraStation is a user-friendly and robust NAS device that incorporates features designed to simplify hard drive replacement and ensure continuous data availability and integrity. Its clear error indicators, hot-swapping capability, guided maintenance procedures, and robust software tools make it a reliable solution for network storage.

Buffalo TeraStation Series Specifications

General IconGeneral
CompatibilityWindows, macOS, Linux
Form FactorDesktop
Supported Drives3.5" SATA HDD
RAID Levels0, 1, 5, 6, 10, JBOD
Network InterfaceGigabit Ethernet
RAM1 GB DDR3
Operating SystemLinux-based
CoolingFan-cooled
SecurityAES 256-bit encryption
Backup FeaturesCloud backup
Warranty3-year warranty
Drive Bays4

Related product manuals