10. Remove any rust or dirt from
the wheel bolts, mounting
surfaces, and spare wheel.
11. Place the spare tire on the
wheel mounting surface.
12. Put the nuts on by hand by
turning the clockwise until
the wheel is held against the
mounting surface. Make
sure the rounded end is toward
the wheel.
13. Lower the vehicle by attaching
the lug wrench to the jack and
turning the wrench
counterclockwise. Lower the
jack completely.
{ CAUTION
Incorrect or improperly tightened
wheel nuts can cause the wheel
to come loose and even come off.
This could lead to a crash. If you
have to replace them, be sure to
get new original equipment wheel
nuts. Stop somewhere as soon as
you can and have the nuts
tightened with a torque wrench to
the proper torque specification.
See Capacities and Specifications
on page 5-98 for wheel nut torque
specification.
Notice: Improperly tightened
wheel nuts can lead to brake
pulsation and rotor damage. To
avoid expensive brake repairs,
evenly tighten the wheel nuts in
the proper sequence and to
the proper torque specification.
See Capacities and Specifications
on page 5-98 for the wheel nut
torque specification.
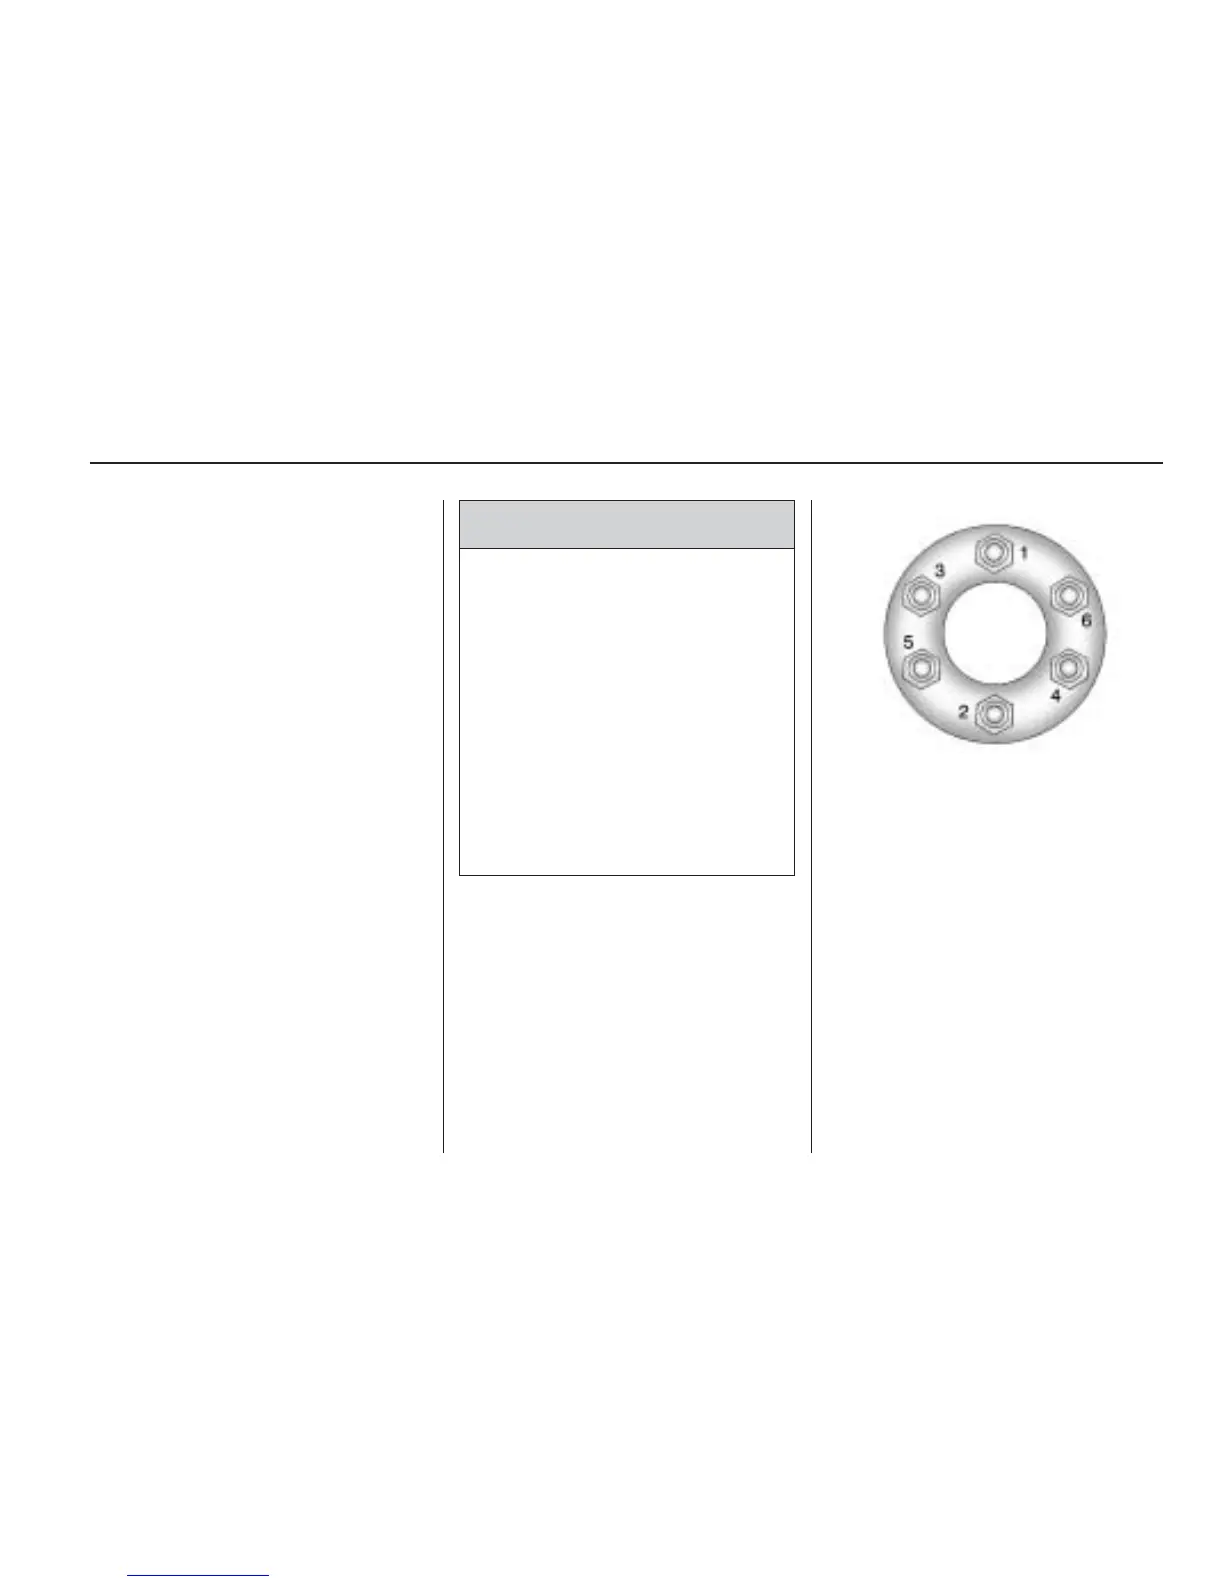
14. Tighten the wheel nuts firmly in
a crisscross sequence, as
shown.
Notice: Wheel covers will not fit
on your vehicle’s compact spare.
If you try to put a wheel cover on
the compact spare, the cover or
the spare could be damaged.
Service and Appearance Care 5-77

 Loading...


