IMPORTANT: This step is performed with the OutLook installation.
Installation Steps
INSTALLATION STEPS
OBD II Port
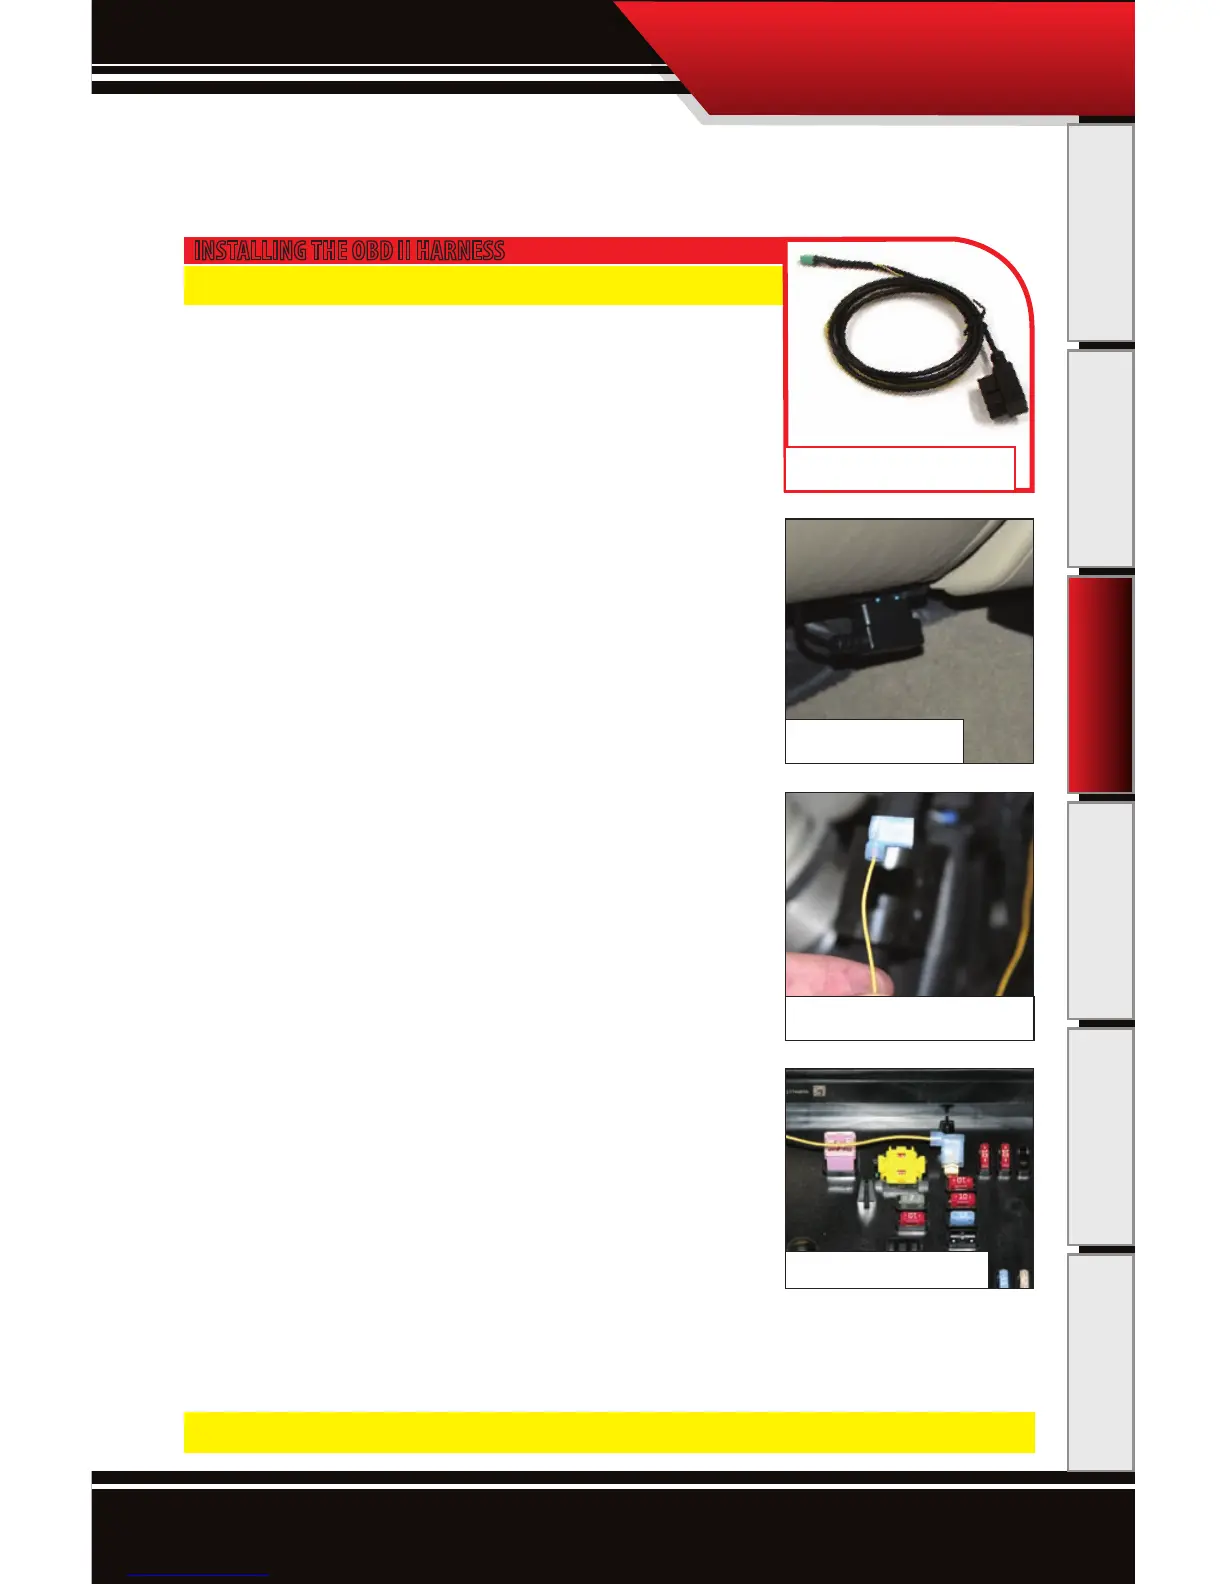
INSTALLING THE OBD II HARNESS
In this step you will connect the OBD II plug, page 2 #7, connect the
power wire, and run the green connector through the re wall.
CONNECTING THE OBD II PLUG:
Plug the OBD II Harness into the OBD II Port located on the bottom side of the
dash on the driver’s side of the vehicle.
CONNECTING THE YELLOW POWER WIRE:
1. Prepare the yellow power wire by stripping the end of the wire about
¼”. Connect the blue 90° connector to the end of the Power Wire using
crimping pliers. The location may vary depending on vehicle make.
2. Locate the fuse box: Dodge fuse boxes are located under the hood inside
the engine bay. Please see your owners manual for more details on fuse
box locations. Once inside the fuse box, locate the appropriate fuse de-
picted in the vehicle-specic picture at right.
3. Remove the fuse, indicated in the picture and insert the fuse jack. Make
sure that the fuse jack is placed on the dead side of the fuse to ensure
that the OutLook monitor is protected by the fuse as well. Use a volt me-
ter to verify the dead side of the fuse. With the fuse pulled and the truck
powered on but not started, the volt meter should read 0 volts on the
fuse jack to ground. Problems that can occur if the incorrect fuse is used
for this connection: the power may stay on continuously even with the
key o; or, the OutLook monitor can receive power at the incorrect time
of the power-on/starting cycle of the vehicle.
4. Connect the yellow power wire to the fuse jack, place the fuse back into the slot, and close the fuse box.
wARNINg: For the OutLook to function properly, all fuses must be pushed in completely.
Yellow Power Wire w/90º connector
Dodge: Fuse #28
OBD II Harness (#6)