7
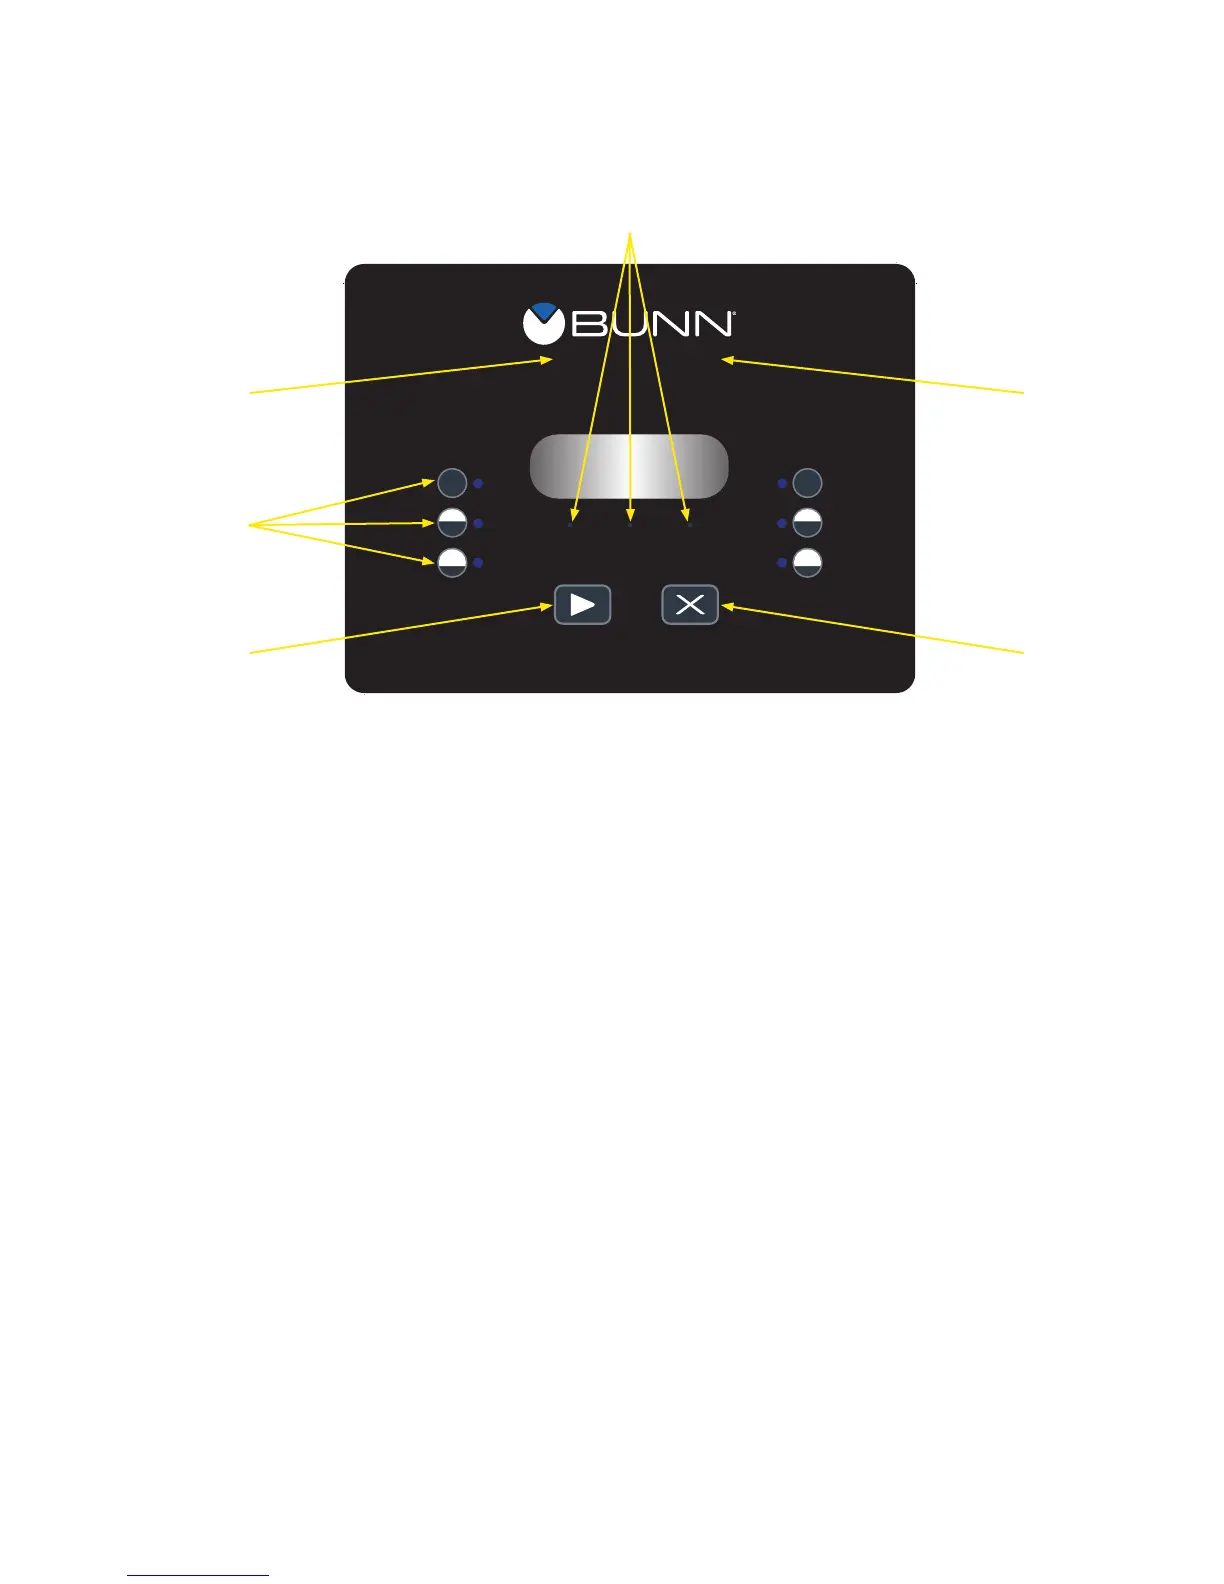
Grind Pad (a) – Pressing initiates a timed grind cycle.
Stop Pad (b) – Pressing ends the operation of the grinder.
Pads (c right) – Hold “Hidden” button 2 seconds to ENTER programming, then use to navigate
setup and programming menus.
(c left) – Use “Hidden” button to navigate setup and programming menus.
Pads (d) – “Hidden” buttons used to navigate setup and programming menus.
Hopper/Batch Selector Pads (e) – Press buttons to select small, medium or large batch size.
• These pads are located on the circles showing ¹⁄
3
, ¹⁄
2
and full brews on each side of the
grinder with a total of 6 pads. Selecting one of these pads will select the amount of grind
and the side from which to grind.
Example: Selecting the lower pad (¹⁄
3
or “small batch”) on the left side will grind enough beans
from the left hopper of the grinder to brew the amount programmed into grinder.
OPERATING CONTROLS
GRIND
STOP
a b
e
c
(left)
d
c
(right)
INITIAL SET-UP & PROGRAMMING (Continued)
Control Board
The control board determines the amount of beans that will leave the hopper in a grind cycle. The
timer portion can be adjusted to dispense a different amount from each hopper and each batch size.
The scale is from 0.4 to 99.9 seconds. Refer to the programming manual for timer setting chart.
050919
 Loading...