7
2.2 To Use the Menus
1. Press the MENU/EXIT button to display or close the main menu
2. Use the Navigation Ring to move around to select, adjust or confirm an item in the OSD (On Screen Display)
menu.
Press the MENU/EXIT button to enter the main OSD. Adjust the items including Picture, Sound, TV, Features, and
Parental.
However, some function items in the menus may only be enabled in the particular source modes.
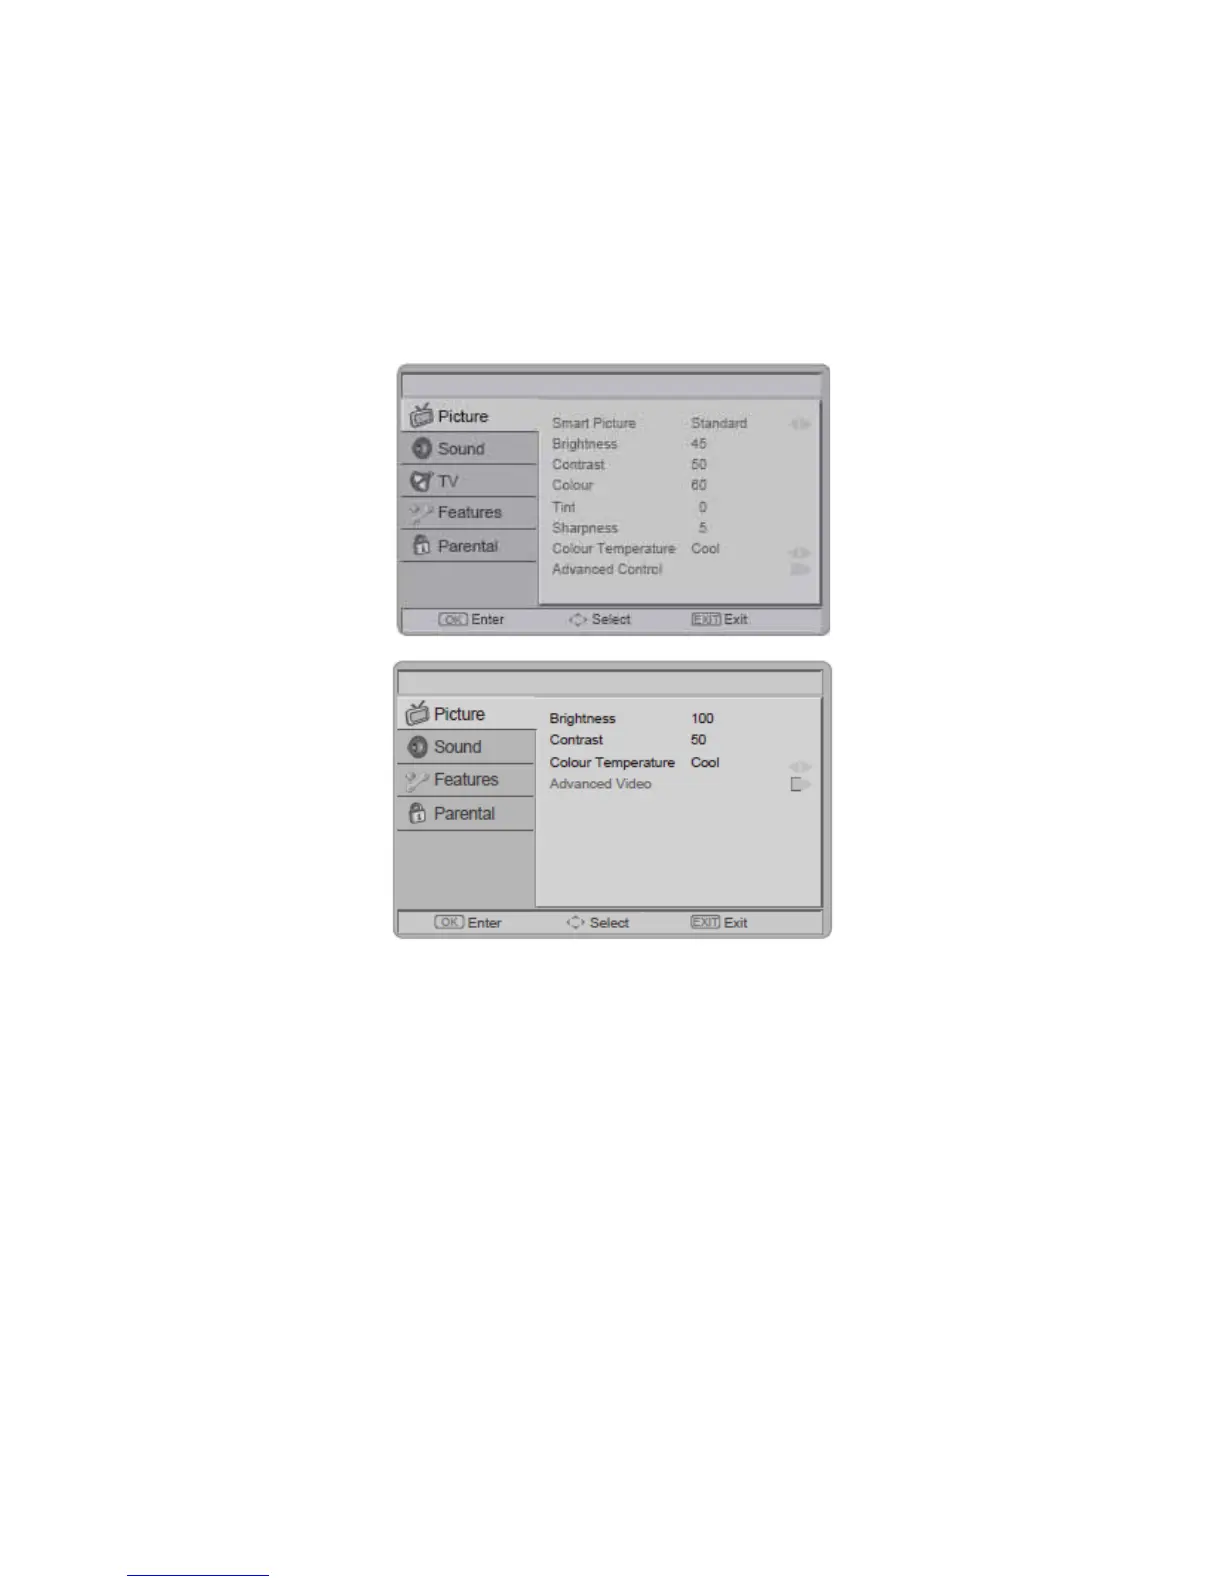
Picture Menu
The Picture menu in most source modes shows as below. It provides several video adjustment items for user fine
tuning the video display.
The picture menu in PC source mode shows as below.
1. Smart Picture: To set the best picture appearance to a predefined picture setting from Standard, Vivid, Movie,
Eco, or Personal.
2. Brightness: To brighten the dark parts of the picture.
3. Contrast: To sharpen the picture quality.
4. Colour: To add or reduce colour.
5. Tint: To adjust the picture tint.
6. Sharpness: To improve detail.
7. Colour Temperature: To choose between Normal (neutral), Warm (redder), and Cool (bluer).
8. Advanced Control:
[Noise Reduction] - To filter out and reduces the image noise and improve picture quality. Select the effect degrees
from Off, Low, Medium, High, or Auto.
[Flash Tone] - To adjust the skin colour to be more natural.
[Back Light] - To make the background colour brighter or darker.
[DCR] - Dynamic Contrast Ratio (DCR) auto adjusts the brightness of the screen to show more depths in the darker
areas.
[HDMI Mode] - (HDMI only) User can select Auto/graphic/Video mode. Description as following:
• Auto: Automatic to get device information, device will indicate sending timing is video timing or graphic timing
(PC timing).
• Graphic: Force video timing shows as graphic timing, for example: 720p shows 1280x720@60Hz; 1080i shows