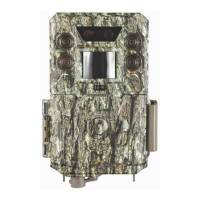
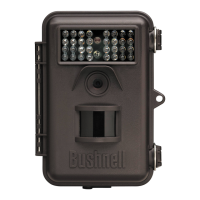
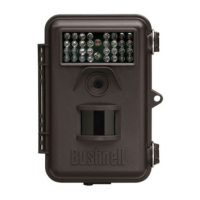
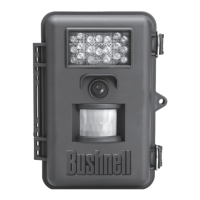
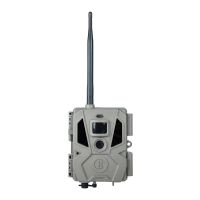
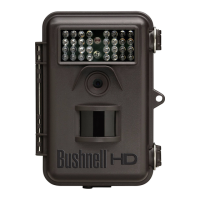
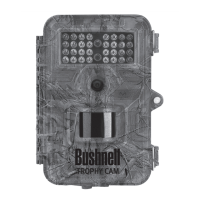
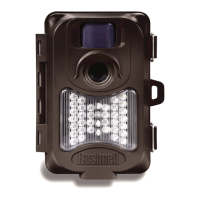
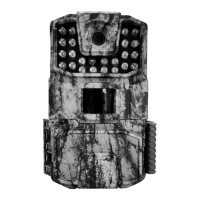
This document describes the Bushnell Trail Camera, a digital scouting camera designed for outdoor use and water resistance. It is triggered by movement of live animals detected by a highly sensitive Passive Infra-Red (PIR) motion sensor.
Function Description
The Bushnell Trail Camera captures high-quality photos (16MP or 18MP resolution, depending on the model) or video clips (720p, 10 seconds in length). It operates with very low power consumption (< 0.1mA) in stand-by mode, allowing for up to twelve months of operation on eight AA alkaline batteries (based on 70 images per day, 35 with flash). When motion is detected, the camera triggers quickly (typically less than 1 second) to capture images or videos. It features built-in infrared (IR) LEDs for flash, enabling clear black & white photos/videos in the dark, and color photos/videos in sufficient daylight.
Important Technical Specifications
- Model Numbers: 66060WM/66061WM/66061A
- Image Resolution-Photo Mode: 66060WM (16MP), 66061WM/66061A (18MP) (resolution via software interpolation)
- Lens Angular Field of View: 57 degrees (+/- 2 degrees)
- PIR Sensor: Yes, auto sensitivity
- Trigger Speed (photo): 0.7 second
- Trigger Speed (video): <3.0 seconds
- Interval Time: 5s, 15s (default), 30s, 60s, 3m
- Number of IR LED: 22-850nm Low Glow
- Max IR Flash Range: 50 feet (850nm)
- Storage: 66061A includes a 16GB SD Card; 66060WM/66061WM do not include an SD Card. Supports standard SD and SDHC cards up to 32GB capacity (class 4 or higher speed recommended).
- Status/AIM Indicator LED: Yes
- Video Clip Time: 10 seconds each
- File Format: JPEG (photos) / AVI (videos)
- Date/Time/ID Imprint: Yes
- Exposure: Auto
- White Balance: Auto
- Power Supply: 66061A (8 AA Alkaline batteries included); 66060WM/66061WM (no batteries included). Bushnell recommends 8 Energizer® Lithium AA batteries for maximum battery life. Do not mix old and new batteries, or battery types (use all lithium or all alkaline). Rechargeable batteries are not recommended.
- Power Consumption: <100mA (<850mA with LED flash)
- Water Resistant: Yes, rated IP54
- Operating Temperature: -10℃ ~ 60℃
- Storage Temperature: -20℃ ~ 80℃
Usage Features
The camera features a 3-way power/mode switch with OFF, AIM, and ON positions.
- OFF: Powers down the camera.
- AIM (Setup Mode): Allows access to settings and verifies the camera's monitoring area. The LCD Display shows current settings. Up, Down, and OK keys are used to navigate and change settings. The STATUS LED flashes during setup.
- Setting Time and Date: Allows setting the current hour (24 hr/military time format), minute, month, date, and year for accurate time/date stamps on photos/videos.
- Setting Interval (Detection Delay) Time: Configures the delay between captured images when an animal remains in the sensor's range (options: 5 sec, 15 sec (default), 30 sec, 60 sec, 3 min).
- Setting Capture Mode: Selects between Single Photo, Rapid Sequence of 3 Photos, or 10-second Video Clips (720p resolution).
- Setting Camera ID#: Assigns a reference ID# (01-99) for the camera, useful when using multiple cameras.
- SD Card Format: Allows formatting the SD card, which erases all files. Users are cautioned to back up important files first.
- Restore Default Settings: Resets Interval, Capture Mode, and Camera ID# to factory defaults. Time, date, and SD card format are not affected.
- ON: Activates normal operation. The AIM/Status LED blinks for several seconds, allowing time to close the cover and walk away. Once it stops blinking, the PIR sensor is active and will trigger photo/video capture as programmed.
Mounting and Aiming:
- The camera can be mounted using the provided adjustable web belt (threaded through two brackets on the back) or a tripod socket (standard 1/4-20 thread) at the bottom.
- Recommended placement: on a sturdy tree (approx. 6 inches diameter), 16-17 ft. away from the monitored area, at a height of 2.5-3.5 ft.
- Optimal night results: subject within 10-50 ft. of the camera.
- Sensing Angle and Distance Test: In AIM mode, movements in front of the camera can be tested. If the AIM/Status LED blinks, the position is sensed. This helps optimize placement and avoid false triggers from heat sources, tree branches, or brush.
Downloading and Reviewing Images:
- Images/videos are saved to a standard SD card.
- To view files, remove the SD card (after switching the camera OFF) and insert it into a computer's SD card slot or a USB card reader.
- Alternatively, connect the camera directly to a computer via a USB cable (not included) to use it as a "mass storage device."
- Files are numbered incrementally (e.g., IMAG0001.JPG, IMAG0001.AVI).
- Users can drag/copy/paste files to their computer for backup and then delete them from the SD card.
Maintenance Features
- Battery Installation: Press the Battery Tray Eject Button to release the tray. Insert 4 or 8 AA batteries, ensuring correct polarity.
- SD Card Insertion: Ensure the write-protect switch on the SD card is "off." With the camera OFF, insert the SD card into the slot until it clicks.
- Troubleshooting/FAQ: The manual provides solutions for common issues such as:
- Continuous images of no subject ("false triggers"): Advised to reposition the camera away from motion-causing obstacles or heat sources.
- Shorter than expected battery life: Check for new alkaline/lithium batteries, ensure the camera is in ON mode (not AIM), and use good quality SD cards (SanDisk® recommended).
- Camera stops taking/won't take images: Check if SD card is full, batteries are new/charged, power switch is ON, SD card write-protect is off, and consider formatting the SD card if previously used in other devices.
- Camera won't power up: Ensure all batteries are installed correctly with proper polarity, and the power switch is firmly in the AIM or ON position (avoid "between" positions). Always move the switch to OFF first when changing between ON and AIM.
- Still Photo and/or Video Quality Problems:
- Dark night photos/videos: Check battery level (flash stops operating near end of battery life), ensure subject is within ideal flash range (10-50 ft.), and note that rapid sequence/short interval settings may result in darker images due to flash recharge time.
- Dark daytime photos/videos: Avoid aiming the camera at the sun or other bright light sources.
- Bright night photos/videos: Subject may be too close (ideal 10-50 ft.).
- Red, green, or blue color cast: May indicate sensor confusion under certain lighting conditions; if consistent, servicing may be needed.
- Short/prematurely ending video clips: Check if SD card is full, batteries are good, and note maximum video length is 10 seconds for battery life.
- Incorrect Date/Time Stamp: Ensure time/date is set in Setup Mode and batteries have adequate power.
- Photos Do Not Capture Subject of Interest: Set camera away from heat sources, aim over ground (not water), avoid small trees prone to wind movement, and clear limbs in front of the lens.
- AIM/Status LED Flashes/Doesn't Flash: LED flashes in AIM mode to indicate motion detection for setup; it does not flash during normal operation (ON mode) to keep the camera hidden.
- LCD Screen Issues (powers on but no text): Ensure power switch is correctly positioned (not "between" modes). Always move switch to OFF first when changing between ON and AIM.
- Camera won't retain settings: Ensure the OK key is pressed after changing settings in Setup Mode to save them.
The device comes with a one-year limited warranty covering defects in materials and workmanship.