5
Step 1: Purchase and activate a SIM card from your mobile phone service
provider. An SMS/MMS (voice+text) enabled SIM card is recommended if
you have unlimited text messaging, as it will minimize costs. Both MMS and
SMTP allow control of the camera remotely via text messages. Select a SIM
card that also supports data (SMTP or SSMTP) if you also want the option to
receive images from the camera via email through your data plan.
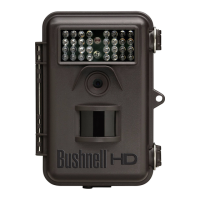
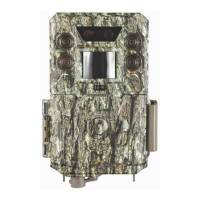
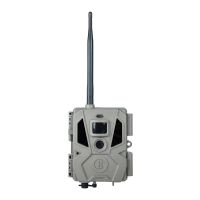
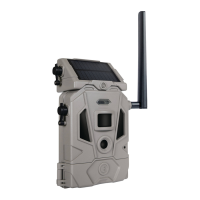
Step 2: Insert the SIM card into the Wireless Trophy Cam HD (slot on top left
edge). Install batteries (12x AA lithium or alkaline) and an SD or SDHC card
(up to 32GB). Attach the antenna by screwing it onto the socket at the top of
the camera. Please refer to the full instruction manual for complete, detailed
directions.
Step 3: Set the Power/Mode Switch to “SETUP”. You should see an icon
conrming the SIM card is installed, followed by wireless signal strength
indicator bars once a connection has been established (allow time for this).
Step 4A (MMS Setup): Press the MENU key, then press the LEFT arrow key
3 times to go to “Wireless Setting”. Press the OK key, then select “MMS
Setting” (if you are using an SMS/MMS capable SIM card) and press OK again.
Highlight “Auto Setting” and press the OK key*. Select your country (where
your mobile phone service is based) using the UP/DOWN arrow keys and
press OK. Select your mobile service provider and press OK. Proceed to Step
5.
Step 4B (SMTP Setup): If you are using an SMTP enabled SIM card, and wish
to get images via data rather than text, select “SMTP Setting” instead, then
press OK. Limited auto setup is available (for SMTP carrier info). You will
still need to add your personal email, address and password as sender in
the "Manual Setup" screen. Next, select the sender's "SMTP Type" (with or
without SSL), and input the receiver's email address ("Email Address" screen).
Proceed to Step 7.
* If “Auto Setting” does not work (which may be due to recent changes made by your service
provider) or if your mobile service provider is not on the list for your country, please use the
“Manual Setting” option instead. Your service provider can help you with the correct settings to
enter.
QUICK START GUIDE: BASIC SETUP STEPS
 Loading...