Do you have a question about the C. Crane CC Vector and is the answer not in the manual?
Select the WiFi network name (SSID) to be repeated by the CC Vector.
Input the WiFi password to connect to the selected network.
Verify that the CC Vector shows 'Connected' and 'Internet Access: Yes'.
Apply silicone grease and coaxial seal to antenna and USB connections for protection.
Use pipe insulation for the CC DX Mile below 32°F for improved performance.
Use a low-loss coax cable to move the receiver indoors for protection.
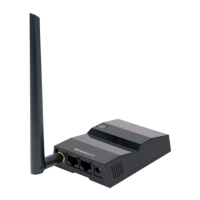
Connect a WiFi router to the CC Vector's LAN port to improve WiFi speed.
Details on wireless standards, frequency bands, data rates, and certifications.
Details on wired/wireless standards, interface ports, security, power, and frequency.
Guidelines for grounding antennas, avoiding power lines, and lightning precautions.
Advice on safe antenna installation, especially in windy conditions or on ladders.
The C.CRANE CC Vector WiFi Repeater is a comprehensive solution designed to extend and enhance your existing Wi-Fi network, particularly for long-range applications. This device allows users to pick up a distant Wi-Fi signal and rebroadcast it, creating a stronger, more reliable connection for multiple devices within a broader area. It's ideal for scenarios where the primary Wi-Fi signal is weak or inaccessible, such as in RV parks, hotels, or large properties.
The core function of the CC Vector is to act as a Wi-Fi repeater. It receives an existing Wi-Fi signal, amplifies it, and then retransmits it as a new, stronger Wi-Fi network. This process effectively extends the range of the original network, making it accessible to devices that were previously out of range or experiencing poor connectivity. The system comprises several key components working in conjunction: a large outdoor antenna (CC DX Mile), a small indoor antenna, a USB amplifier cable, and the main CC Vector Repeater unit.
The large outdoor antenna is designed to capture weak or distant Wi-Fi signals. This antenna is connected to the CC DX Mile, which then connects via a 30 ft. cable to the USB amplifier cable. The USB amplifier cable, in turn, plugs into the main CC Vector Repeater unit. The main repeater unit processes the amplified signal and, with the help of the small indoor antenna, broadcasts a new Wi-Fi network. This setup ensures that even very distant signals can be captured and effectively repeated.
The device offers two primary methods for initial configuration: wirelessly via an internet browser or directly using an Ethernet cable. The wireless method is generally preferred for its convenience, allowing setup from a computer, tablet, or smartphone. Users connect to the CC Vector's default Wi-Fi network, then access a web-based interface to select the desired network to extend and enter its password. For those who prefer a wired connection or encounter issues with wireless setup, an Ethernet cable can be used to connect the CC Vector to a computer, providing a direct link to the configuration interface.
Once configured, the CC Vector continuously monitors the connection to the extended network. It provides status updates through its web interface, indicating whether it's connected to the internet and the quality of the link. This allows users to easily verify the system's operation and troubleshoot any potential issues.
The CC Vector is designed for user-friendly operation, with clear instructions for assembly and setup.
Assembly: The assembly process begins with attaching the large outdoor antenna to the CC DX Mile, ensuring proper weatherproofing with silicone grease and a coaxial seal. The CC DX Mile then connects to a 30 ft. cable, which in turn connects to a 1.5 ft. USB amplifier cable. This amplifier cable plugs into the main CC Vector unit. Finally, the small indoor antenna is attached to the CC Vector, and the unit is powered by plugging it into a wall outlet. The sequential assembly steps are crucial for optimal performance and durability.
Configuration (Wireless):
192.168.18.1 is entered into the address bar. This opens the CC Vector's configuration interface.Configuration (Wired):
192.168.18.1 in a browser.Optimizing Signal Performance: The manual emphasizes the importance of signal strength for optimal performance. Users are advised to ensure the signal bar for the chosen network is higher than 50% during the selection process. If the signal is weak, adjusting the orientation and placement of the USB antenna (CC DX Mile) can significantly improve reception. A "Rescan" option in the configuration interface allows users to check for improved signals after adjustments.
Connecting Devices: Once the CC Vector is set up and broadcasting an extended network, other devices (smartphones, tablets, laptops) can connect to this new network using the password provided during the setup. The CC Vector also supports Wi-Fi Protected Setup (WPS) for compatible devices, allowing for a password-free connection by pressing the WPS button on the CC Vector when prompted by the device.
Adding a Wi-Fi Router (Optional): For users seeking even faster Wi-Fi speeds or needing to connect multiple devices simultaneously, the CC Vector can be integrated with an external Wi-Fi router. After setting up the CC Vector normally, an Ethernet cable connects one of the CC Vector's LAN ports to the "Internet" or "WAN" port of the external router. Devices then connect to the router's Wi-Fi signal, leveraging the extended range provided by the CC Vector while benefiting from the router's additional features and speed.
Proper maintenance and troubleshooting are essential for ensuring the longevity and optimal performance of the CC Vector.
Weatherproofing: The outdoor components, particularly the large antenna and the CC DX Mile, require careful weatherproofing. The manual instructs users to coat the threads of the antenna with supplied silicone grease before connection and then use a coaxial seal to completely cover the connection. Similar protection is recommended for the USB connection with silicone grease and coaxial seal to prevent rust and water incursion, which can significantly impact performance and device lifespan.
Cold Weather Protection: For environments where temperatures drop below 32°F, specific measures are suggested to protect the CC DX Mile. Using a 10-inch piece of pipe insulation (1-1/2" outside diameter) around the CC DX Mile can provide an additional 10 degrees of protection, down to 22°F. The insulation should be secured with electrical tape at the top, leaving the bottom open for drainage. It is important to remove this insulation when temperatures rise above 75°F to prevent overheating and potential damage. For even colder conditions (below 22°F), a second layer of larger pipe insulation (3-inch) can be added.
Resetting the Repeater: If the CC Vector experiences persistent issues such as dropping connections, unresponsiveness, or if the password is forgotten or misconfigured, a factory reset can resolve many problems. The reset procedure involves powering up the unit, then pressing and holding the reset button on the bottom of the unit for 15 seconds using a non-sharp object like a paper clip. After the reset, the device needs to be reconfigured from Step A1.
Troubleshooting Common Issues:
Optimal Placement and Separation: For best performance, a separation of 5 to 15 feet between the CC Vector and the USB Antenna (CC DX Mile) is recommended. Additionally, rotating the USB Antenna horizontally and aiming its broad side towards the distant Wi-Fi network can sometimes improve Wi-Fi speed.
Understanding Speed Reduction: It is normal to experience some speed reduction when repeating a Wi-Fi network because the signal has to be processed and delivered twice. This is an inherent characteristic of Wi-Fi repeaters.
The CC Vector is a robust and adaptable device designed to provide reliable long-range Wi-Fi extension, with clear guidance for setup, optimization, and maintenance to ensure a consistent and strong internet connection.
| Frequency Range (AM) | 520 - 1710 kHz |
|---|---|
| Antenna Type (Wireless) | Internal |
| Frequency Range (FM) | 88-108 MHz |
| Power Supply | AC Adapter |
| Antenna | AM/FM Antenna |