® SECTION 4: FLOW
making
since 1986
ater work
4D. LINE FILL & VALVE CLOSE TIMES
The Line Fill & Valve Close Times are used to set
the amount of time each valve time will have to
stabilize before checking flow.
After you have enabled the flow meter on the FLOW
METER screen as described in Section 4A:
1.
Press the BACK key twice to return
to the FLOW METER, MASTER
VALVE, & PUMP screen
(Figure 4.1).
2. Press the LINE FILL & VALVE
CLOSE TIMES Menu key.
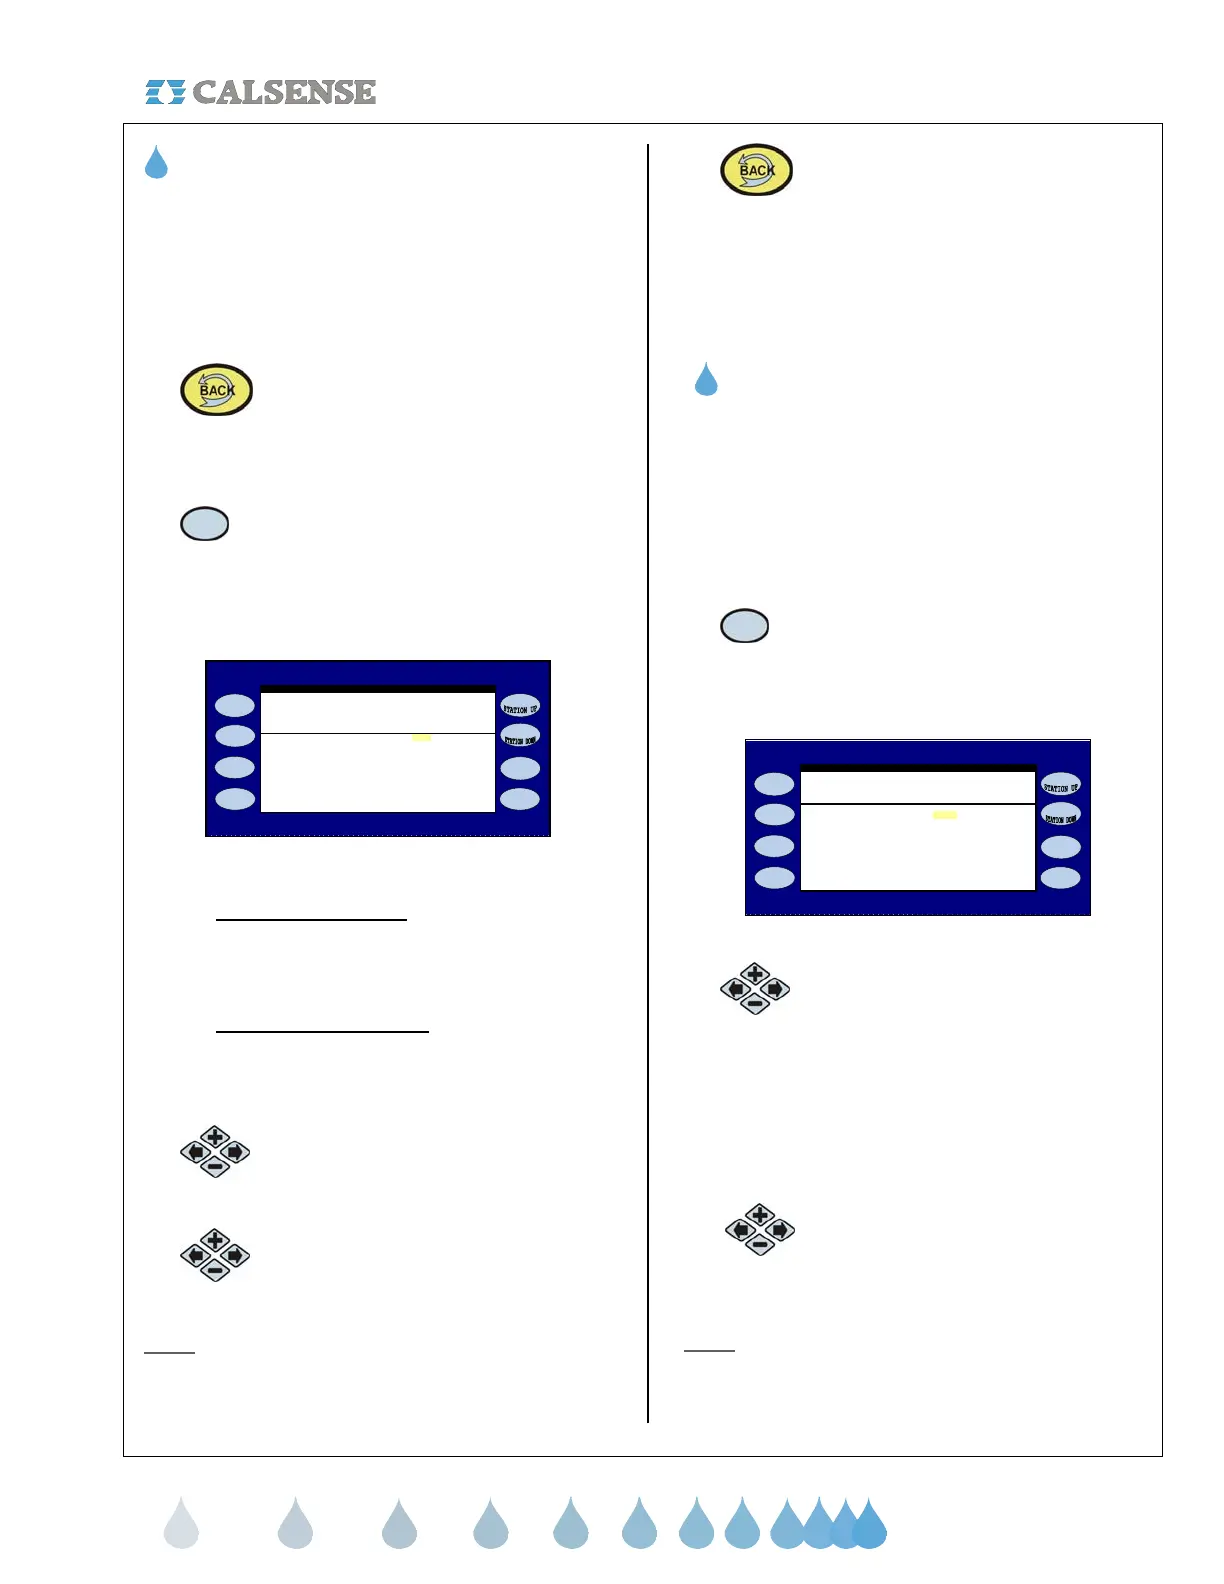
The LINE FILL & VALVE CLOSE TIMES screen is
displayed (Figure 4.11).
PROG A . . . . . . . . . . . . . . . . . . . . 60 60
LINE FILL & VALVE CLOSE TIMES
Line Valve
Fill Close
PROG B . . . . . . . . . . . . . . . . . . . . 60 60
PROG C . . . . . . . . . . . . . . . . . . . . 60 60
(times are in seconds)
PROG D . . . . . . . . . . . . . . . . . . . . 60 60
PROG E . . . . . . . . . . . . . . . . . . . . 60 60
DRIP 1 . . . . . . . . . . . . . . . . . . . . 60 60
DRIP 2 . . . . . . . . . . . . . . . . . . . . 60 60
Figure 4.11
• LINE FILL TIMES: The delay time in
seconds that the controller will wait to check
flow rates on a station allowing the flow to
stabilize.
• VALVE CLOSE TIMES: The delay time in
seconds that the controller will wait to check
flow on the very next valve allowing time for
the previous valve to close.
3.
Press the blue ARROW keys to move
the cursor to the LINE FILL TIME for
Program A.
4.
Press the PLUS or MINUS keys to
set the desired time (in seconds).
Note:
Use this same method to change the VALVE
CLOSE TIME for Program A and then repeat these
steps for each program on the list.
5.
Press the BACK key to return to
the FLOW METER, MASTER
VALVE, & PUMP SETUP screen
(Figure 4.9).
THIS CONCLUDES THE LINE FILL & VALVE
CLOSE TIMES SECTION
4E. PUMP
If you are using a pump for any one of your valves
you will have to set the controller to recognize that
there is a pump in use and on which program it will
be used on.
From the FLOW METER, MASTER VALVE & PUMP
screen (Figure 4.1).
1.
Press the PUMP Menu key.
The WHICH PROGRAMS USE THE PUMP screen
is displayed (Figure 4.12).
PROG A . . . . . . . . . . . . . . . . . . . . YES
WHICH PROGRAMS USE THE PUMP
if you would like to use the pump
For each program, select YES
PROG B . . . . . . . . . . . . . . . . . . . . YES
PROG C . . . . . . . . . . . . . . . . . . . . YES
PROG D . . . . . . . . . . . . . . . . . . . . YES
PROG E . . . . . . . . . . . . . . . . . . . . YES
DRIP 1 . . . . . . . . . . . . . . . . . . . . YES
DRIP 2 . . . . . . . . . . . . . . . . . . . . YES
Figure 4.12
2.
Press the blue ARROW keys to
move the cursor to the program
desired.
The default setting is set to YES on all programs.
This means that the controller’s pump output will be
activated whenever a station on any program is
activated.
3.
Press the PLUS or MINUS keys to
change any Program.
Note:
If the Pump Output Enabled setting is set to
NO on a program, the pump output will not activate
when a station on that program is activated.