Do you have a question about the Cambridge Audio azur 840A and is the answer not in the manual?
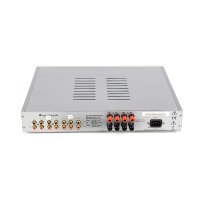
Verify the unit's voltage rating before connecting to mains power.
Guidance on correctly fitting or changing the mains plug.
The main power switch for turning the unit on and off.
Connection point for the amplifier's mains power cable.
Connects the amplifier's output to loudspeakers.
Receives modulated IR commands for multi-room systems.
Allows un-modulated commands for multi-room or CI systems.
Serial port for custom installation control and software updates.
Connects multi-room keypads and speakers.
High-quality balanced audio input using XLR connectors.
Outputs for connecting to external power amplifiers or subwoofers.
Connects to tape decks or recorders for recording and monitoring.
Analog line-level inputs for various audio sources.
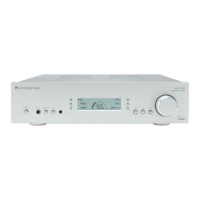
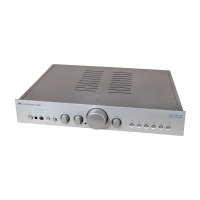
Switches the unit between Standby and On modes.
Connects stereo headphones for private listening.
Allows selection of connected speaker sets (A, B, or A+B).
Choose the audio source to listen to.
Adjusts the audio output level for speakers and headphones.
Adjusts the tonal balance of the sound output.
Bypasses tone controls for a purer audio signal path.
Includes Mode, Infrared Sensor, and Display.
Controls the amplifier's audio output level remotely.
Mutes or unmutes the audio output remotely.
Includes Standby, Input Selection, Mode, and Speaker A/B.
Adjusts the front panel display backlight remotely.
Illustrates the fundamental setup with a CD player and speakers.
How to connect a tape deck for recording and monitoring.
Connecting a second set of speakers for multi-room audio.
Linking to external amplifiers or active subwoofers.
Connecting sources with balanced outputs, e.g., Azur 840C.
How to control the listening volume.
Setting the left-right audio balance.
Using Bass and Treble controls for sound shaping.
Choosing which speaker set(s) to activate.
Renaming inputs to match connected source components.
How to enter and navigate the amplifier's settings menu.
Enabling/disabling Clip and Speaker Short detectors.
Adjusting LCD brightness and display modes.
Configuring automatic volume changes on standby/on.
Choosing between dB or arbitrary units for volume indication.
Matching loudness levels between different sources.
Setting specific inputs to a fixed volume level.
Assigning a constant volume level to specific inputs.
Linking power states of multiple Cambridge Audio units.
Using the Control Bus for system commands.
Integrating with IR-based control systems.
Controlling the amplifier via RS232 serial commands.
Teaching IR commands to custom installation systems.
Protects speakers from DC voltage faults.
Prevents damage from excessive internal heat.
Safeguards output transistors from electrical stress.
Detects and prevents damage from speaker terminal shorts.
Prevents amplifier clipping and protects speakers.
Diagnosing and resolving power and audio signal problems.
Troubleshooting tape deck connectivity and recording.
Resolving weak stereo imaging and flashing display alerts.
| Signal to Noise Ratio | > 93dB (unweighted) |
|---|---|
| Input Impedance | 47k Ohms |
| Power Output | 120W RMS per channel (8 Ohms), 200W RMS per channel (4 Ohms) |
| Total Harmonic Distortion | <0.001% at 1kHz |
| Frequency Response | 5Hz - 50kHz (±1dB) |
| Power Consumption | 750W max |
| Damping Factor | >100 |
| Weight | 15kg (33lbs) |