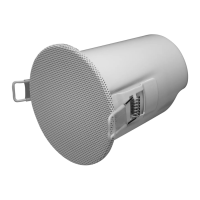
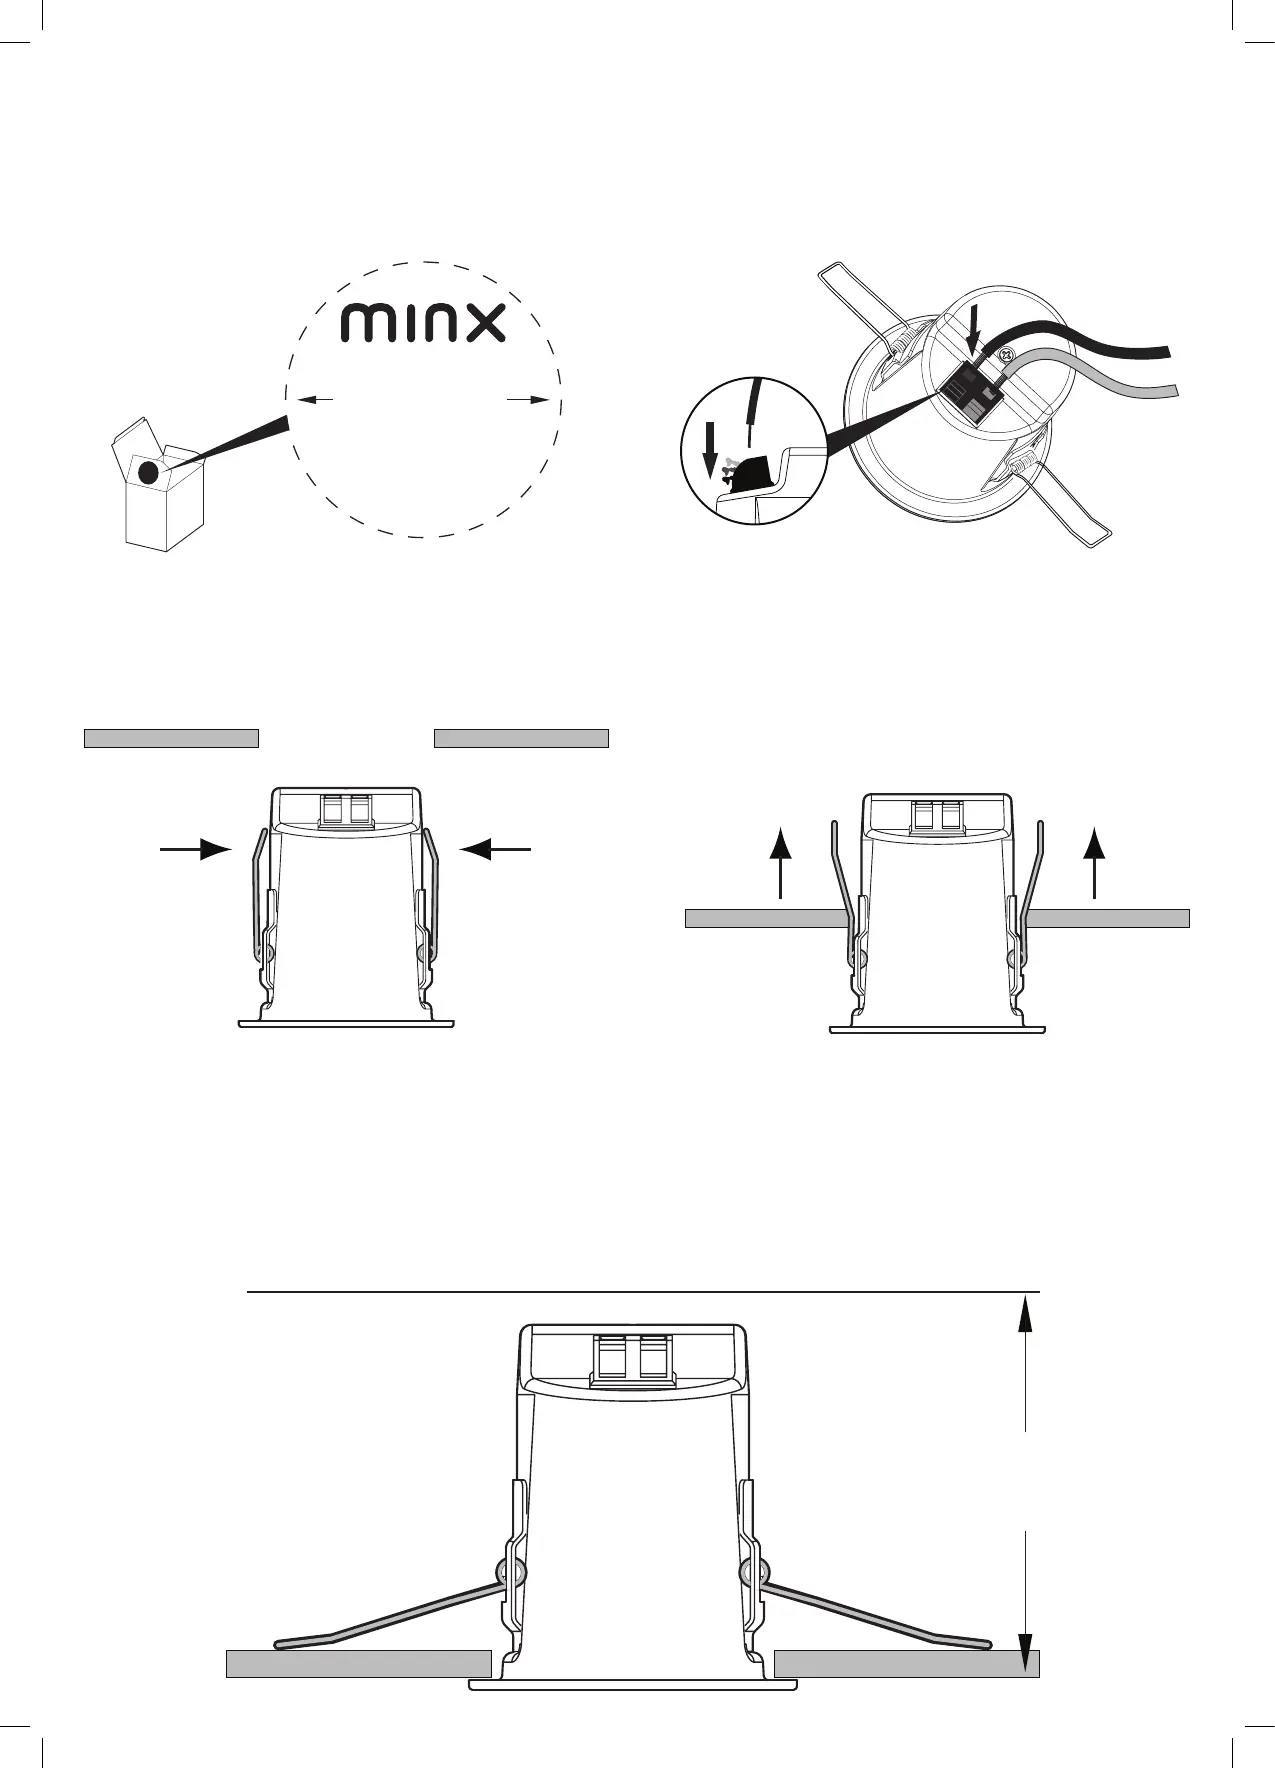
Cutting Template
Use the template to mark the position for the mounting hole at the
selected location.
Note: We recommend the use of a 75mm (3”) Downlight Hole Saw
Press the metal clips upwards and t the two longer arms into the ceiling
hole.
Push the speaker upwards until rmly in the mounting hole.
When mounting speakers ush to a ceiling or wall, ensure that enough depth/clearance is available in the respective cavity. A clearance of at least
95mm(3
3
/
4
”) is necessary when mounting a Minx C46.
95mm
(3
3
/
4
”)
Connections
IMPORTANT!
Ensure that positive RED(+) and negative BLACK(-) connections are
matched.
CEILING SPEAKER CUTTING TEMPLATE
Punch out perforation to use as guide
Follow building regulations when
mounting speakers
INSIDE DIAMETER 75mm (3”)
1 2
3 4
5
 Loading...