9. Install hopper handle as shown in Fig. 7.
M6 X 15MM SCREW
BOTTLE OPENER
M6 LOCK WASHER (2)
M6 FLAT WASHER (2)
HOPPER HANDLE (1)
PGC24-12
M6 RUBBER WASHER (2)
FIG. 7
8. Install the feed gasket over the hopper tube. Install the
hopper tube through the square opening on the side of
the smoker assembly. When the hopper tube is about
half way in, route the Thermometer through the upper
rectangular hole. Note: Be careful not to damage the
thermometer. See FIG. 8
Thermometer
Feed Gasket
Hopper Tube
Route thermometer
through this hole
FIG. 8
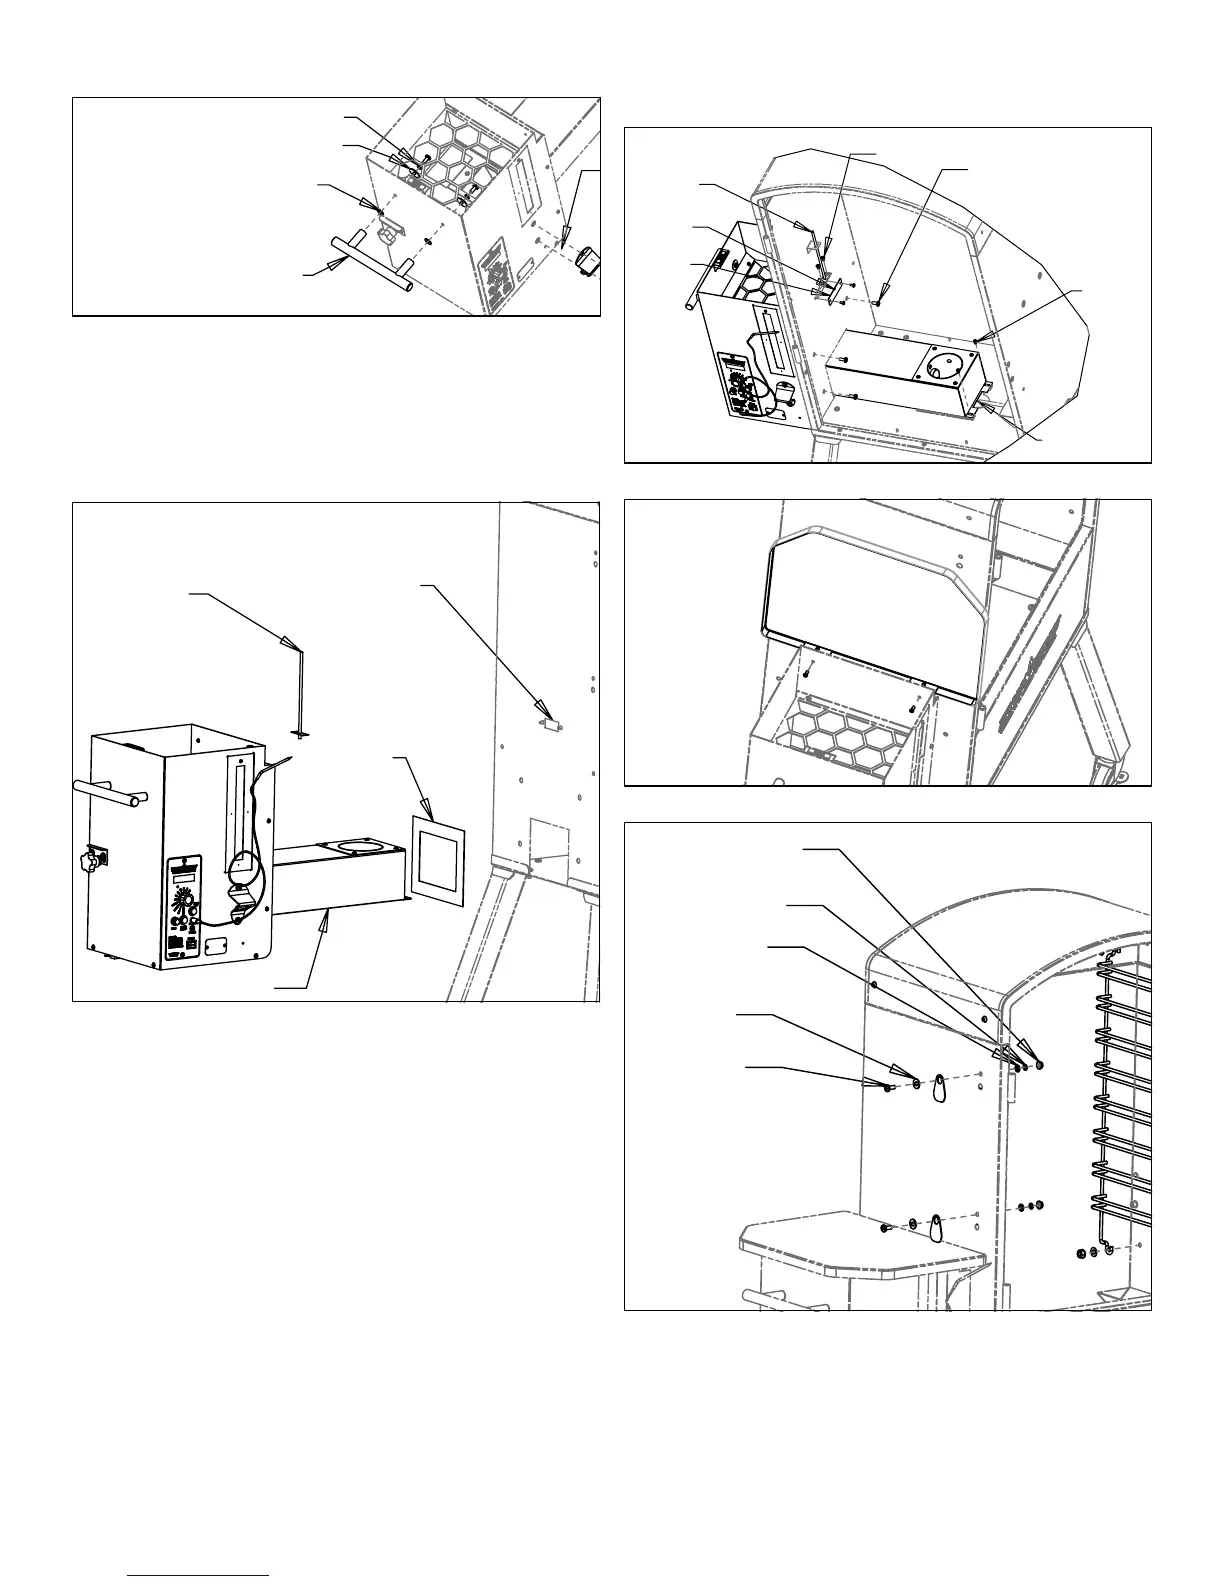
9. Attach hopper assembly using Qty (4) M6 x 15 bolts as
shown. See FIG. 9
10. Install thermometer as shown then secure using Qty (2)
#8-32 screws. See FIG. 9
11. Push extra wire from thermometer back through the hole
to the hopper. Install probe cover to the wall where the
thermometer came thru the wall using QTY (2) #8-32
screws. Make sure that the notch in the cover is up and
wire goes through notch so it is not pinched. See FIG. 9
12. Secure hopper end to the smoker body assembly using
Qty (2) self tapping screws. See FIG. 9
Probe Cover
Notch Up
Self Tapping
Screws
Thermometer
#8-32
M6 x 15
Hopper End
FIG. 9
13. Install hopper lid as shown in Fig. 10.
FIG. 10
14. Install Qty (2) probe covers as shown. See FIG. 11
13. Install Qty (2) Probe Covers as shown.
14. Install Qty (2) Wire Rails as shown.
M6 X 15 Bolt
M6 Flat Washer
Probe Cover
M6 Flat Washer
M6 Lock Washer
M6 Hex Nut
M6 X 20 Bolt
M6 Flat Washer
M6 Keps Nut
Wire Rail
FIG. 11
 Loading...